In this blog post series we will explore, how to automate Amazon Web Services (AWS) by using Vagrant. The series is divided into three parts. Readers that are interested in the automation part only can skip part 1 (the AWS EC2 console part) and jump directly to part 2, since both, part 1 and part 2 are self-contained.
- In Part 1, we will introduce Amazon Web Services (AWS) and will show how to sign into a free trial of Amazon, create, start, shut down and terminate a virtual machine on the AWS EC2 console.
- Part 2 will lead you through the process how to use Vagrant to perform the same tasks you have performed in part 1, but now we will use local Vagrantfiles in order to automate the process.
- Part 3 is the shortest part and will show, how Vagrant helps you to go beyond simple creation, startup, shutdown and termination of a virtual machine. In less than 10 minutes, you will be able to install a Docker host on AWS. With a few additional clicks on the AWS EC2 console, you are ready to start your first Docker container in the AWS cloud.
At the end, you will have running a Docker host in the public cloud, allowing you to load any of the images from Docker Hub instead of installing any software.
Document Versions
v1 (2016-04-03): initial release
v2 (2016-04-11): improved the step by step procedure
v3 (2016-04-21): added a chapter Appendix A about AWS cost control
Executive Summary
According to Gartner, Amazon Web Services (AWS) is the No. one service provider in the public cloud IaaS space. Amazon is offering a „free tier“ test account for up to 12 months and up to 750 hrs of a t2.micro Linux instance as well as 750 hrs of a t2.micro Windows 2012 instance. For more details, check the free tier limits page. For services outside the free tier limits, check the AWS simple monthly (cost) calculator.
Per default, AWS is assigning a dynamic private and a dynamic public IP address. The public IP address and DNS name will change every time you restart the instance.
Deleting an instance is done by „Terminating“ it. For a long time, the terminated instance will still be visible in the instance dashboard as „Terminated“. The sense and non-sense of this is discussed in this forum post.
Contents of Part 1
- Why this guide?
- Why Amazon Web Services?
- Getting started with AWS
- Sign in
- Launch an Instance
- Connect via SSH
- Stop or Terminate the Instance
Why offering yet another ‚Hello World‘ for Amazon Web Service Automation using Vagrant?
The reason is, that the other guides I have found do not start start from scratch and I have learned the hard way that the they assume that you already have created an AWS user with the appropriate rights. Since I benefit from all those other Evangelists out there helping me with my projects, I feel obliged to pay back my share.
Many thanks to Brian Cantoni, who has shared with us a (much shorter) Quick Start Guide on the same topic. Part 2 of my detailed step by step guide is based on his work.
Why Amazon Web Services?
According to Gartner’s 2015 report, Amazon Web Services is the leader in the IaaS space, followed by Microsoft Azure. See below the Gartner’s magic quadrant on IaaS:

Source: Gartner (May 2015)
There are many articles out there that compare AWS with Microsoft Azure. From reading those articles, the following over-simplified summary has burnt its traces into my brain:
Amazon Web Services vs. Microsoft Azure is like Open Source Linux world vs. the commercial Microsoft Software world. For a long time, we will need both sides of the world.
Now that we have decided to begin with the open source side of the world, let us get started.
Getting started with Amazon Web Services
Step 1: sign in to AWS
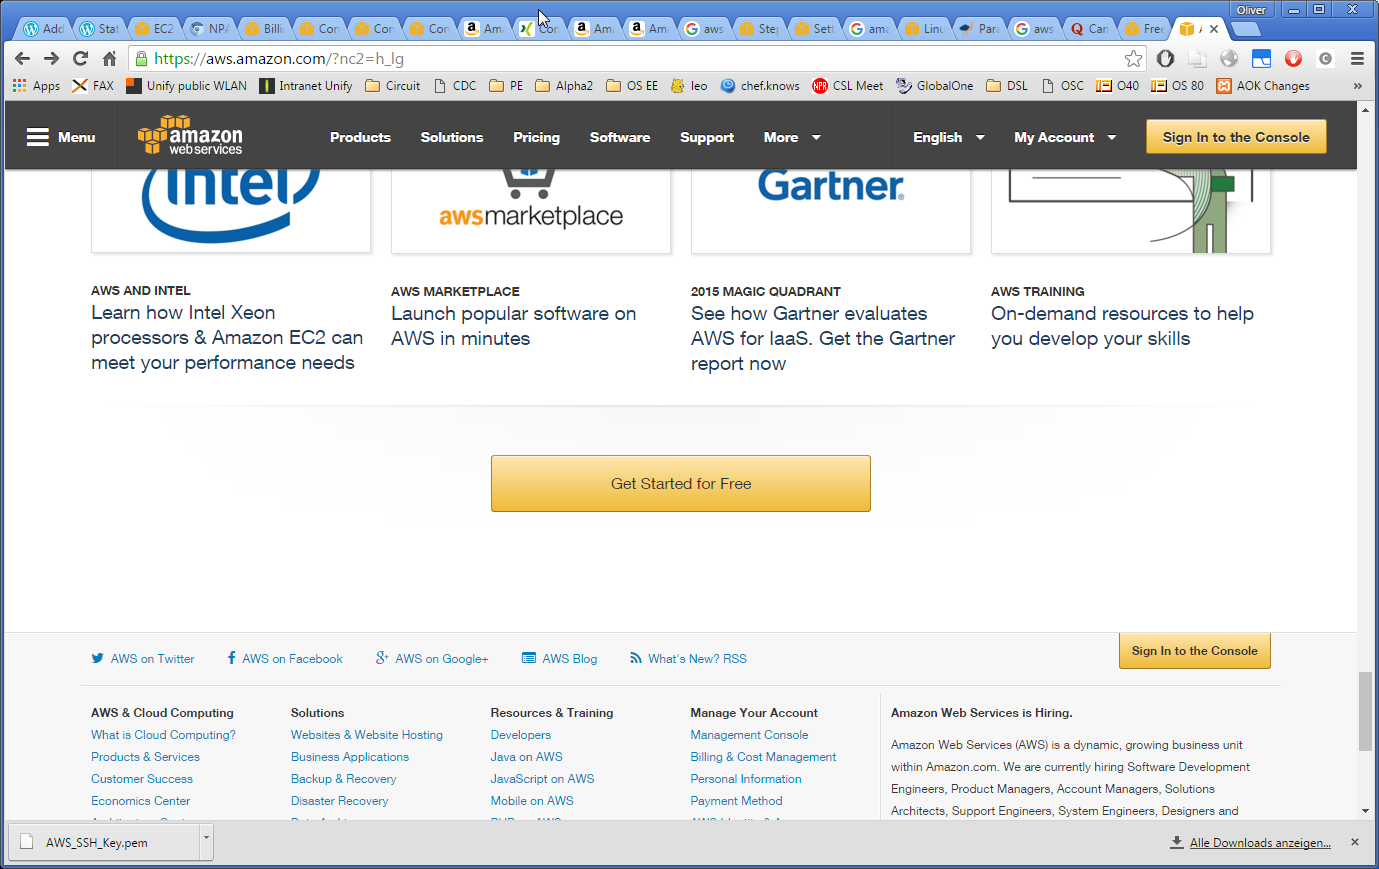
In order to get started, you need to sign into the Amazon Web Services, if not already done so. For that, visit https://aws.amazon.com/, scroll down and push the Get Started for Free button. This is starting a free tier trial account for up to 12 months and up to two time 750 hrs of computing time; Linux and Windows 2012 server on a small virtual machine.
Note that you will be offered options that are free along with other services that are not for free, so you need to be a little bit careful. Vagrant with its easy automation will help us to minimize the resources needed.
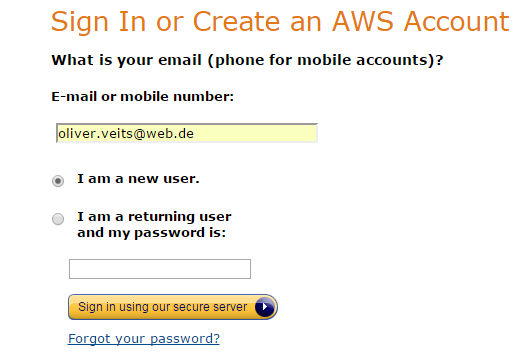
I had signed into AWS long ago, but as far as I remember, you need to choose „I am a new User“, add your email address and desired password and a set of personal data (I am not sure whether I had to add my credit card, since I am an Amazon customer anyway).
Install an Ubuntu machine from the EC2 image repository
Step 2: Enter EC2 Console
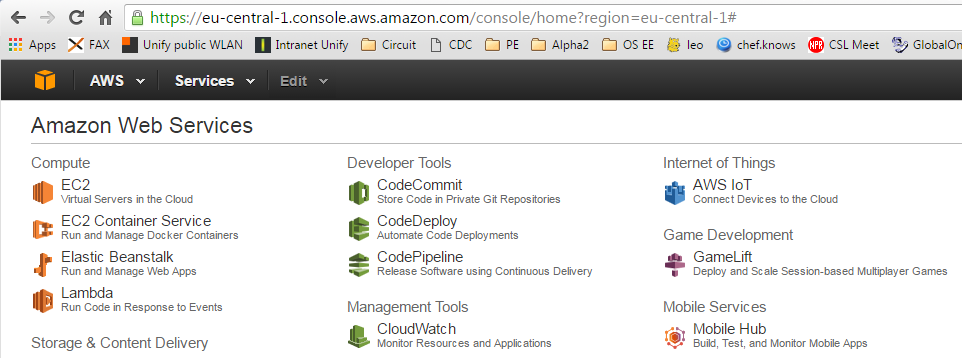
Now we want to create our first virtual machine on AWS. After having singed in, you are offered to enter AWS home (the link depends on the region you are in, so I do not confuse you with a link that might not work for you) and you can enter the AWS EC2 console on the upper left:
Step 3: Choose and Launch Instance
On the following page, you are offered to create your first virtual machine instance:

Choose Launch Instance. I am an Ubuntu fan, so I have chosen the HVM version of Ubuntu:
Step 3.1: Choose Image

This image is ‚Free tier eligible‘ so I expect not to be charged for it. Note that there are two image types offered for each operating system: HVM and PV. HVM seems to have a better performance. See here a description of the differences.
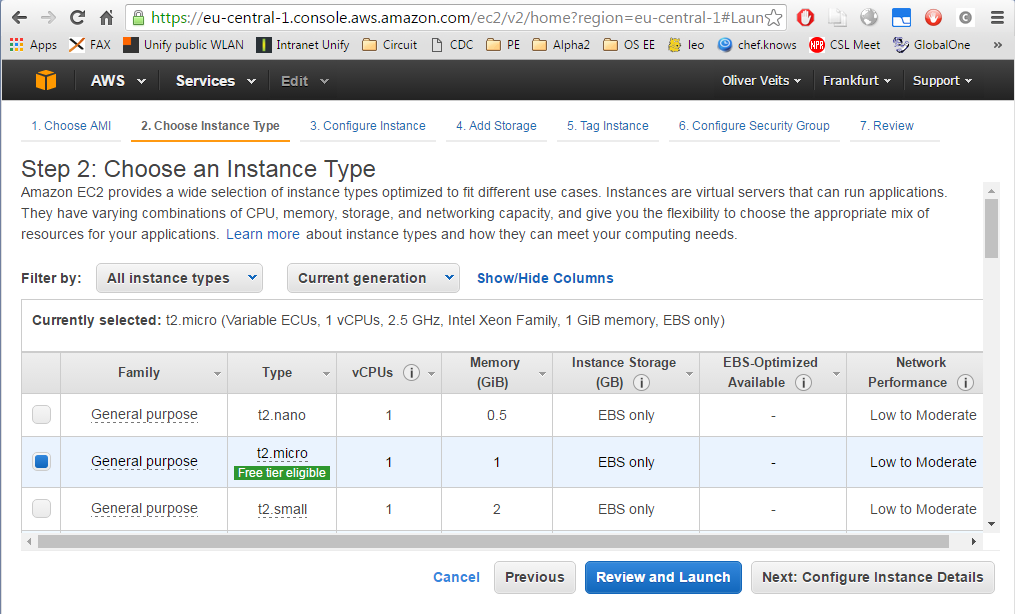
Note, that only t1.micro is ‚Free tier eligible‘. Larger images will not come for free, as we might have expected. However, note that also the smaller t2.nano instance is not ‚Free tier eligible‘. If you want to use a t2.nano image, you will have to pay for it from day one.
If you plan making use of services that are not ‚Free tier eligible‘, the AWS simple monthly (cost) calculator helps you to estimate your monthly cost.
Step 3.2: Launch Instance
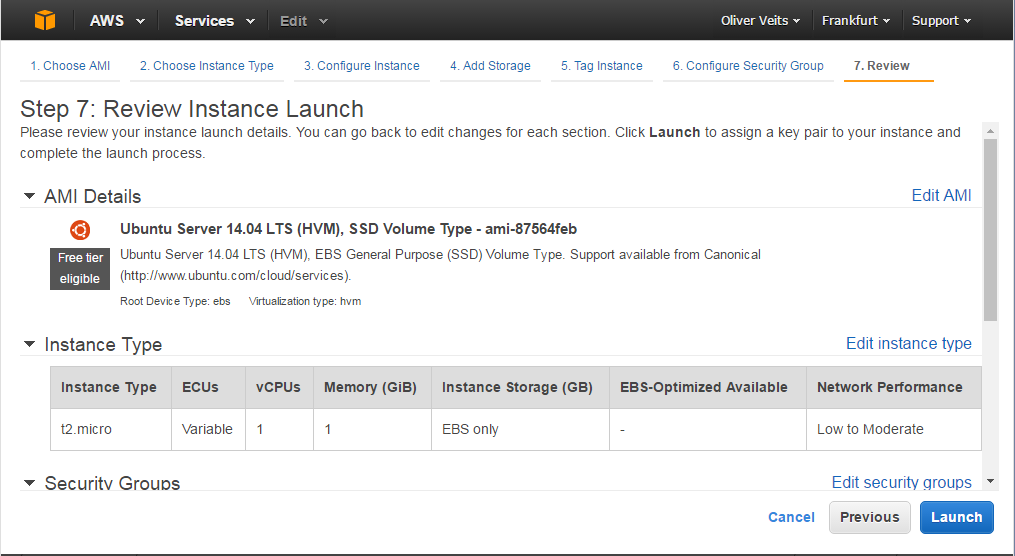
Now click on Review and Launch.
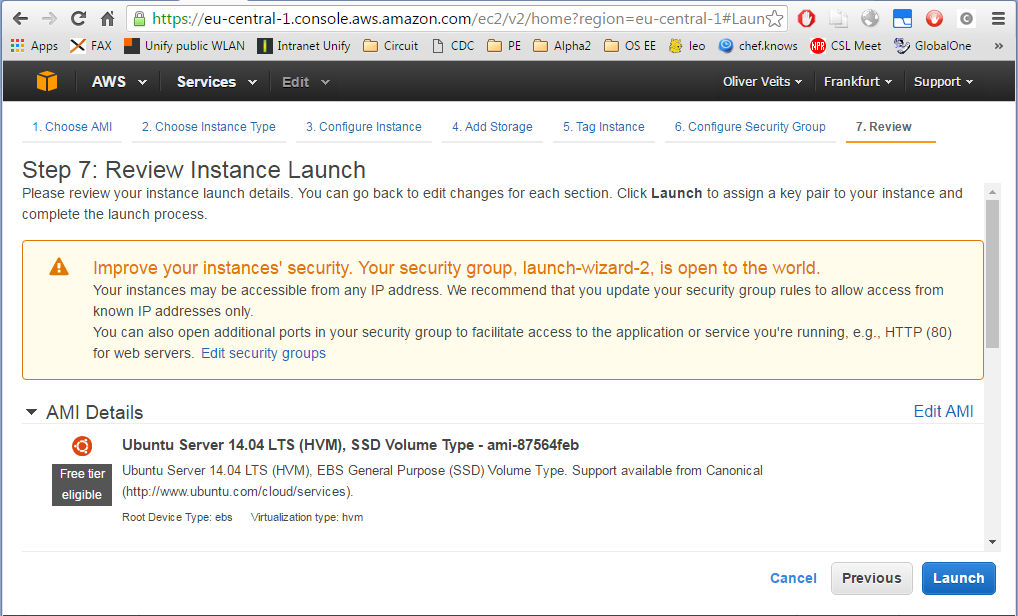
Step 3.3: Adapt Security Settings
We get a security alert we take seriously: creating an instance that is open to the Internet is not a good idea, so we click „Edit security groups“:
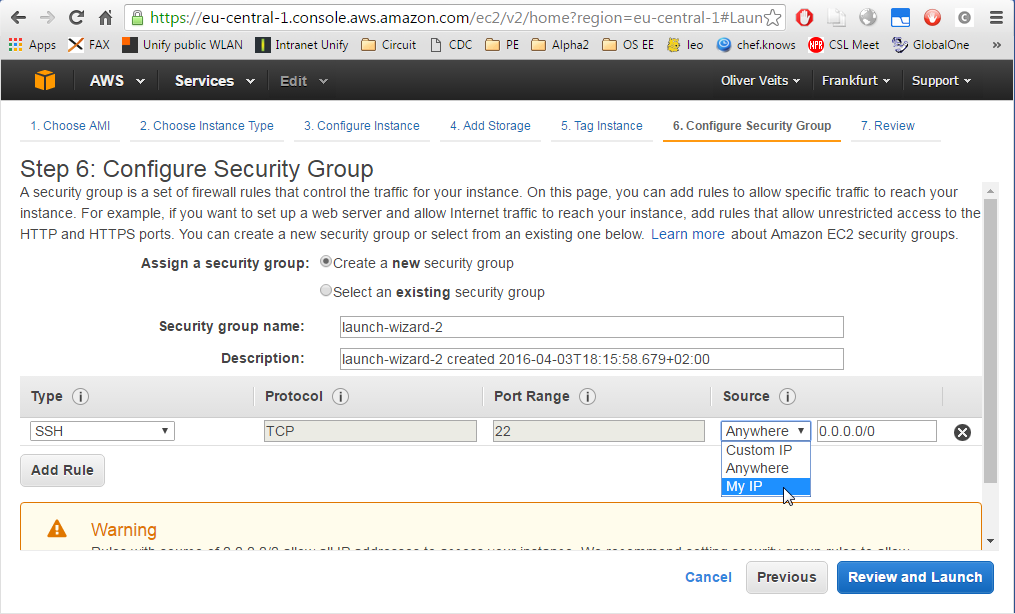
From the drop down list of the Source, we select „My IP“, before we press „Review and Launch“. Then we can review the instance data again and press Launch:
Step 3.4: Create and download SSH Key Pair
In the next pop up window, you are offered to create a new SSH key pair. Let us do so, and call the key „AWS_SSH_key“ and download the corresponding PEM file to a place you will need later on to connect to your instance:
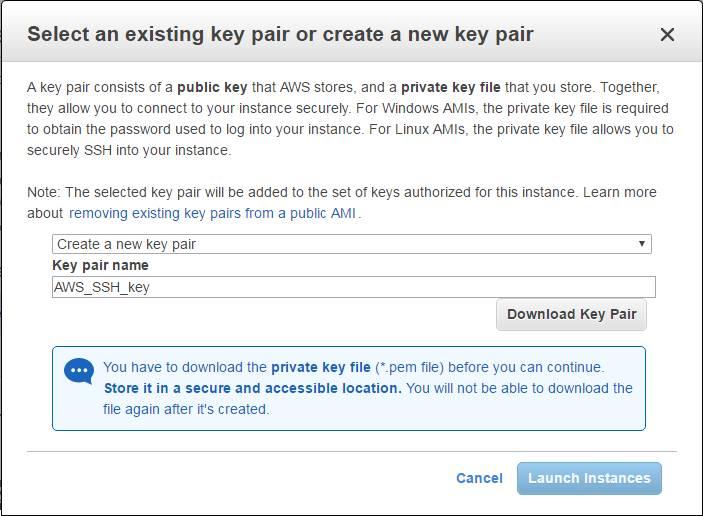
Now press „Launch Instances“. You will be redirected to a page that helps you with connection to your Instance:
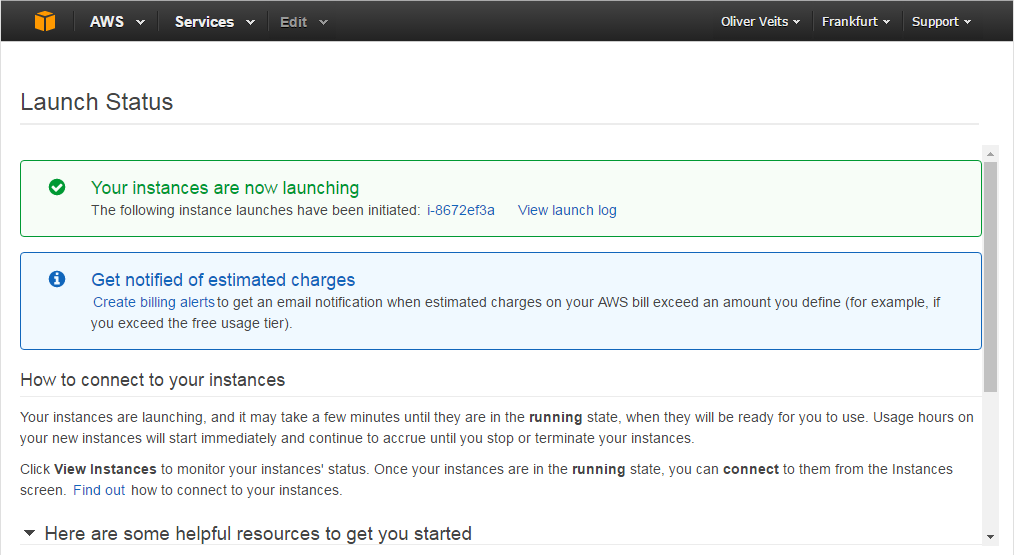
Step 3.5: Check Instance Status
After clicking on the Instance Link, we will see that the instance is running and the „Status Checks“ are being performed:
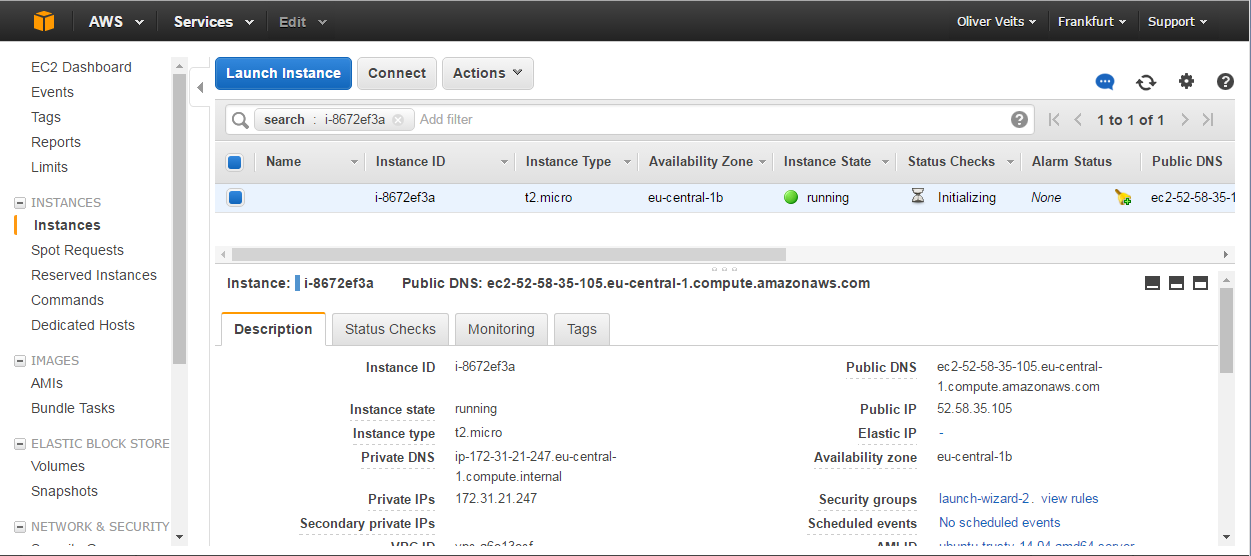
In the description, we also will find some important information on the instance like the Public IP and the Public DNS name (FQDN). This information will be needed now, since we want to connect to the instance via SSH
Note the IP address and the Public DNS will change every time the image is started. For static IP addresses, a so-called Elastic IP needs to be rented from AWS. If this IP is assigned to a free tier instance, also the rented Elastic IP seems to be free of charge.
Step 4: Connect via SSH
If you are connecting your instance from a Linux or Unix operating system, follow Step 4 a) and use the built-in SSH client. For Windows systems, we recommend to follow step 4 b) based on putty.
Note: With Cygwin on Windows, you might also try using step 4 a). However, other Linux emulations on Windows like the bash shell that comes with Git do not play well with editors like vim, so I recommend following 4 b) in this case.
Step 4 a) Connection from a *nix operating system
On a Unix or Linux machine or on a bash shell on Windows, you can connect via the *nix built-in SSH client. The following command line connection worked for me on a bash shell on my Windows machine. Replace the path to the private PEM file and the public DNS name, so that it works for you as well:
$ssh ubuntu@ec2-52-29-14-175.eu-central-1.compute.amazonaws.com -i /g/veits/PC/PKI/AWS/AWS_SSH_Key.pem
The authenticity of host 'ec2-52-29-14-175.eu-central-1.compute.amazonaws.com (52.29.14.175)' can't be established.
ECDSA key fingerprint is e2:34:6c:92:e6:5d:73:b0:95:cc:1f:b7:43:bb:54:39.
Are you sure you want to continue connecting (yes/no)? yes
Warning: Permanently added 'ec2-52-29-14-175.eu-central-1.compute.amazonaws.com,52.29.14.175' (ECDSA) to the list of known hosts.
Welcome to Ubuntu 14.04.3 LTS (GNU/Linux 3.13.0-74-generic x86_64)

 * Documentation:  https://help.ubuntu.com/

  System information as of Fri Apr  1 20:38:25 UTC 2016

  System load:  0.08              Processes:           98
  Usage of /:   10.0% of 7.74GB   Users logged in:     0
  Memory usage: 6%                IP address for eth0: 172.31.21.237
  Swap usage:   0%

  Graph this data and manage this system at:
    https://landscape.canonical.com/

  Get cloud support with Ubuntu Advantage Cloud Guest:
    http://www.ubuntu.com/business/services/cloud

0 packages can be updated.
0 updates are security updates.
ubuntu@ip-172-31-21-237:~$
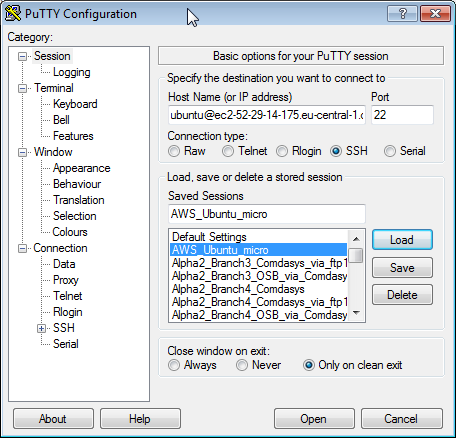
Step 4 b) Alternatively, on Windows, use putty to connect via SSH:
Since I am using a Windows machine and the formatting of a ssh session in a CMD console using command line ssh in a bash does not work well (try using vim in a Windows CMD console), I prefer to use putty on Windows.
In putty, add the host ubuntu@<public DNS>:
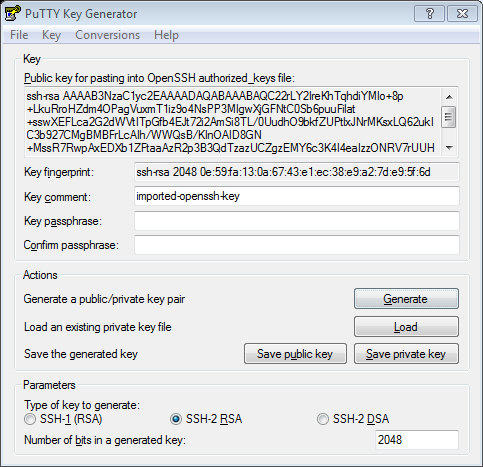
Convert the pem file to a ppk format putty understands. For that, import the pem file using Putty Key Generator (puttygen) via Conversions->Import Key->choose pem file -> Save private key with ppk extension.

Now you can add the path to the ppk file to Connection->SSH->Auth->Private key file for authentication: in the putty client.
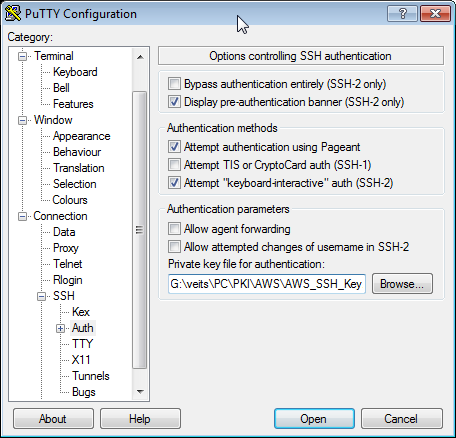
To save the changes, you need to click on Session on the left Category Pane and then press Save:

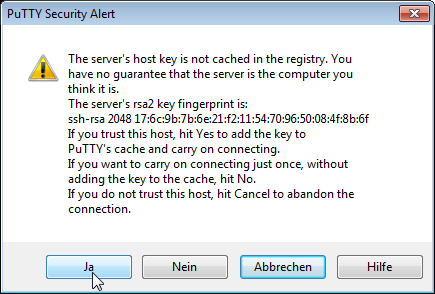
Now, press the „Open“ button, accept the SSH security key:
and you should be logged in:

Step 5: Destroy the Instance on AWS
In order to save money (or trial workhours in our case), and when you are ready with playing around with the instance, let us destroy the instance in the AWS EC2 console again:

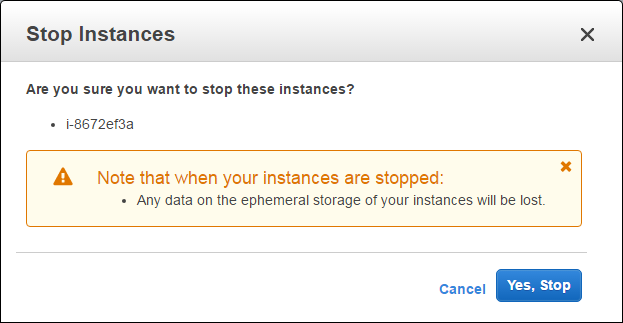
Select the instance, choose Actions->Instance State->Stop. Note that any changed to the instance will be lost, if you stop the system:
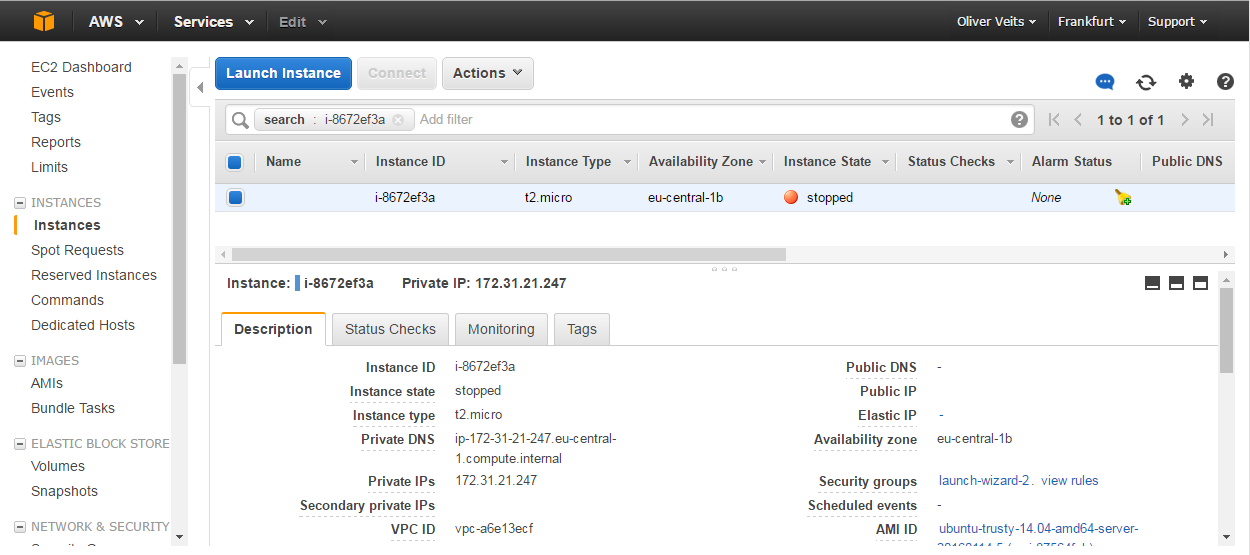
Only the private IP addresses and DNS names are kept, while the public IP and DNS are freed up. Next time you start the system, the public IP address and public DNS name will be different and you will need to update the DNS in your SSH client for external access.
Alternatively, you also can terminate the instance, which will delete the instance from AWS database. Note, however, that you still we see the instance in a „Terminated“ status. The sense and non-sense of this is discussed in this forum post.
Appendix A: Cost Control with AWS
An estimation of the expected cost can be calculated with the AWS monthly cost calculator tool.
The actual cost can be observed on AWS‘ billing page. At the bottom of the page, there is a „Set your first billing alarm“ link that allows to define an email alarm as soon as a certain threshold is exceeded.
Note for users that are not in the East of the US: I was a little bit confused that the „Set your first billing alarm“ link (https://console.aws.amazon.com/cloudwatch/home?region=us-east-1&#s=Alarms&alarmAction=ListBillingAlarms) contains a variable region=us-east-1, while I am using resources in eu-central-1 only. However, the corresponding link https://eu-central-1.console.aws.amazon.com/cloudwatch/home?region=eu-central-1#alarm:alarmFilter=ANY does not allow to set any billing alarms. I assume that the billing for all regions is performed centrally in US East for all regions (I hope).
Next: AWS Automation using Vagrant — Part 2: Installation and Usage of the Vagrant AWS Plugin

I don’t think the title of your article matches the content lol. Just kidding, mainly because I had some doubts after reading the article.