In this blog post, Java Hipster will help us creating a mini blog application based on Angular 4 and Spring Boot. Angular is a popular framework for creating reactive single page applications, while Spring Boot is a robust java-based backend framework that helps you create database access and RESTful APIs.
We will closely follow the JHipster introduction on YouTube and explore administrative functions like user management, logging and API management (with swagger). After creating and importing a simple model for a blog, we will manipulate the blog and its entries via the GUI.
For your convenience, we will run everything in a Docker container, so you do not need to install any of the required software packages (apart from Docker itself). As a little goody, we will outline how to add some additional security functions: we will restrict delete access to authorized users. That is an extension to the many good examples shown in the JHipster introduction on YouTube video.

Tools and Versions used
- Vagrant 1.8.6
- Virtualbox 5.0.20 r106931
- jhipster Docker image v4.6.2
Why JHipster?
JHipster is a Yeoman-based code generator for a complete Web application based on Angular and Spring Boot, two popular frameworks for frontend and backend systems.
- Angular is a popular single page frontend framework
- Spring Boot is a high-performance backend framework
mixed with CSS Bootstrap styles, and an easy-to use web-based modeling tool that creates text-based models that can be used to generate the corresponding database and REST entities/functions, JHipster, JHipster is a quick way to get projects started.
I have not checked out yet all other features mentioned on their home page, like
- microservice support with JHipster Registry, Netflix OSS, Elastic stack and Docker
We will build our first application within a Docker container.
Step 0: Install a Docker Host
This time (again), our application will need more than 750 MB RAM. Therefore, we cannot use my beloved Katacoda as our Docker playground, which is limited to this amount of DRAM. Instead, you need to get access to a Docker host with, >~ 2 GB RAM. A nice way of installing an Ubuntu Docker host via Vagrant is described here (search for the term “Install a Docker Host”).
Prerequisites of this step:
- I recommend to have direct access to the Internet: via Firewall, but without HTTP proxy. However, if you cannot get rid of your HTTP proxy, read this blog post.
- Administration rights on you computer.
Steps to install a Docker Host VirtualBox VM:
Download and install Virtualbox (if the installation fails with error message „Oracle VM Virtualbox x.x.x Setup Wizard ended prematurely“ see Appendix A of this blog post: Virtualbox Installation Workaround below)
1. Download and Install Vagrant (requires a reboot)
2. Download Vagrant Box containing an Ubuntu-based Docker Host and create a VirtualBox VM like follows:
(basesystem)# mkdir ubuntu-trusty64-docker ; cd ubuntu-trusty64-docker
(basesystem)# vagrant init williamyeh/ubuntu-trusty64-docker
(basesystem)# vagrant up
(basesystem)# vagrant ssh
Now you are logged into the Docker host and we are ready for the next step: to download the Docker image and to start the application in a container.
Step 1: Start JHipster Docker Container
(dockerhost)$ docker run -it -p 8080:8080 -p 3001:3001 -p 9000:9000 -p 9060:9060 -v $(pwd):/localdir jhipster/jhipster:v4.6.2 bash
(containter)# cd /localdir
Note: You also can omit the version tag (:v4.6.2) and work with the latest image. However, v4.6.2 is the version tested in this blog post.
Note that you might have to view (docker ps) and stop (docker stop) any container that is running on port 8080 first, since I have experienced problems, when mapping the port 8080 to another port than 8080 (I need to try again). If you have followed step 0, you will need to issue the command
(dockerhost) sudo docker stop cadvisor
Step 2: Create, Start and Login to App
Step 2.1: Create App
(container)# mkdir blog; cd blog
(container)# yo jhipster
I have chosen
- monolithic
- base name: blog
- default java package name: org.jhipster <– should use another name, probably
- authentication: JWT
- database type: SQL
- production database: MySQL
- development database: H2 with disk-based persistence
- Hibernate 2nd level cache: Yes, with ehcache (local cache, for a single node)
- Other Technologies (choose none, just press enter)
- Framework: Angular 2
- libSass: Yes
- Internationalization: Yes
- Chosen English and German
- Testing Frameworks (besides JUnit and Karma:
- Gatling
- Protractor
Wait for ~2-4 minutes
Step 2.2 Start App
In order to be able to explore an (empty) JHipster app, we can start the application as follows:
Start Spring Boot Application:
In the project root directory, type:
(container)# ./mvnw
Only as a reference: Start Webpack development server (was not needed in my case!)
container)# yarn start
Step 2.3 (optional): Connect to (default) App
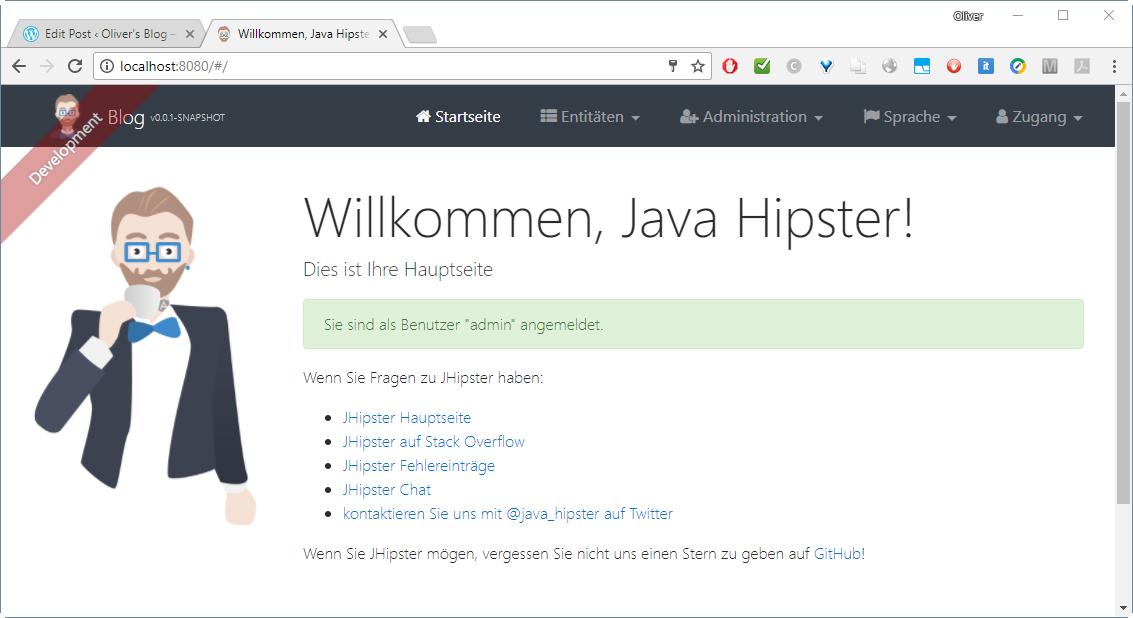
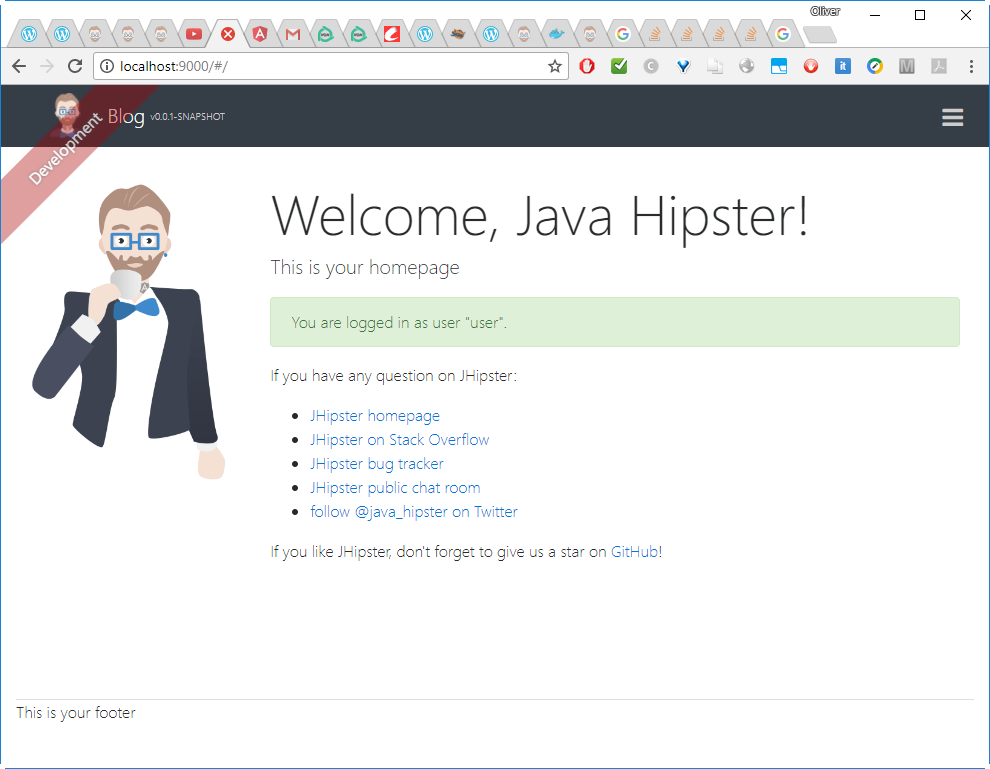
In a local browser, connect to localhost:8080:
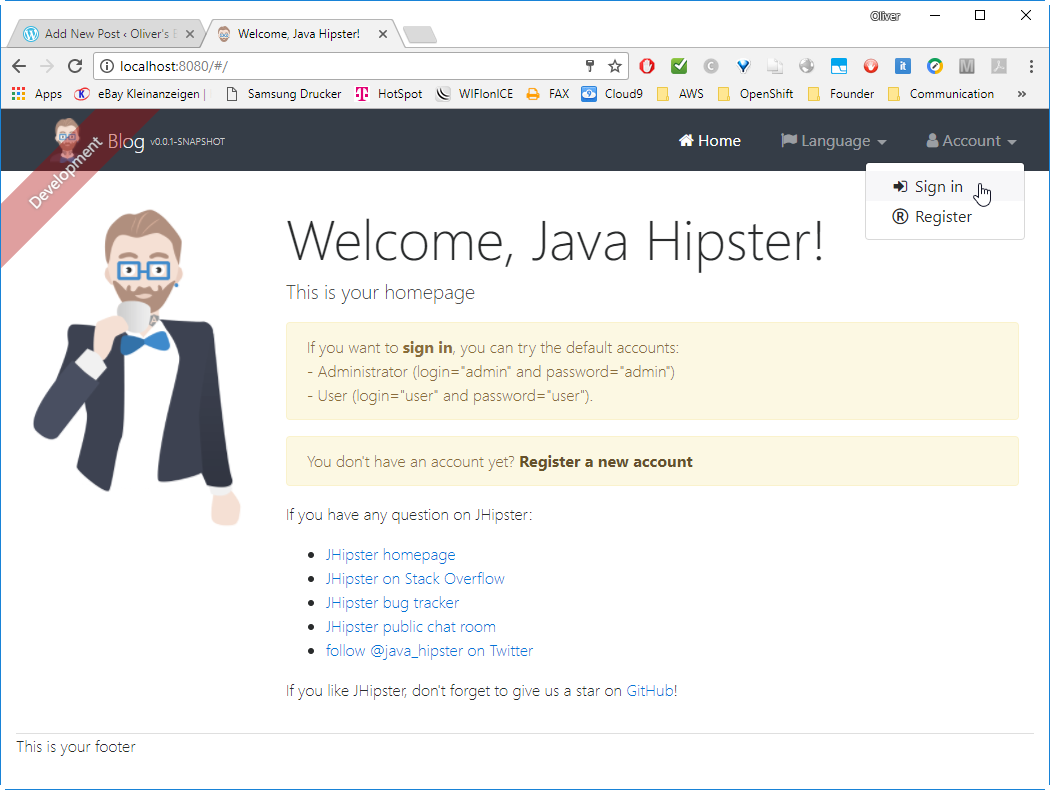
Sign in as admin with password „admin“.
Step 2.4 (optional): Explore (default) App
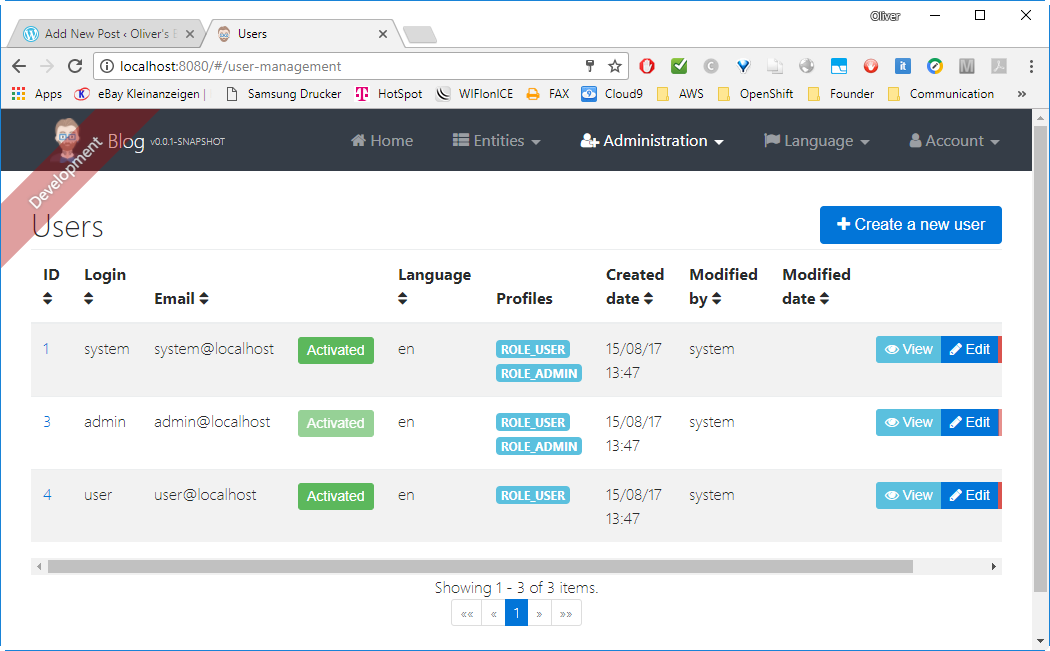
The Entities are empty yet, but unser Administration we can see the user management, metrics etc:

We have not yet created and imported a model, so this is still the default JHipster app. It comes with a User Model, though, with three users created per default:
- admin / admin
- user / user
- system / system?
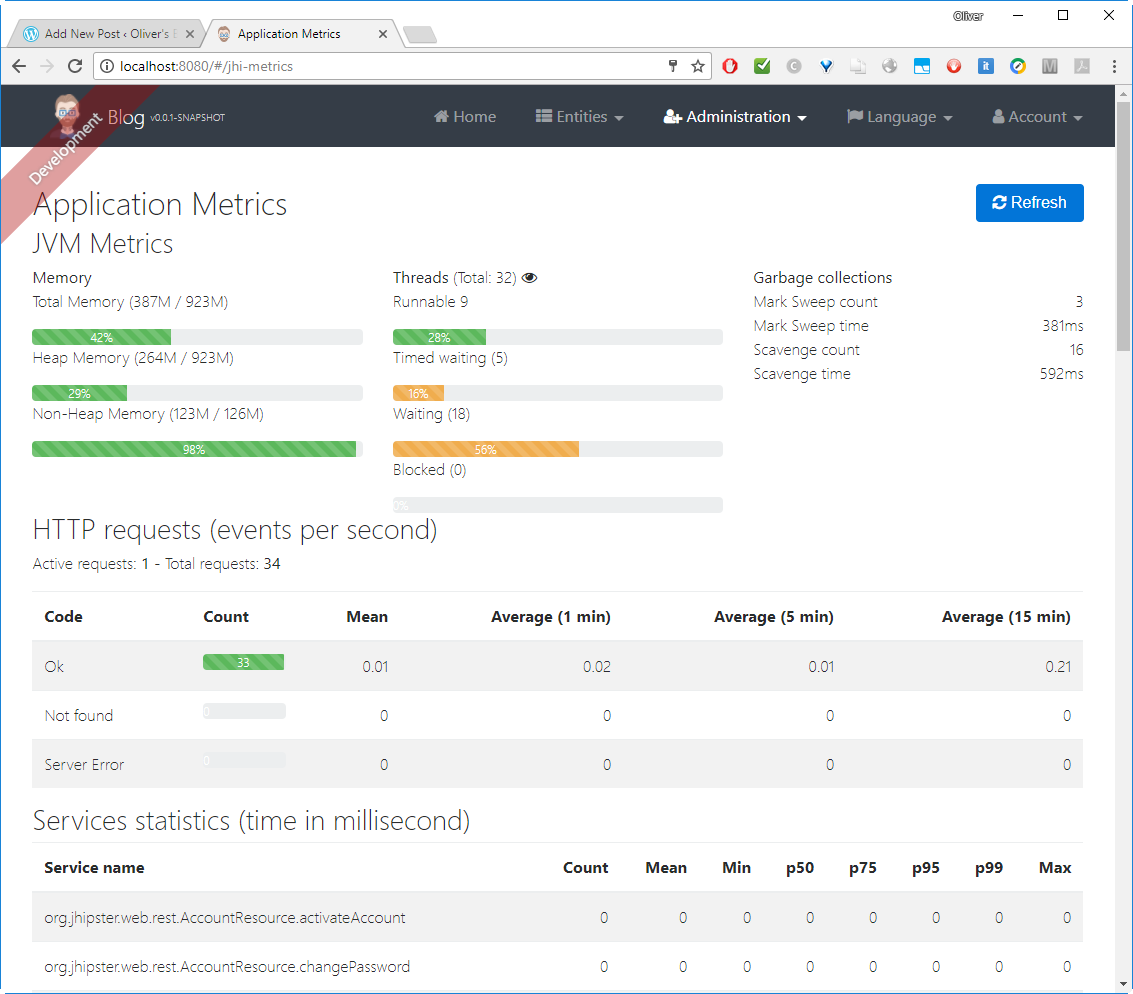
Under Administration -> Metrics, we can see JVM Metrics as well as HTTP statistics:
Under Administration -> Configuration, we see the Spring properties, even though they seem to be read-only:

However, the log configuration can be edited in the way that a log can be chosen e.g. to show DEBUG instead of WARN messages only

Under Administration -> API we find a swagger page that helps you to test your REST services:
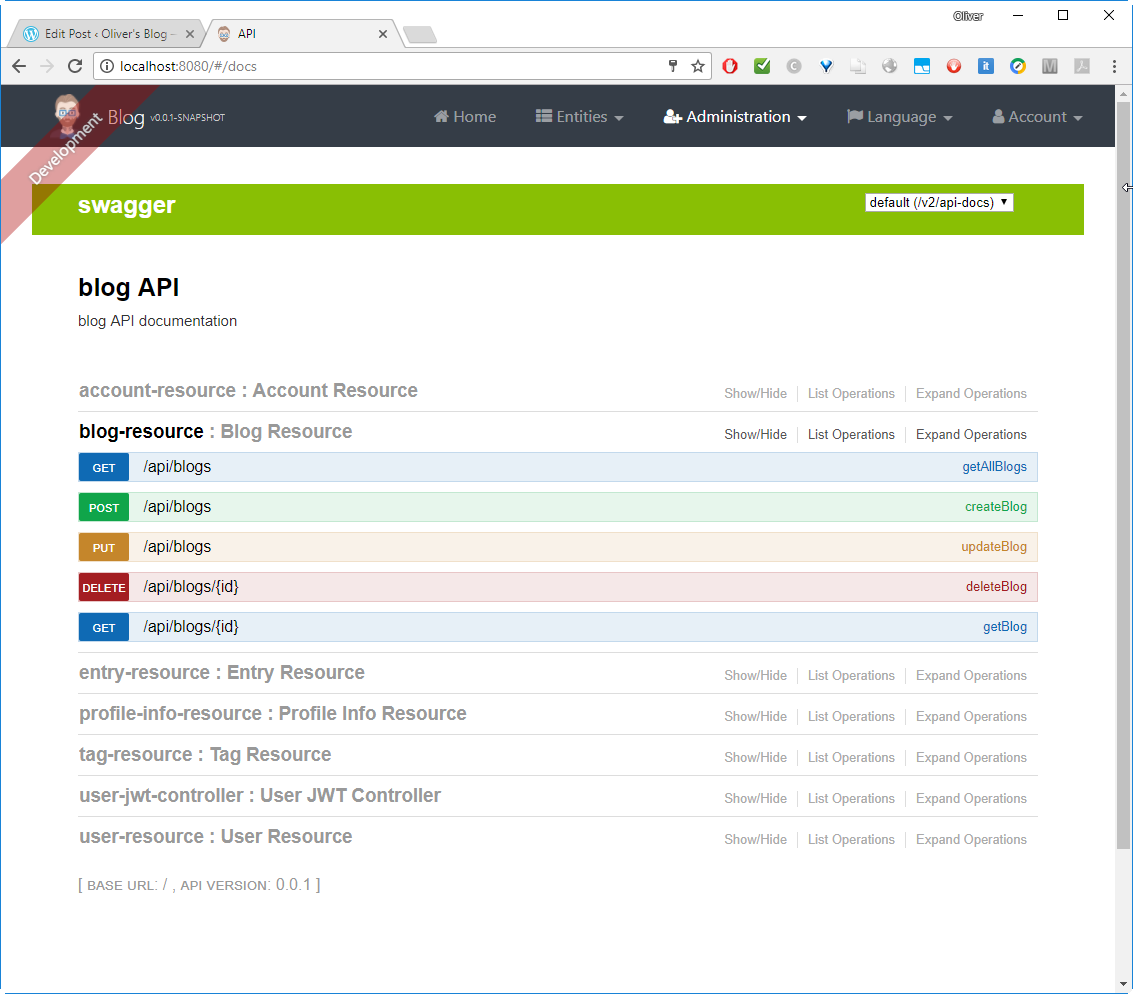
Okay, I am cheating a little here: you will not be able to see the blog-resource yet, since we have not created the resources yet (we will do so later). You will only see the account, the profile info, the user-jwt controller and the user resource. It can be used to test the interface. E.g. you can read all users by clicking the button
![]()
of users-resource GET /api/users and we will receive something like follows:
[
  {
    "id": 1,
    "login": "system",
    "firstName": "System",
    "lastName": "System",
    "email": "system@localhost",
    "imageUrl": "",
    "activated": true,
    "langKey": "en",
    "createdBy": "system",
    "createdDate": "2017-08-15T11:47:06.180Z",
    "lastModifiedBy": "system",
    "lastModifiedDate": null,
    "authorities": [
      "ROLE_USER",
      "ROLE_ADMIN"
    ]
  },
  {
    "id": 3,
    "login": "admin",
    "firstName": "Administrator",
    "lastName": "Administrator",
    "email": "admin@localhost",
    "imageUrl": "",
    "activated": true,
    "langKey": "en",
    "createdBy": "system",
    "createdDate": "2017-08-15T11:47:06.180Z",
    "lastModifiedBy": "system",
    "lastModifiedDate": null,
    "authorities": [
      "ROLE_USER",
      "ROLE_ADMIN"
    ]
  },
  {
    "id": 4,
    "login": "user",
    "firstName": "User",
    "lastName": "User",
    "email": "user@localhost",
    "imageUrl": "",
    "activated": true,
    "langKey": "en",
    "createdBy": "system",
    "createdDate": "2017-08-15T11:47:06.180Z",
    "lastModifiedBy": "system",
    "lastModifiedDate": null,
    "authorities": [
      "ROLE_USER"
    ]
  }
]
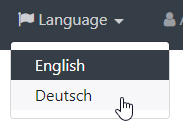
We also can choose the German language, since we have chosen English AND German:
Step 3: Create and Download Your Model
You can create and download the model from JDL Studio and access it from your application. If you have followed the instructions above, you need to make sure the file is visible from the JHipster container. For that, you need to place it to the folder you have mapped in step 1 by using the -v docker run flag.
It might be more convenient to cut&paste the content into a file /localdir/blog/model.jh within the container:
entity Blog {
name String required minlength(3),
handle String required minlength(2)
}

entity Entry {
title String required,
content TextBlob required,
date ZonedDateTime required
}

entity Tag {
name String required minlength(2)
}

relationship ManyToOne {
Blog{user(login)} to User,
Entry{blog(name)} to Blog
}

relationship ManyToMany {
Entry{tag(name)} to Tag{entry}
}

paginate Entry, Tag with infinite-scroll
The graphical representation of the model looks like follows:
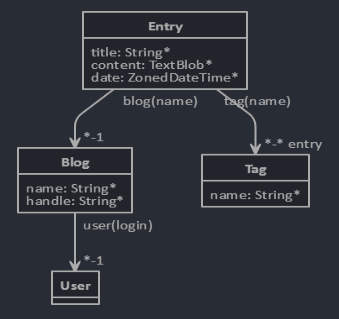
The modes is re-using the User model that is present in JHipster per default. Now, each blog is mapped to a user. Each blog can have many blog entries and each entry can have many tags, while each tag can be attached to many entries.
In the next step, we will import this model.
Step 4: Import Model
To import the model, we stop the currently running mvnh process (if so), and import the model as follows:
(container)# yo jhipster:import-jdl ./model.jh
Overwrite liquibase/master.xml?: a
Step 5: Start Spring Boot App
After 5 minutes or so, we can start the application again:
(container)# ./mvnw
Note:
yarn startalone will not do the trick. See https://stackoverflow.com/questions/43291477/jhipster-cannot-login-after-starting-with-yarn-start-webpack
Step 6: Connect and Login as admin
In a Browser, we need to navigate to localhost:8080 and login as admin with password admin or user with password user. It does not make a difference for now.
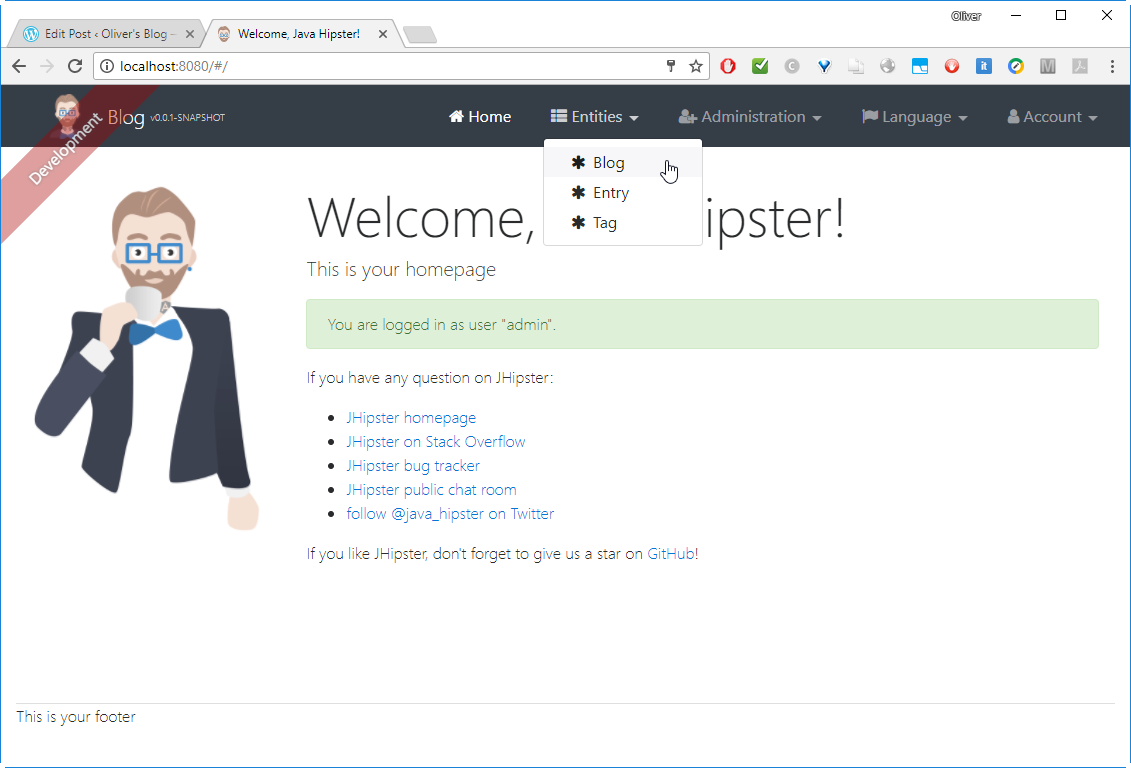
We will notice, that now the model entities are available:
Step 7: Create a Blog
Let us choose „Blog“ and ![]() :
:
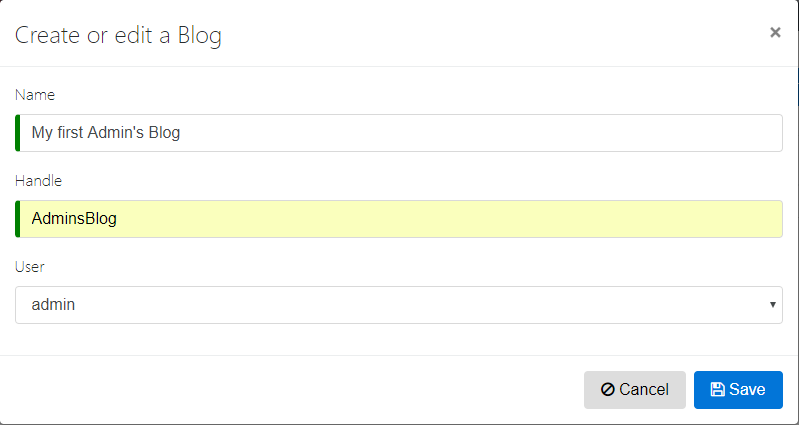
Click Save.
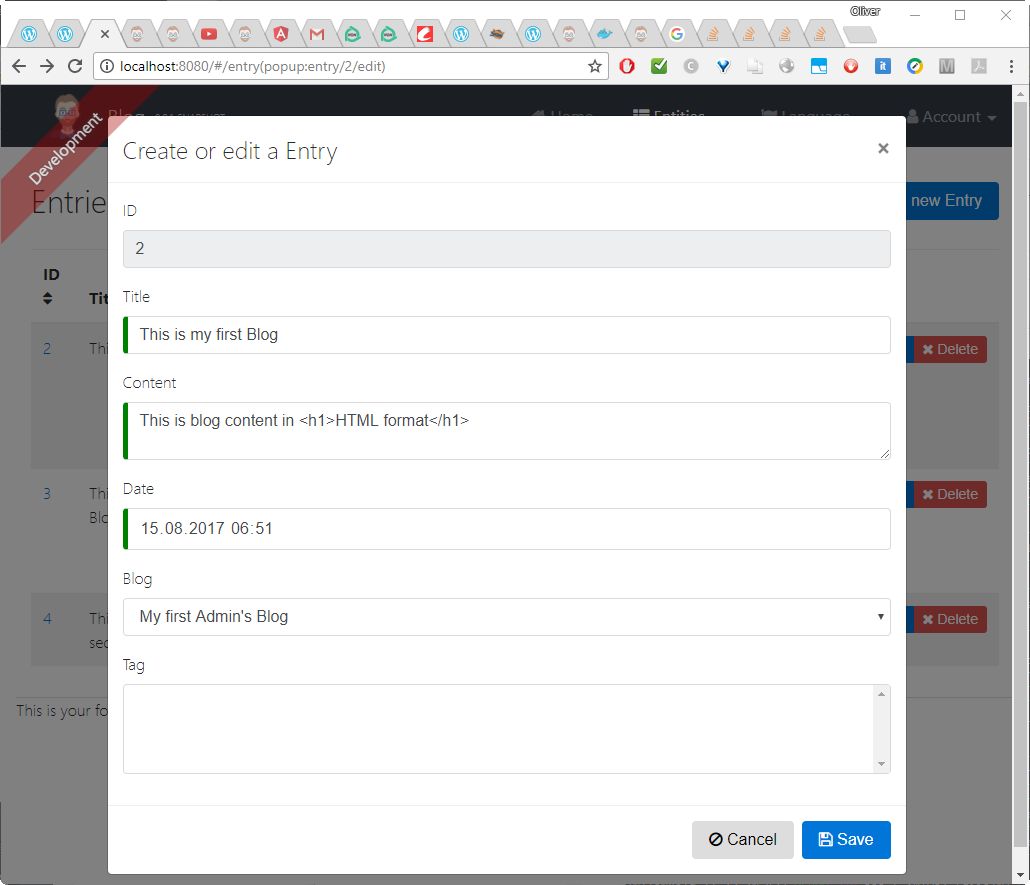
Step 8: Create a Blog Entry
Now let us ![]() on Entities -> Entry:
on Entities -> Entry:
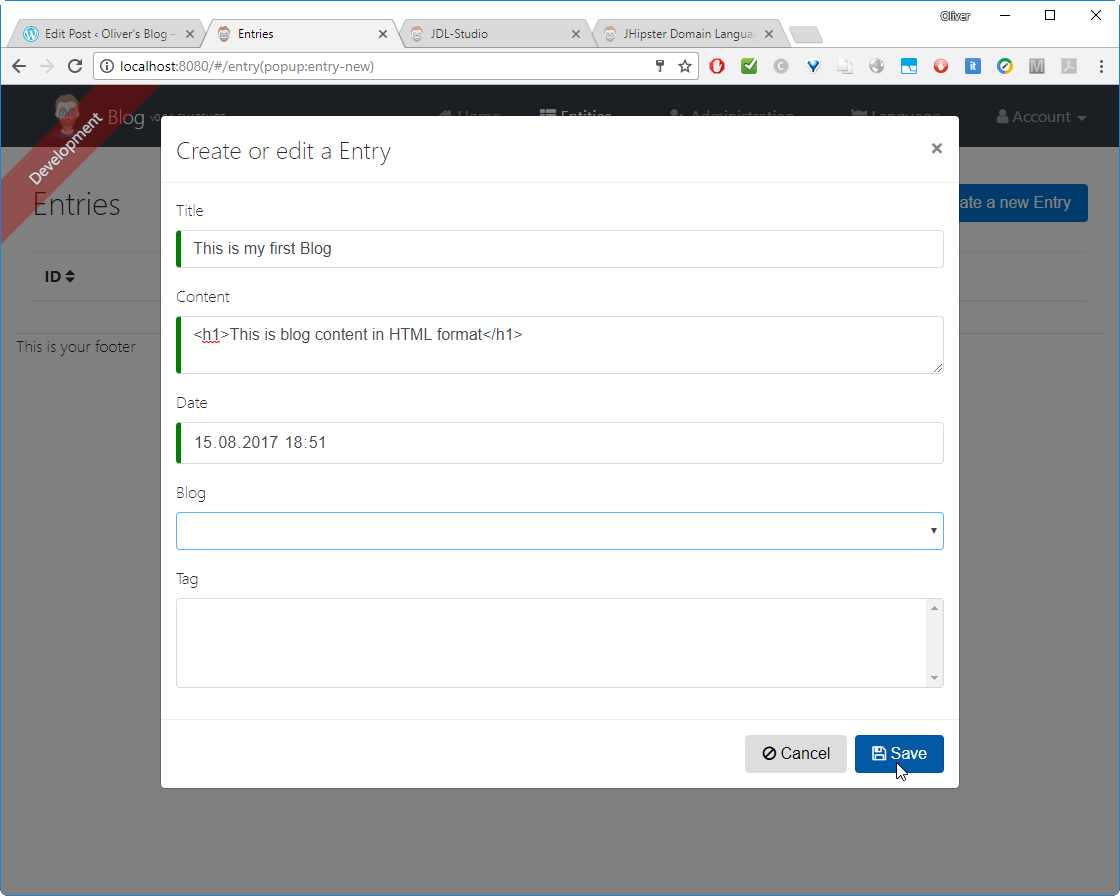
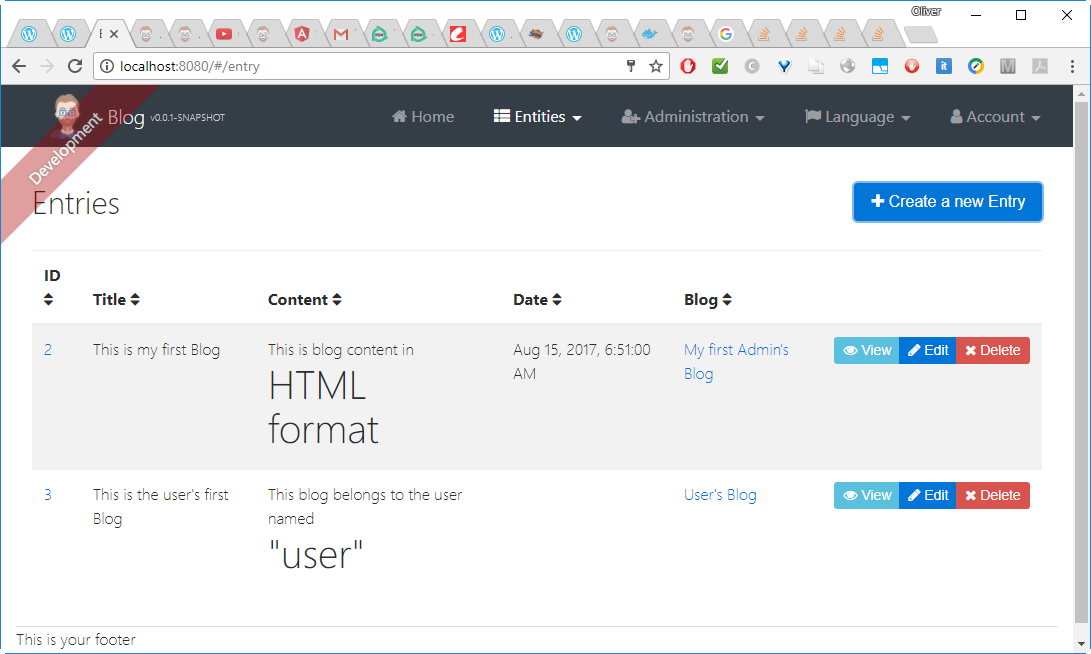
We can see that the Blog field is not mandatory (otherwise the mouse will show that the Save button cannot be pressed). However, let us choose the Admin’s Blog we have just created:

Note, that I have put only part of the content in headline style.
The ID is 2 instead of 1, since I had played around before and I had created/deleted a blog entry already.
Step 9: Add Multi User Support
In this step we will make sure that a user can only edit and delete any entity that belongs to the logged in user.
Step 9.1: Log out and log in as User „user“
We now log out and log in as user „user“ with password „user“. You will notice that you can see and edit or delete any entity that belongs to the admin. This is a no-go for any multi-user application and needs to be fixed.
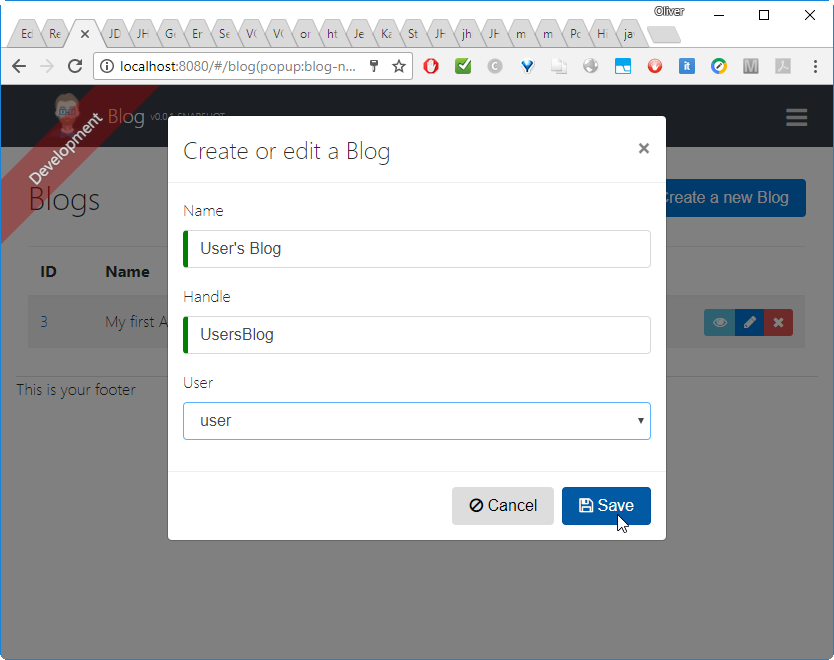
Step 9.2: Add a User’s Blog
Let us first create a User’s Blog and a Blog entity like follows:
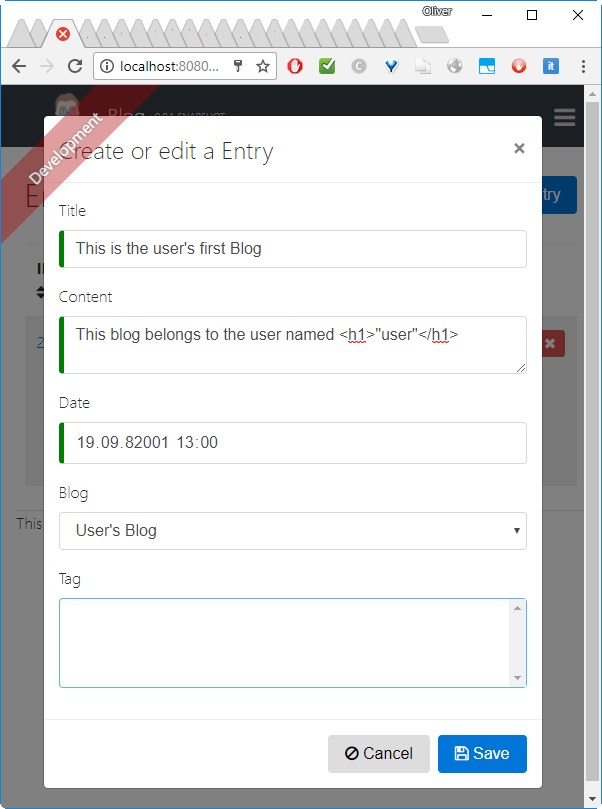
We will see both Blog entries:
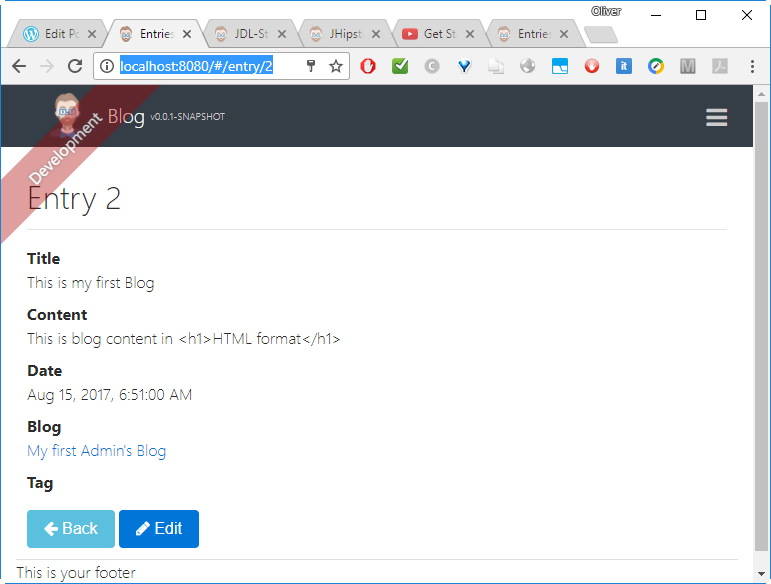
(since you have not yet fixed the HTML Display, the content will look different in your case, you will see the escaped HTML instead like
However the Date is missing. Oups, when checking with my screenshot above, I have entered a wrong date far in the future. And there is a bad side-effect: when I try to edit or delete the entry, the application does not react.
For the records:
- we need to make sure that the user input is verified
- we need to find a way to delete this entry
For now, let us create a new entry:
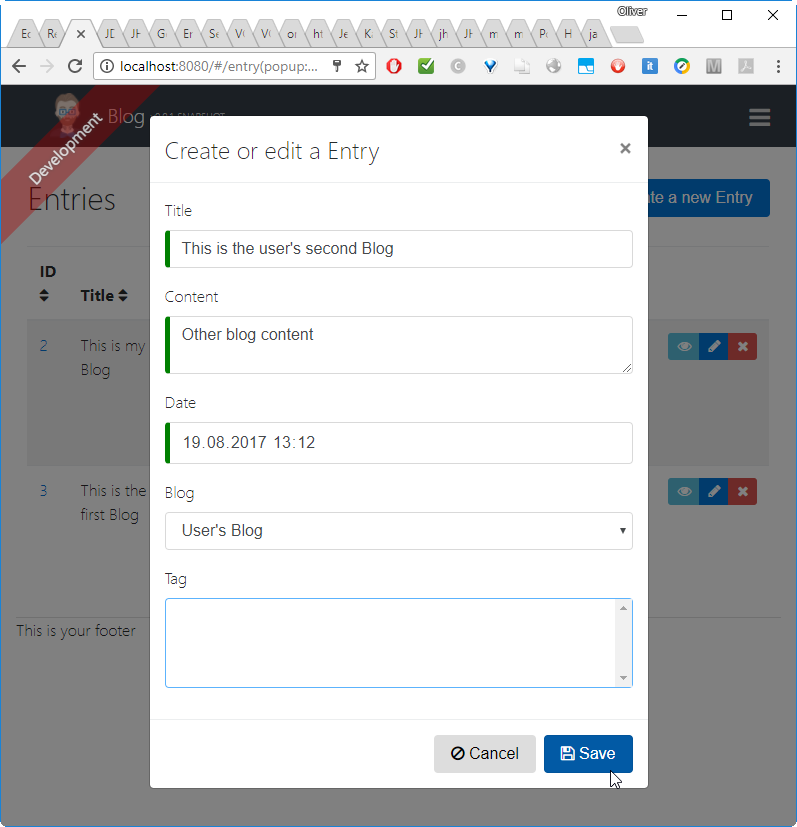
This is an entry that can be edited and deleted, if needed.
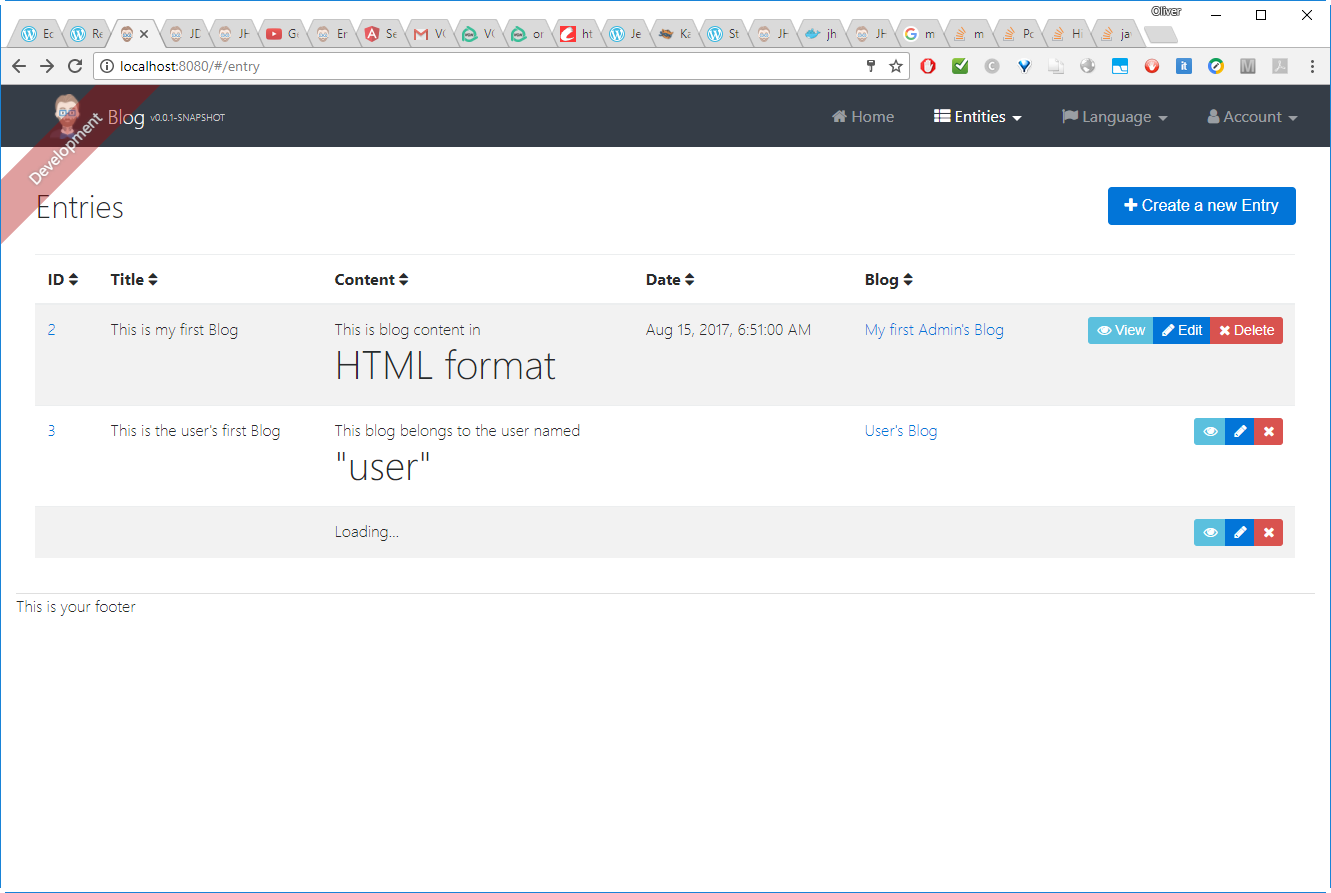
Note: It seems to take quite long, until the entry is loaded. Also, it will be „Loading…“ forever, if you click on View of the upper entry and use the „back“ button on that page. Maybe this is the case because of the bad entry #2?
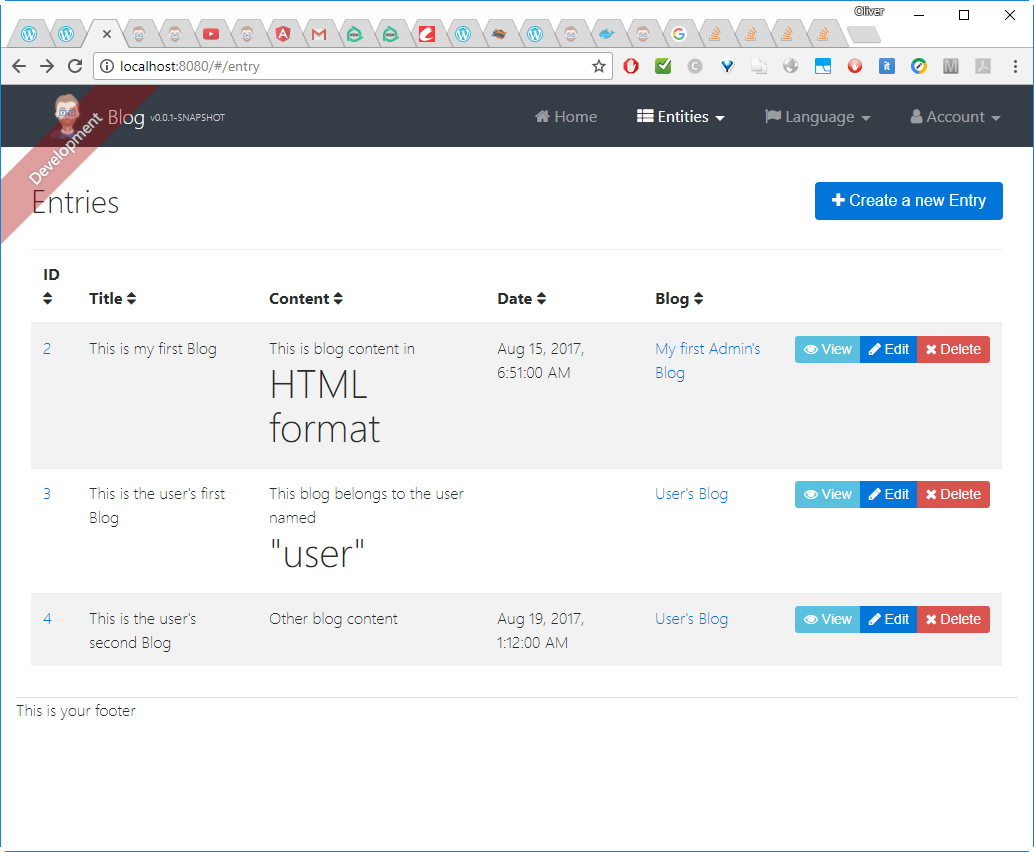
If you are reloading the page, it does display, though and the new entry can be edited, if needed:
Step 9.3: Test write access to admin’s entries
Now click ![]() of the admin’s entry and you will see that the user is allowed to edit admin’s entries.
of the admin’s entry and you will see that the user is allowed to edit admin’s entries.
We need to take two measures:
- the
 and
and  buttons should not be visible (or grayed out and not functional) on entries that do not belong to to the logged in user.
 - the user should not be able to circumvent security by directly calling the Edit or Delete function for entities of other users.
- calling the URL „http://localhost:8080/#/entry(popup:entry/2/edit)“ should return an error
- but also: corresponding Create/Update/Delete REST calls should return an error.
Step 9.4: Start Application in develop Mode
In order to view the results of any file changes immediately, you need to issue the command
(container)# yarn start
and connect to port 9000 instead of 8080:
Log in as user „user“ again.
Step 9.5: Remove foreign Blogs from Blog Table View
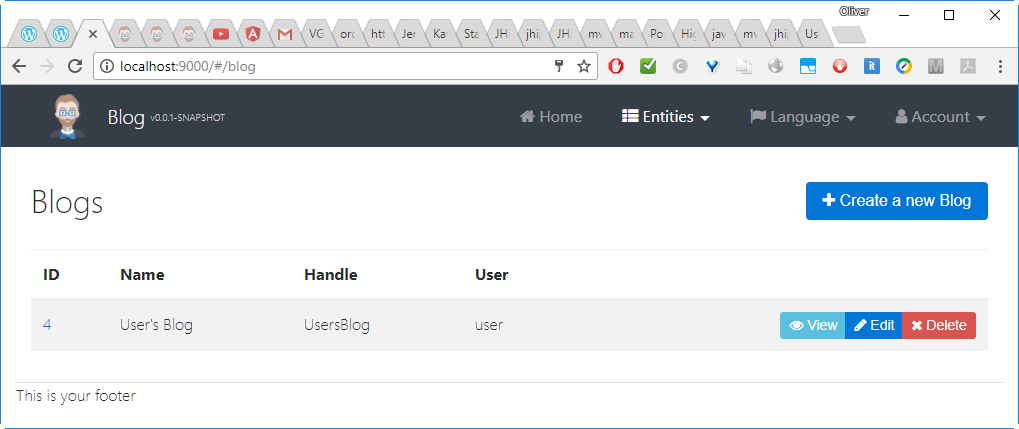
For now, as user named „user“ we can see both blogs we had created:
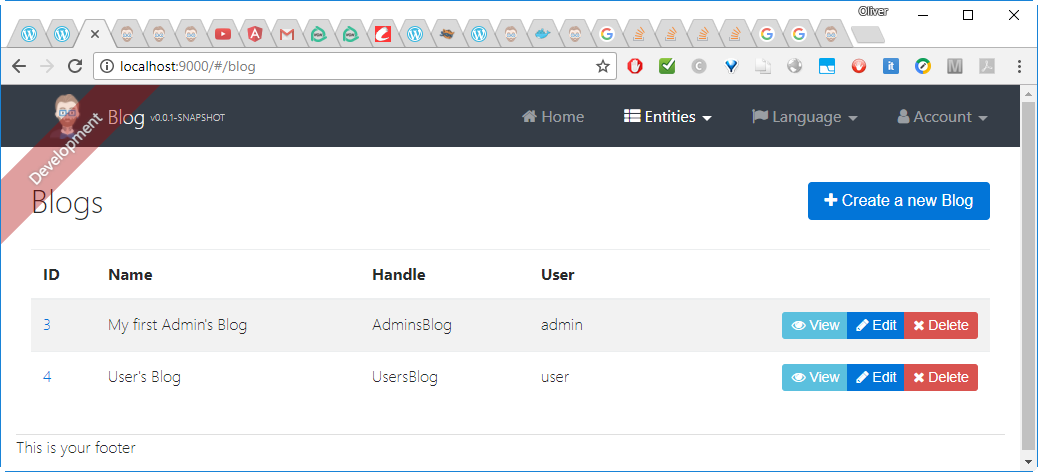
A quick&dirty way to remove the ![]() and
and ![]() buttons from the user’s view is to remove the admin’s blogs from the view, as shown in the JHipster introduction on YouTube:
buttons from the user’s view is to remove the admin’s blogs from the view, as shown in the JHipster introduction on YouTube:
Let us search for the function getAllBlogs in the java File BlogResource (found on the container as src/main/java/org/jhipster/web/rest/BlogResource.java)
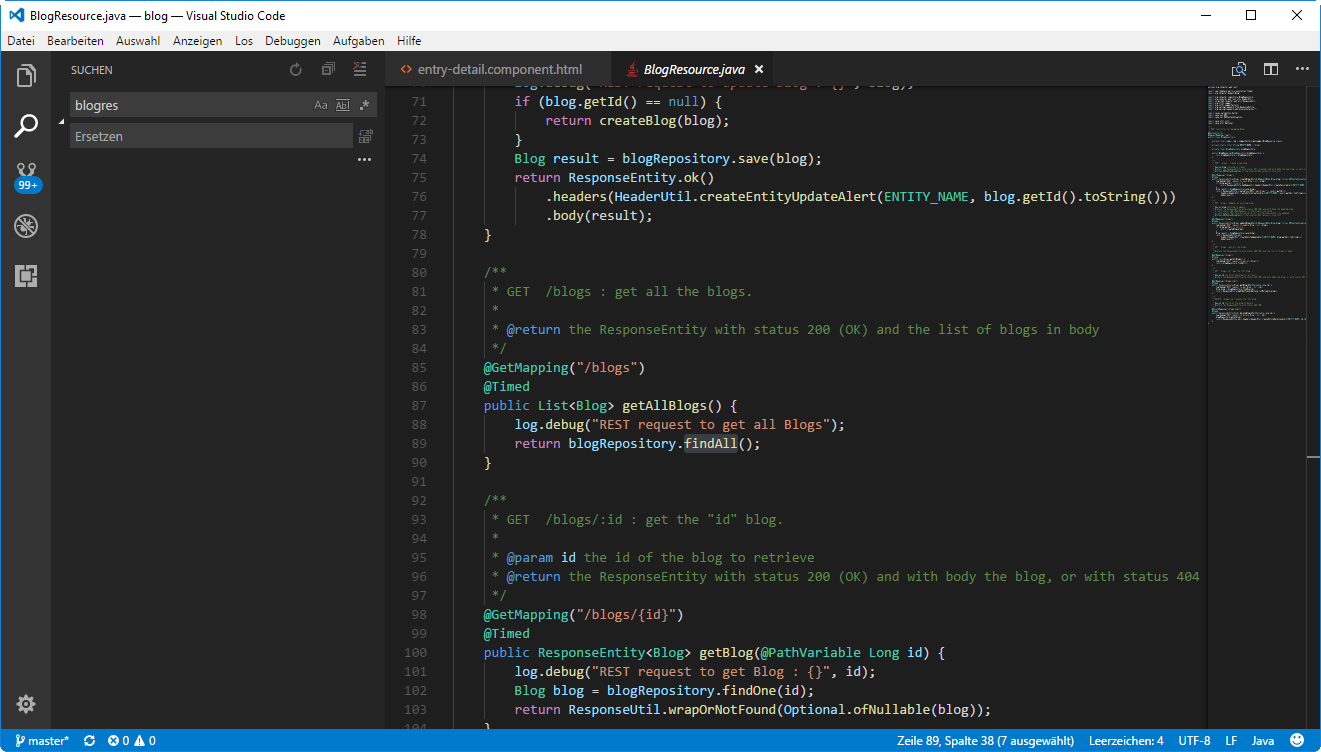
and we change
findAll()
by
findByUserIsCurrentUser()
which is available on JHipster on any model per default.
After restarting ./mvnw, the admin’s blog will be removed from the blog table:
Step 9.6: Restrict Access for Single Blog View
In the previous step, we have removed the admin’s blog from the user’s blog table view. However, the admins’s blog can still be accessed by the user named „user“, if he knows (or guesses) the ID:
This is a topic that is not mentioned in the JHipster introduction on YouTube. So, let that fix too:
On java/org/jhipster/repository/BlogRepository.java, we can reset the return value to „null“, if the found blog does not belong to the logged in user. For that we add:
// file: java/org/jhipster/repository/BlogRepository.java
import import org.jhipster.security.SecurityUtils;
...
    @GetMapping("/blogs/{id}")
    @Timed
    public ResponseEntity getBlog(@PathVariable Long id) {
        log.debug("REST request to get Blog : {}", id);
        Blog blog = blogRepository.findOne(id);

        // The user is not allowed to access this blog, if it is not owned by this user:
        if (!blog.getUser().getLogin().equals(SecurityUtils.getCurrentUserLogin())) { blog = null; }

        return ResponseUtil.wrapOrNotFound(Optional.ofNullable(blog));
    }
For that we import the SecurityUtils and compare the user login of the found blog with the user login of the user that is logged in. If it is not equal, we just reset the found value to null.
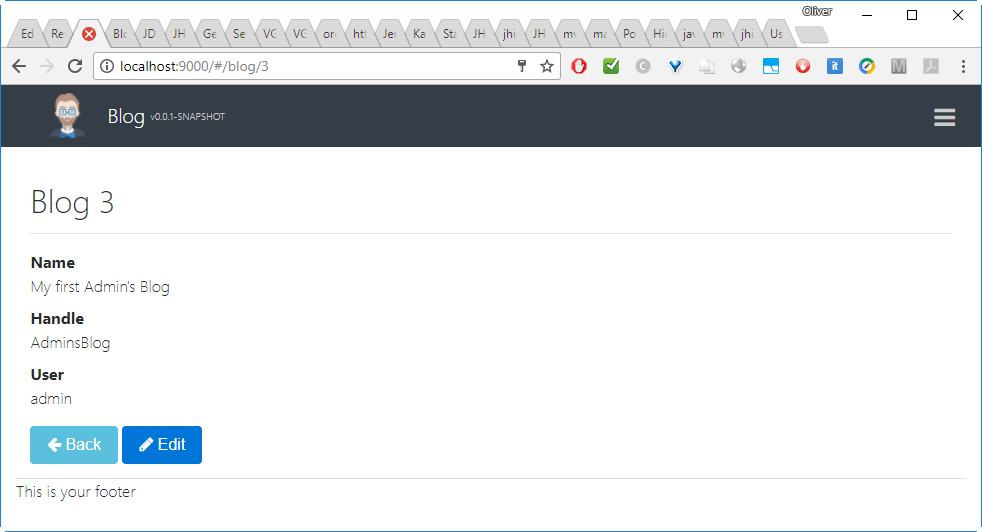
With that, the blog is not accessible anymore, after we have restarted ./mvnw:
This is, what we want to achieve: blog/3 is not visible because it is not owned by the logged in user.
However, let us double-check, that general access to the blogs is not broken. For that, let us access the user’s blog, /blog/4 in my case:
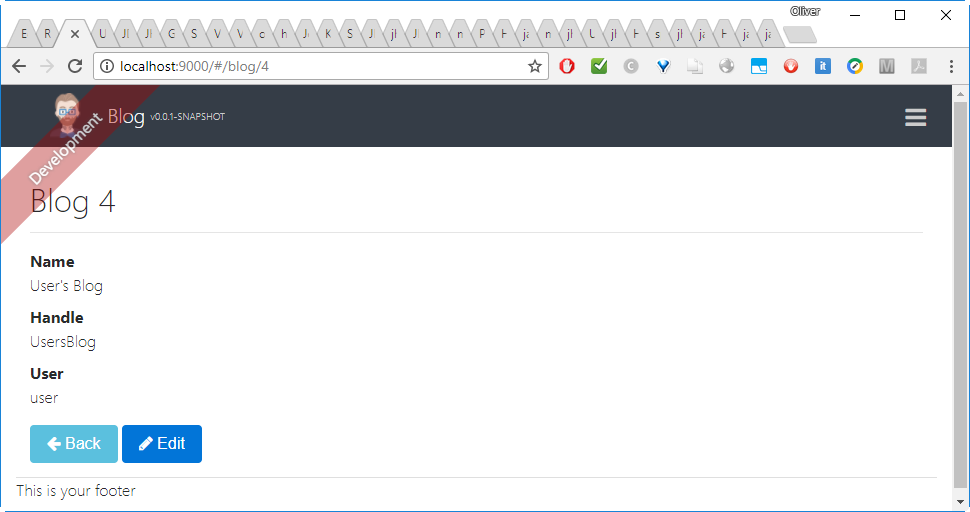
Yes, that’s it.
Note: since we have not done anything on the DELETE function, any user, who knows how to access the API, will still be able to DELETE or UPDATE the entry. This will be covered in the next blog post, where we will have a closer look to the API created by Spring Boot. To cut is short, following code change (in red) will be shown there:
    @DeleteMapping("/blogs/{id}")
    @Timed
    public ResponseEntity deleteBlog(@PathVariable Long id) {
        log.debug("REST request to delete Blog : {}", id);

        Blog blog = blogRepository.findOne(id);

        if(blog != null) {
        	if (!blog.getUser().getLogin().equals(SecurityUtils.getCurrentUserLogin())) {
        		// The user is not allowed to delete this blog, if it is not owned by this user:
            	        log.debug("Found blog, but user is not allowed to delete it");
            	        return ResponseEntity.status(403).headers(HeaderUtil.createEntityDeletionAlert(ENTITY_NAME, id.toString())).build();
        	} else {
	        	blogRepository.delete(id);
	        	return ResponseEntity.ok().headers(HeaderUtil.createEntityDeletionAlert(ENTITY_NAME, id.toString())).build();
        	}
        } else {
        	return ResponseEntity.notFound().headers(HeaderUtil.createEntityDeletionAlert(ENTITY_NAME, id.toString())).build();
        }


    }
Note: A similar code change is needed for the PUT (Update) function.
Step 10: Fix the HTML Display
We can see on Entities -> Entry -> View that the HTML display is not correct, since it is escaped:
Let us fix that now. For that, navigate to src/main/webapp/app/entities/entry/entry-detail.component.html (you can do that inside the container via vi, or, since the content is mapped to the Docker host, we also can use an IDE like Visual Studio Code from outside of the container:

There, we can change
![]()
by
![]()
Unlike what is shown in the JHipster introduction, the application running on localhost:8080 does not seem to recognize, when a file is changed. Even stopping and restarting mvnw did not change anything:
Instead, I have run
(container)# yarn start
within the container and I have connected to the Webpack in development mode on port 9000:
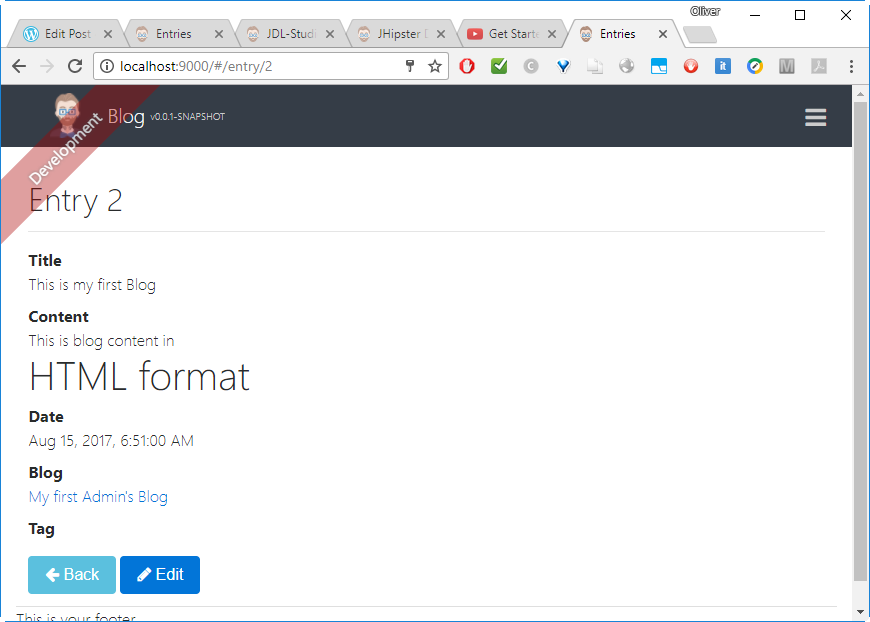
This did the trick.
Now, I can change the files from within the container (by opening an extra session into the Docker container via docker exec -it <containerid> bash, and webpack will re-transpile the code within seconds (but I need to refresh the Browser, it seems).
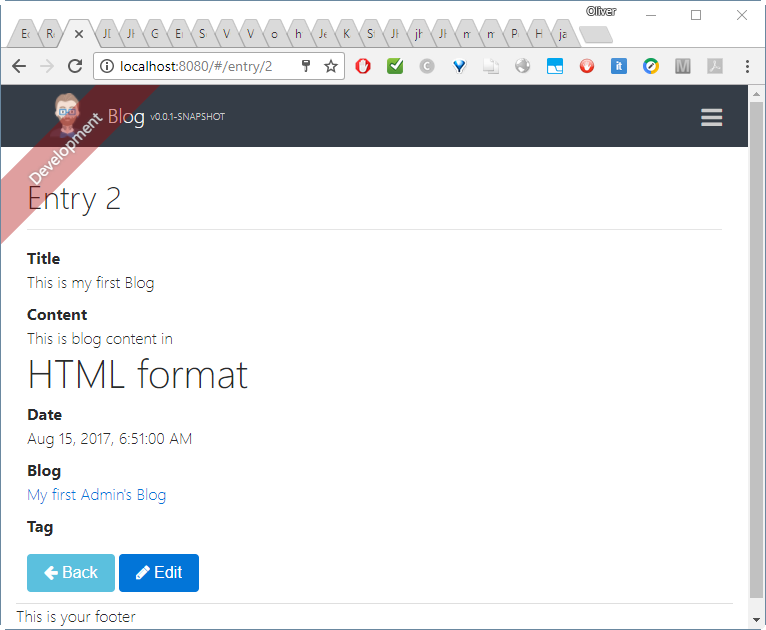
Note: after running the application some days on my notebook, I have logged in as admin again (without reloading the application) and the change now was visible on port 8080 as well:
I guess, this problem needs some more investigation…
Summary
In this blog post, we have created a little blog application using the Java Hipster code generator. For that, we have
- installed a Docker host, if needed
- started a Docker JHipster container on the Docker host
- run and explored the default administration functions of the JHipster application like
- user management,
- API exploration (via swagger) and
- logging
- edited a model for our application using the JDL Studio Web Page
- imported the model file of a blog application (blogs, entries, tags) into JHipster
- explored the new functions of the application
- tweaked the Spring Boot Read and Delete function, so that only the owner is able to see and delete a blog (this is an addition to what you will find on the JHipster introduction on YouTube.)
- tweaked the view of the blog within an Angular template to display HTML content correctly
We have seen, how easy it is to import an arbitrary model into the default JHipster application and to create and display the entities defined in the model. In our case, we have created a simple blog application with blogs, entries and tags.
Coming Soon
- I already have started a Blog Post, where I am exploring the REST API that is automatically generated by JHipster. We will learn, how to use swagger to find the correct curl commands, how to authenticate the service and how to tweak the REST interface, so only the owner of a blog entity is allowed to delete the entry. Follow this blog, if you are interested in the blog post.

3 comments