In this blog post, we will explore, how to get started with Docker Cloud, a Docker orchestration cloud service that helps deploying and managing Docker hosts clusters and Docker containers running on those host clusters.
Background
Since Docker has acquired Tutum in Oct. 2015, Docker is able to offer a service called Docker Cloud. Other than what you might expect from its name, Docker Cloud is not a Docker host as a Service offering: i.e. you cannot rent Docker hosts from it and you cannot push your Docker containers, if you have not signed up to one of the following IaaS providers:
- DigitalOcean
- Amazon Web Services (AWS) (see also: Getting Started with AWS HowTo)
- Microsoft Azure
- SoftLayer (IBM)
- Packet
Instead, Docker Cloud offers a Docker orchestration as a Service for Docker hosts and Docker containers and as such it
- allows the automatic deployment of Docker host clusters on one of the data centers of the said IaaS providers. Once a Docker host (cluster) is deployed, the
- Docker Cloud service allows to deploy, manage and terminate Docker containers (i.e. dockerized services) on those Docker hosts.
Overview
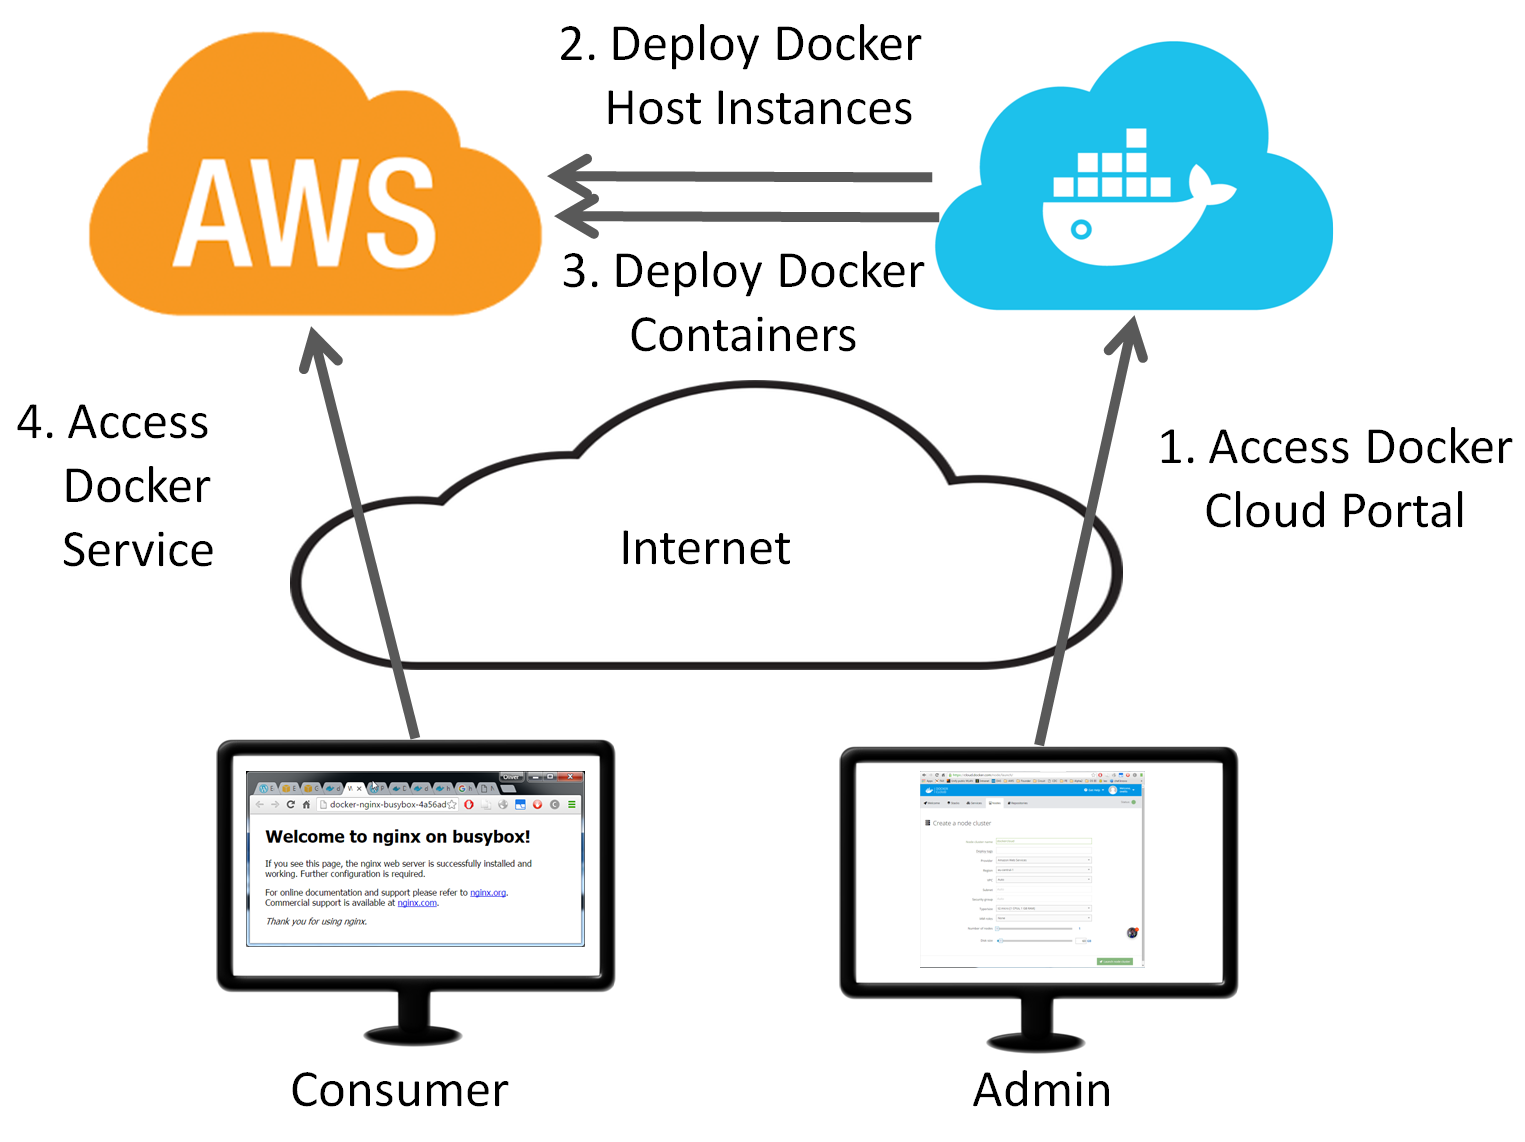
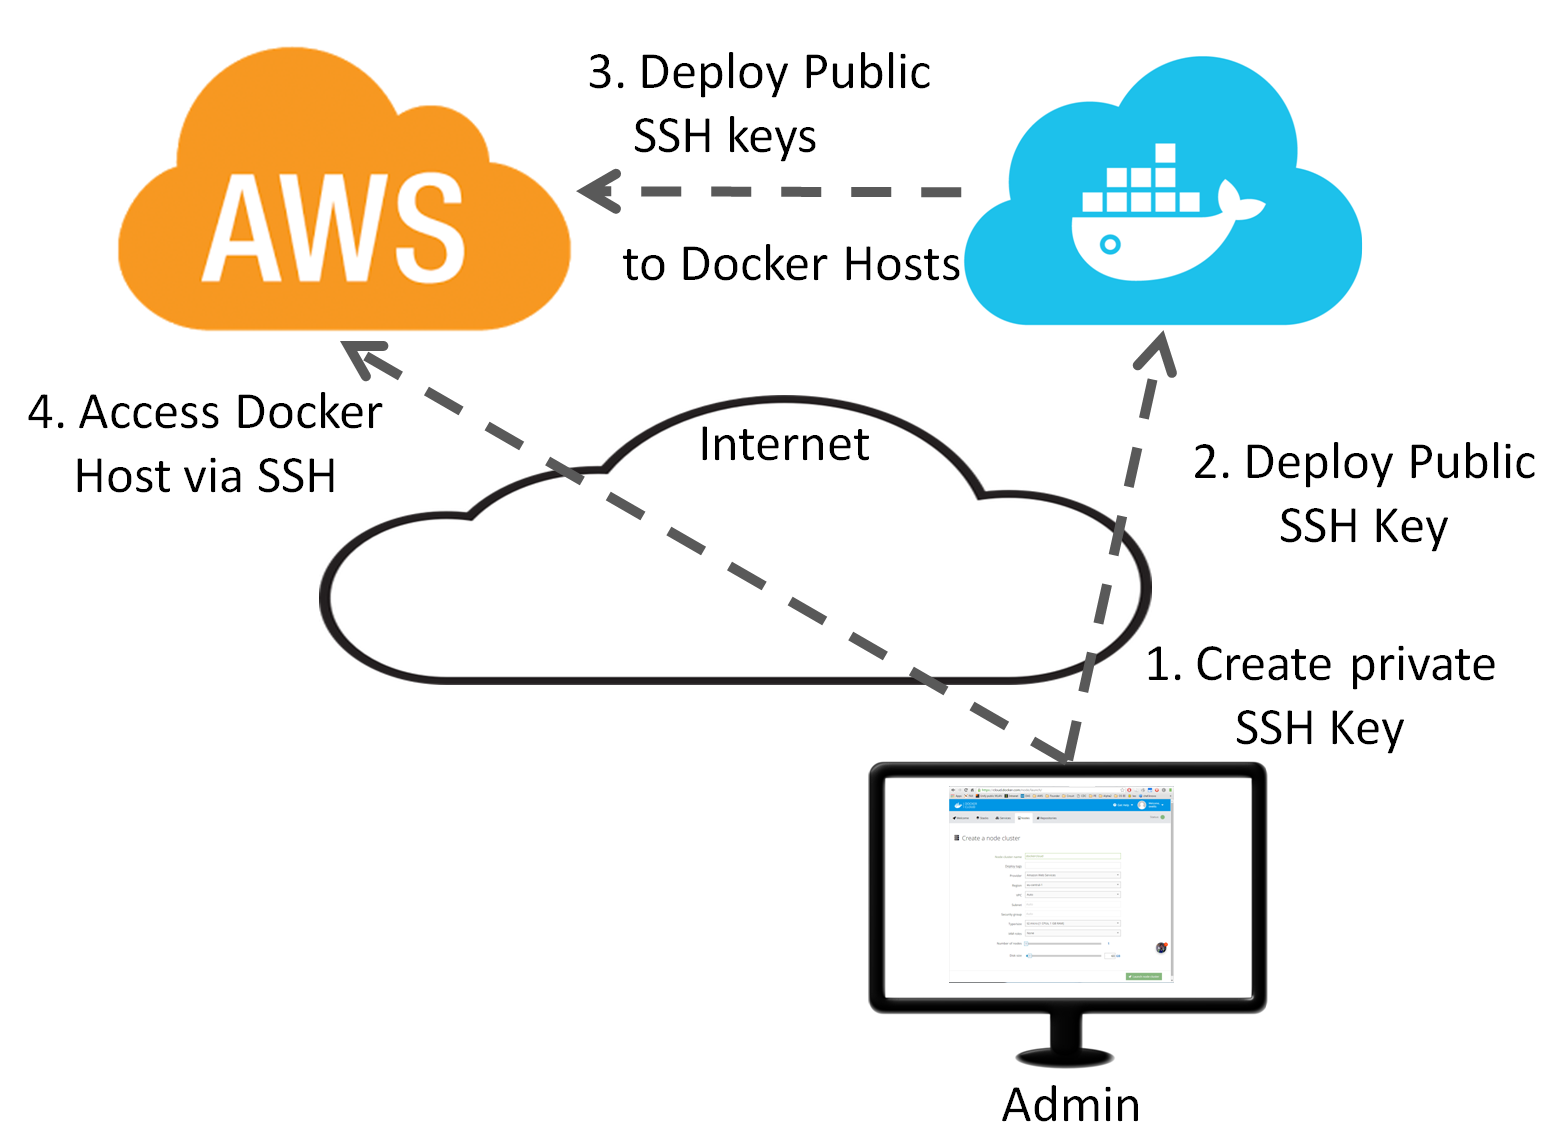
This is, what we want to achieve:
- Deploy Docker host and Docker container via Docker Cloud:
- Deploy SSH keys for admin SSH access to the Docker hosts:
Let us start:
Step 1: Sign up for Docker Cloud
Click ![]() on the Docker Cloud Home Page and follow the instructions or goto the next step.
on the Docker Cloud Home Page and follow the instructions or goto the next step.
Step 2: Create Docker Cloud User on IaaS Portal
You could use your main user’s access credentials. However, from a security perspective, it is better to create a new user for Docker Cloud access with the permissions Docker Cloud needs.
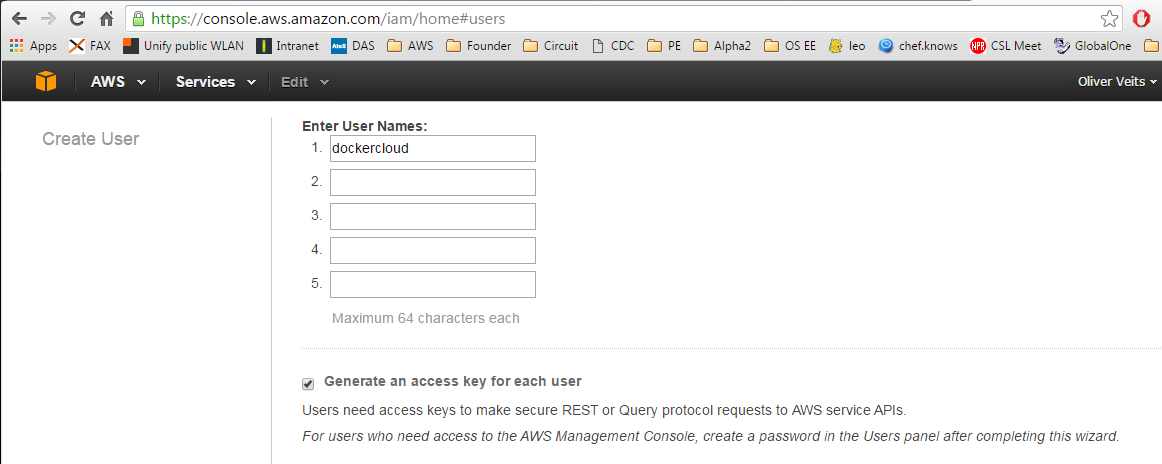
On the User’s view of the AWS IAM console, we push the ![]() button and enter a user name „dockercloud“. Leave the „Generate an access key“ for each user checked.
button and enter a user name „dockercloud“. Leave the „Generate an access key“ for each user checked.
Click the Create and then the ![]() button and save the CSV to a save place.
button and save the CSV to a save place.
Step 3: Assign the needed access rights to the dockercloud user
If this step is skipped, you will get following error messages or warnings in the next step:
- Invalid AWS credentials
-> this one will prevent you to add the AWS credentials to Docker Cloud and is critical. We will get rid of this error in Step 3.1. - Couldn’t load instance profiles
-> this warning that did not prevent me from successfully deploying Docker hosts and clusters. However; I have found how to get rid of the warning in Step 3.2.
Step 3.1: Get rid of the „Invalid AWS credentials“ error
Adapt and goto the Policies tab of the AWS IAM Link.
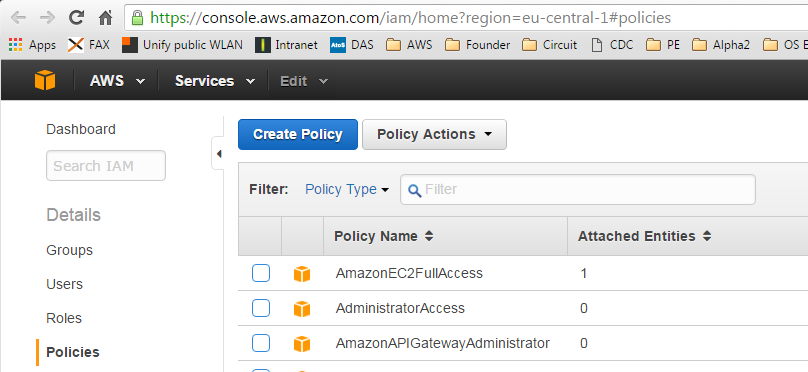
Click the „Get Started“ button, if the list of policies is not visible already. After that, you should see the list of policies and a filter field:
In the Filter field, search for the term AmazonEC2FullAccess.
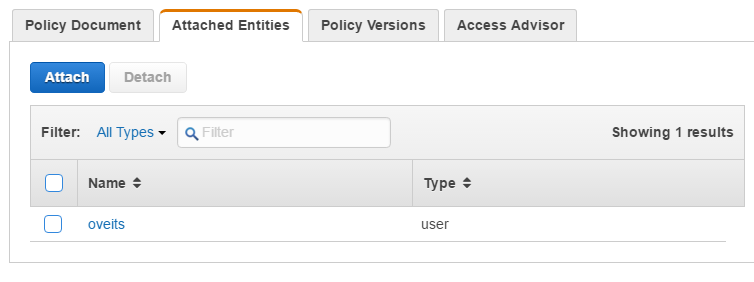
Click on the AmazonEC2FullAccess Policy Name and then choose the tab Attached Identities.
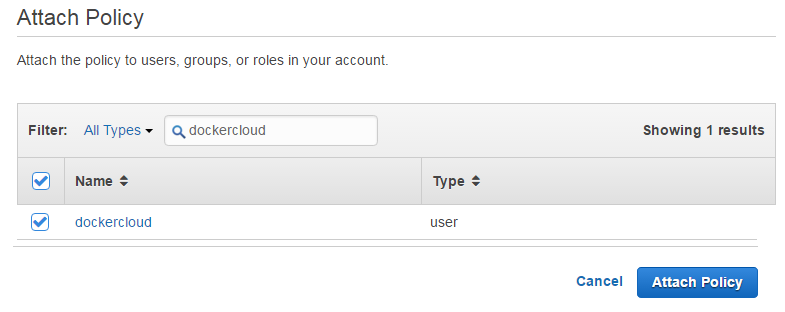
Click the Attach button and attach the dockercloud user:
Now we have taken care of the first (critical) error.
Step 3.2: Get rid of the „Couldn’t load instance profiles“ warning
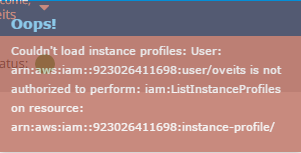
To get rid of this warning, rerun Step 3.1, with AmazonEC2FullAccess by IAMReadOnlyAccess.
Step 4: Add your IaaS login credentials on the Docker Cloud account page.
On the Docker Cloud account page, click on the AWS add the Access Key ID and the Secret Access Key from the csv file you have downloaded in the previous step.
If you are interested, AWS‘ official documentation can show you how to retrieve the access credentials on your own account, if needed.
Step 5: Launch a Docker host cluster
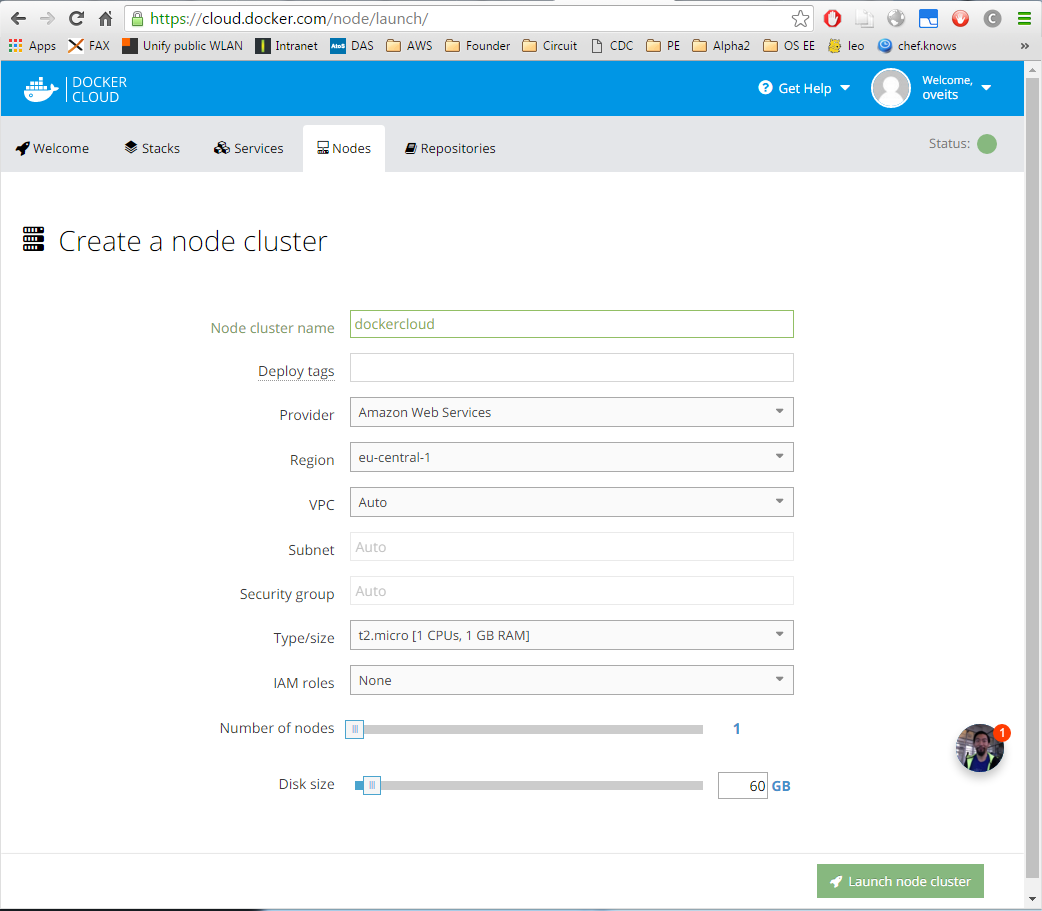
Once you have added the login credential on the account page, you either can
on the Nodes Docker Cloud page without logging into your IaaS provider’s web page.
Be sure to select the right data center, so you are not confused when connecting to the IaaS provider’s portal (in my case: AWS console) and not finding your instance.
Also, if you are using the AWS free tier, you need to choose t2.micro deployment size instead of the offered t2.nano deployment: although t2.nano is smaller than t2.micro, it is not „free tier eligible“, but t2.micro is. See AWS‘ comment on this on the bottom of this page.
Note: since disk space comes at a cost, for our purposes it is sufficient to deploy e.g. only 6 GB instead of the default 60 GB disk.
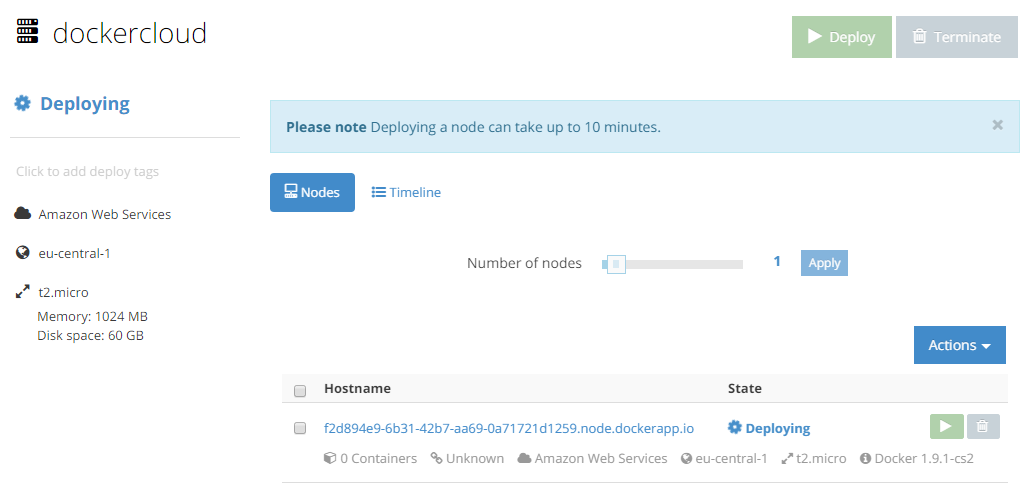
Click the ![]() button. We get following view:
button. We get following view:
Step 6 (optional): View the Docker hosts instance(s) in your IaaS provider’s web portal
After clicking the Launch node cluster button, the Docker host(s) are automatically created on your IaaS data center. You optionally can review the virtual instance on the IaaS provider’s web portal (the AWS Console in my case). Choose the first icon Compute->EC2.
We will see the running instance by clicking on the Running instances link of on the Instances->Instances menu item of the left sidebar:
Step 7: Create a Service on Docker Cloud
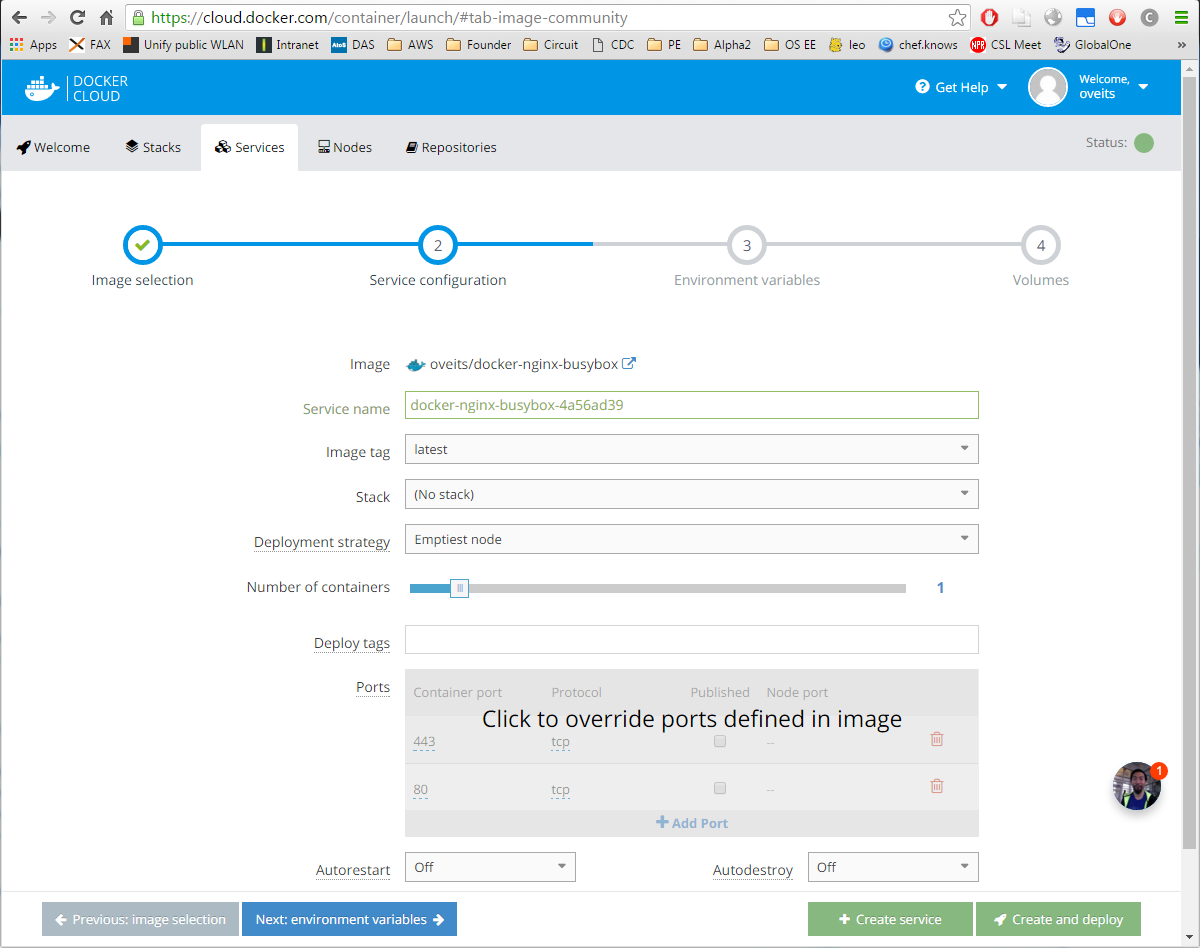
On the Docker Cloud Services page, we click on the ![]() button. If you have no better alternative, you choose the public docker-nginx-busybox image, which has a tiny footprint (~ 8 MB image size).
button. If you have no better alternative, you choose the public docker-nginx-busybox image, which has a tiny footprint (~ 8 MB image size).
Click to override ports defined in image, check the „Published“ checkbox and add the ports you want to use to access the image from the Internet:
Note: I just have found out that the https port 443 of the chosen docker image is not functional, currently. Better use port 80 only.
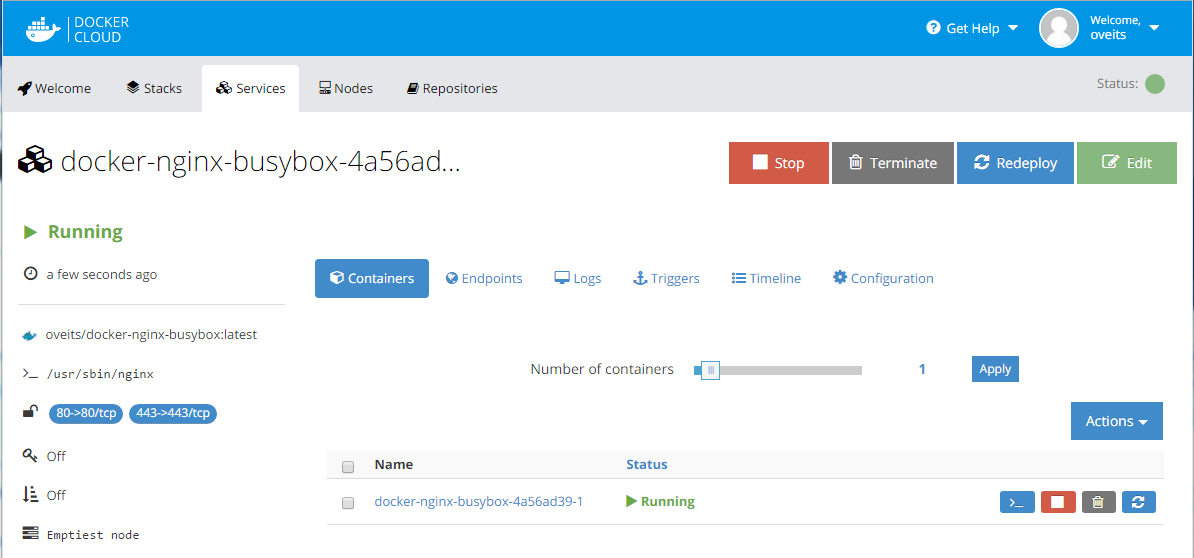
Click the ![]() button and within seconds, the image will be downloaded and a container will be started on the Docker host. The service should be shown as „started“:
button and within seconds, the image will be downloaded and a container will be started on the Docker host. The service should be shown as „started“:
Step 7: Access the Service from the Internet
There are two ways to access the service. The unconvenient one is to find the DNS name of the Docker host in the AWS console and access an URL http://<Docker host name or IP address> in a browser.
The more convenient option is to click on the service name on Docker Cloud
and click on the port 80 link. We will reach the service:
Now we have deployed our first simple Internet service using Docker Cloud.
Step 8: Terminate the Docker Host
In case the Docker host is not needed anymore, and you need to save computing time / IaaS cost, do not forget to terminate the Docker host. This is best to be done in the Docker Cloud nodes page.
Note: Docker Cloud offers to terminate (i.e. destroy) the node only ; stopping and re-starting of the node is possible only via the IaaS portal (AWS console). Although the public IP address of the instance may change, the Docker Cloud service link becomes functional again as soon as the service is started.
Here, we have pressed the Terminate button to terminate the node. The deployed service will become dysfunctional. However, we can keep the defined service for later deployment on a different Docker host (node). On the AWS EC2 Console, we can verify that the instance is terminated:
After some time (less than an hour?), the instance (and its SSD volume) will disappear from the console view.
Note: Stopping the instance instead of terminating the instance comes at a certain cost for the image’s disk space: e.g. for central Europe, the AWS monthly cost calculator currently shows ~7.14 US$/month for a 60 GB General purpose SSD, as deployed per default by Docker Cloud). I am not sure, whether you have to pay for the whole disk (60 GB in this case) or only for the disk space used (< 4 GB in this case).
For checking on the current AWS cost, consult the AWS billing page.
Appendix A: Maintenance Access to the docker host via SSH
For troubleshooting purposes, it makes sense to get SSH access to the automatically deployed Docker host.
Note that SSH key pair created by AWS do not work per default for Docker hosts deployed from Docker Cloud, since Docker cloud deploys its own SSH keys. We need to upload our own SSH key to Docker Cloud in order to access the deployed hosts via SSH.
Step A.1: Upload public SSH key to all Docker hosts
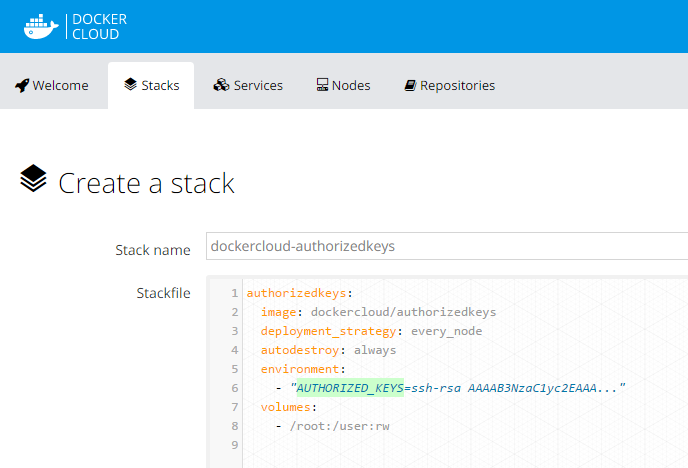
The recommended way to deploy a SSH public key to all docker hosts deployed by Docker Cloud is to deploy an special image provided by Docker Cloud for this purpose. For that, click on Deploy to Cloud on this Docker documentation page. The following page will be displayed:
Step A.2: Edit the AUTHORIZED_KEYS.
- For this, find your public key you want to use (in my case: G:\veits\PC\PKI\AWS\AWS_SSH_Key_pub.pem). The content should start with „ssh-rsa“.If you do not have an SSH key yet, you can create and download a private key on AWS following the AWS instructions if you do not want to use the traditional way to create the key pair using openSSH (e.g. see the „Generating RSA Keys“ chapter of this Ubuntu instructions). Note that apart from downloading your private key, you will also need to create a public key from the private key, which is described in the same AWS documentation page in the chapters starting with „Retrieving the Public Key …“ in the second half of the page.
- Click on Create and Deploy
Step A.3: use private key in the SSH client
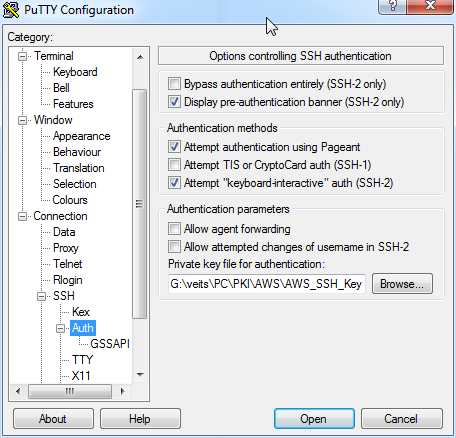
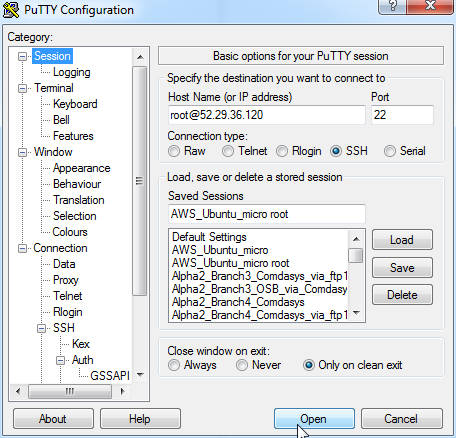
Now your instances will have the public key added and you can SSH to the instance with the corresponding private key. Note that in case of Windows putty, the private PEM key file needs to be converted into the PKK file format putty understands. For this, the tool puttygen is used. Use Conversions->Import to import the PEM file and click on „Save private key“ for saving the PKK file. This is the one you need to add to the right pane on Connection->SSH->Auth.
Do not forget to click on Session and Save to make the change permanent.
Then we click on „Open“ in order to connect to the system:
From here, the docker commands can be performed. Try with docker help.
Summary
In this blog post, we have shown, how to create a Docker host cluster on an AWS data center through usage of the Docker Cloud web portal. After this, a containerized service can be launched and accessed from the Internet after a view clicks. In order to get maintenance access to the Docker hosts via SSH, a public SSH key must be deployed. For that, a special Docker image is deployed with the Stacks feature from the Docker Cloud.
From my point of view, the whole process is quite straightforward with the only tricky part being the assignment of the correct access rights to the dockercloud user.
