This blog post will lead you through the steps how to trigger a downstream Freestyle job or Pipeline workflow from an upstream Freestyle project. We will also show how to pass a parameter from Freestyle project to the downstream workflow or job.
In the next blog post we will make use of this method and show how it can be used to trigger a Pipeline workflow via a trigger mechanism that is supported for Freestyle projects only.

Tools and Versions used
Tested with Jenkins v2.32.2 and v2.46.2
Step Zero: Access or Install a Docker Host
If you have no Docker host available, you may consider to either
- (easiest procedure) start this Katacoda scenario. Step 1 of thei blog post below is identical with step 4 of the Katacoda scenario. After performing this step, the Katacoda terminal and Jenkins web page can be used to perform all other steps described below.
- (more work) or install a Docker host by using Vagrant and Virtualbox as described in Step 1 of the blog post „Installation of Jenkins the Docker way„. While this is more work to to, the advantage of this option is that you can keep the Jenkins Home directory persistently on your local PC.
The commands we will use in this blog post are chosen in a way that will work in both environments.
Note: the Katacoda environment does not support the mapping of volumes to the Docker host via -v option. If you wish to keep the Jenkins Home directory for later use, you may consider to opt for option 2 and replace Step 1 and 2 by the steps found in the blog post Installation of Jenkins the Docker way. However, using Katacoda and the steps below is the quickest way to reach our goal to test the Jenkins Pipeline plugin.
Step 1: Run a pre-configured Jenkins Image
In order to skip some steps you might have seen already in part 1 and part 7 of this series, we will start a pre-configured Jenkins Docker image like follows:
docker run -d --rm --name jenkins \
       -p 8080:8080 -p 50000:50000 \
       oveits/jenkins:2.46.2-alpine-nologin-with-maven-git-pipelines
You can load the Jenkins‘ dashboard by opening a browser and navigating to http://localhost:8080 (or to the link specified within the Katacoda example).
The used image is prepared to skip any login credentials. Maven, Git and Pipelines Plugins are installed and configured.
Note: if you want to start from scratch, consider to follow part 1 of this series. The installation and configuration of Maven, Git and Pipelines Plugins are described on part 7 of this series.
Step 2: Add Plugin: „Parameterized Trigger plugin“
-> ![]()
-> ![]()
-> ![]()
-> ![]()
-> ![]()
->![]()
Step 3: Create downstream Pipeline Project
Let us now create our a downstream Pipeline workflow job.
-> ![]()
-> 
-> 
-> ![]()
-> We scroll down to the Pipeline Script section and choose „try sample pipeline“ -> Hello World
-> ![]()
Step 4: Create and Configure an upstream Freestyle Project
Why using a Freestyle project to trigger a Pipeline project? The reason is that some trigger plugins do not support pipelines yet. E.g. I was trying to use the Bitbucket Pullrequest Builder Plugin within a pipeline project, but I got a java traceback. The same triggering mechanism works for Freestyle projects, though. The idea now is to use a Freestyle trigger mechanism like the Bitbucket Pullrequest Builder Plugin (or any trigger mechanism supported by Freestyle projects) and to use the Parameterized Trigger plugin to trigger a Pipeline from the Freestyle project. Any Parameter available in the Freestyle project can be transferred and re-used in the Pipeline project, as we will show in our simple example:
-> ![]()
-> 
-> 
-> ![]()
-> 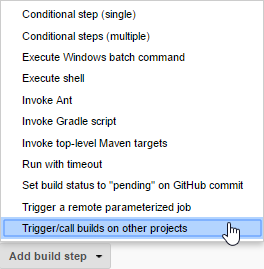
-> Build-> Trigger/call builds on other projects -> Build Triggers -> Triggered Pipeline
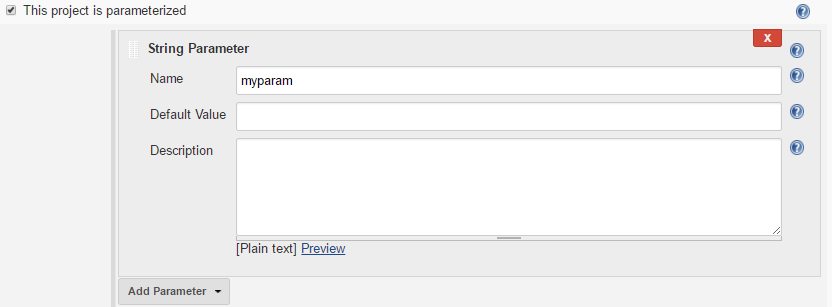
Step 5: Add Parameter
For testing how to pass a parameter from Freestyle to triggered Pipeline project, let us define a myparam parameter like follows:
-> 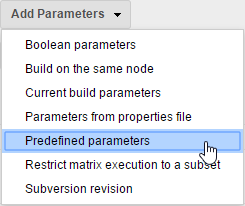
-> now we add „myparam = myvalue“ in the Parameters field:
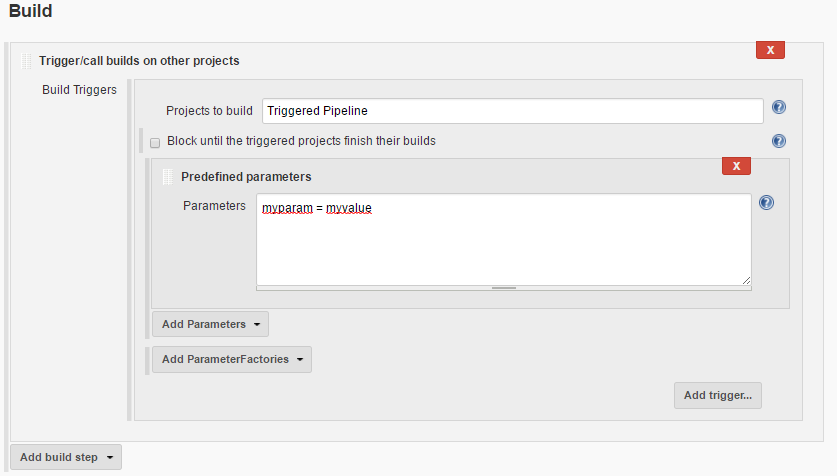
Step 6: Define Parameter on Triggered Pipeline
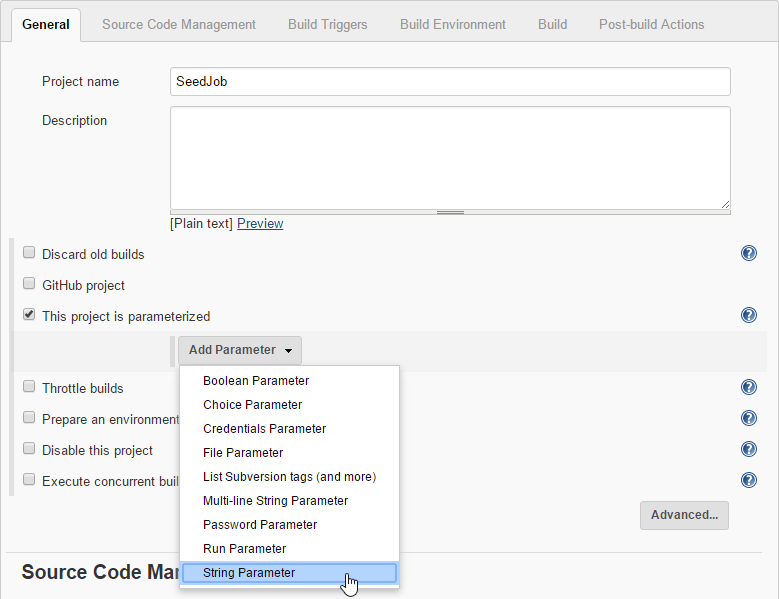
The parameter we have defined in the Freestyle project needs to be caught on the triggered Pipeline project. For that, the Pipeline Project needs to be configured to be parameterized in the configure section:
-> Configure
-> 
In the Pipeline script section, we replace the „Hello World“ echo by following code, which will demonstrate three ways to use the parameter that has been passed between Freestyle and Pipeline project:
node {
 echo "Hello ${env.myparam}"
 echo "Hello " + myparam
 echo "Hello ${myparam}"
}
Step 7: Build Freestyle Project
This yields following result on the „Triggered Pipeline“ project, when we „Build now“ the Freestyle job:
Freestyle Project -> ![]()
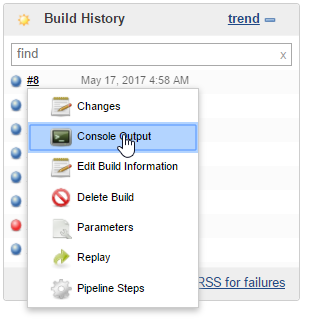
Step 8: Review Results on Pipeline Project
-> Pipeline project
-> 
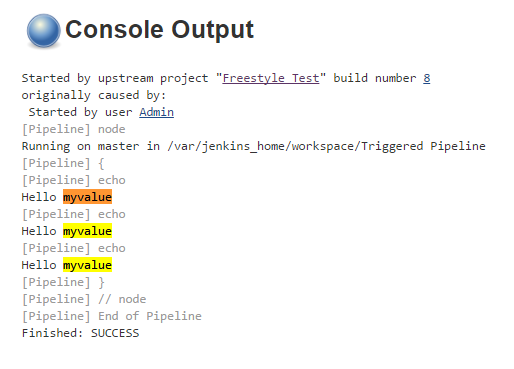
As we can see, all three syntax samples work.
Summary
At this point, we have verified, that
- A Freestyle job can trigger a Pipeline workflow
- a parameter can be passed from the Freestyle job to the Pipeline workflow
Next Steps
In the next blog post we will show how to use this method to trigger a Pipeline workflow from a pull request on a BitBucket/Stash Git repository, despite of the fact that the corresponding plugin is not supported for Pipeline workflows, currently (v2.46.2).