In this step-by-step tutorial, we will follow a behavior-driven development approach to create an Angular 4 application from Angular CLI. The hello-world-like application will consume the WordPress REST API and it will display a blog post title. We will create and run end-to-end test scripts that simulate the customer behavior on a Chrome browser within a Protractor headless Docker container.
As a side feature of this tutorial, we will demonstrate basic Git handling: we will learn how to create a GIT Repository, create a feature branch, commit code changes, and merge the tested and fully functional feature branch into the main development branch.
Check out this book on Amazon: Angular Test-Driven Development
Introduction
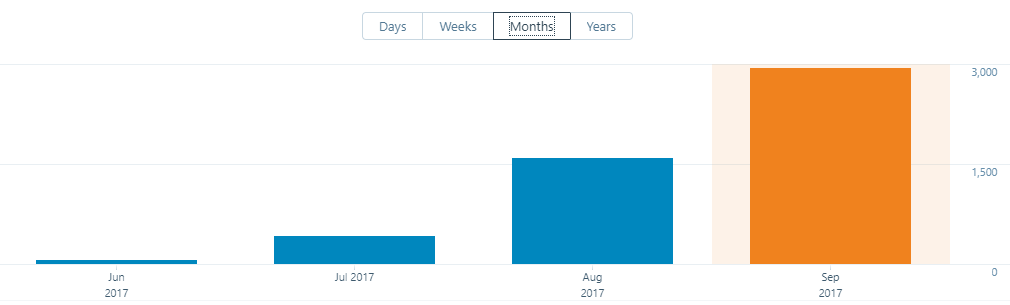
My post Consuming a RESTful Web Service with Angular 4 has grown much more popular than expected. Thanks a lot for your views! The September ist still not finished, and the article has achieved more than 3000 views in its fourth month. I hope the trend will keep on:
😉
So, why would I want to rework a blog post that seemingly plays a chord in the developer’s community? The reasons I have started to rework the example are:
- I have come to a point, where I had the need to refactor the code. However, I do not like refactoring before I do not have a good coverage of end-to-end tests. This was fixed easily in my previous blog post Angular end-to-end Testing.
- The next topic was not so easy to be resolved: I had created a working example, but when I have created a GIT repository from it, Angular CLI had a problem with new clones of that code. An Angular problem I could not resolve easily and it looked like I had to start from scratch. This is, what I am doing now, committing many snapshots to GIT. If I so, why not explaining to my audience, what I am doing and why? This way, the current post has become an example that demonstrates basic GIT handling.
This blog post will fix those two issues, I deem.
Even if I am tempted to automate many of the development process steps, we will keep it simple without the usage of DevOps tools like Jenkins with BitBucket, Sonar, BrowserStack, JMeter Integration and Docker data center integration you would find in real-world agile projects. Some of such topics can be explored in more detail on my other blog posts on Jenkins (explore the „Jenkins Tutorial“ drop-down menu of my blog).
Why behavior driven development?
I have made a very good experience with behavior driven development (BDD), or „test first“ development. Some years ago, I have applied this principle on a ProvisioningEngine I had developed based on Ruby on Rails and java (Apache Camel). The advantages of BDD I see are:
- better customer view: if you follow the behavior driven principle, your first thought is, how the web pages look like and how the web pages behave with respect to customer actions — in detail. This helps me to always start with the customer view in mind.
- higher motivation: as a developer, I find it rewarding to start with test development with „red“ test cases that become green over time
- higher quality: I often challenge myself to optimize my code (e.g. make it DRYer of more versatile). In this process, I do not want to sacrifice and previous achievements. A large set of unit tests and e2e test help me to keep the set of features intact in phases of code restructuring
Okay, as an Angular beginner, I deem I am far from being an ideal behavior driven Angular developer. However, at some point in future, I believe that I can increase my hobby development productivity by applying principles like BDD together with build&deployment automation based on TravisCI, CircleCI or a local Jenkins system to my development approach.
Overview
Along the way, we will get acquainted with a set of typical error messages and we will learn how to cope with them.
So, if you are ready for a quick ride into a simple „test first“ strategy example with GIT repo handling, buckle up and start coding with me in four phases:
😉
- Phase 1: Create a Hello World App based on Angular CLI
- Phase 2: Adapt the end-to-end Tests
- Phase 3: Adapt the Code
- Phase 4: Verify the successful e2e Tests
If you do not care about BDD and GIT, then you might also want head over to the post Consuming a RESTful Web Service with Angular 4. Or better, follow the instructions you find here, but omit the steps related to e2e testing (protractor) and/or GIT.
Phase 1: Create a Hello World App based on Angular CLI
In this phase, we will
- use an Angular CLI Docker image to create a new application
- fix some problems with the end to end testing inherent in the standard hello world app
- save and upload the changes to GIT
Step 1.0: Get access to a Docker Host with enough Resources
If you do not have access to a Docker host yet, I recommend following the step 0 instructions on my JHipster post. I recommend to use a Docker host with at least 1.5 GB RAM. To be honest, this is a guess. I always test on a 4 GB Docker Host Virtualbox VM, but I know that 750 MB RAM is not sufficient.
Step 1.1: Prepare an alias for later use
Let us first define an alias that helps us to shorten the commands thereafter.
(dockerhost)$ alias cli='docker run -it --rm -w /app -v $(pwd):/app -p 4200:4200 -u $(id -u $(whoami)) oveits/angular-cli:1.4.3 $@'
Why this complicated user option
-u $(id -u $(whoami))? The reason is that
- if we omit it, then all new files will be created as root, so we will get permissions problems later on
- If we use ‘centos’, then the container will complain that he does not find the user ‘centos’ in its passwd file
- If we use the ID of centos, then it works. However, it might not work in all cases. This time, the ID of centos user is 1000, and by chance, a user (named ‘node’) exists on the container as well. But let us live with this uncertainty for now.
With each cli something command, we will start a something command on an Angular CLI @ Alpine container originally created by Alex Such and enriched with git and bash by me.
Consider appending the alias command to your Docker host’s ~/.bashrc file, so the alias is persistent.
Step 1.2: Create a Project and install required Modules
Now let us create a new project and install the node modules via npm:
(dockerhost)$ cli ng new consuming-a-restful-web-service-with-angular
(dockerhost)$ cd consuming-a-restful-web-service-with-angular
(dockerhost)$ cli npm install
npm info it worked if it ends with ok
npm info using npm@3.10.10
npm info using node@v6.11.2
npm info attempt registry request try #1 at 7:54:24 PM
npm http request GET https://registry.npmjs.org/fsevents
npm http 200 https://registry.npmjs.org/fsevents
npm info lifecycle consuming-a-restful-web-service-with-angular@0.0.0~preinstall: consuming-a-restful-web-service-with-angular@0.0.0
npm info linkStuff consuming-a-restful-web-service-with-angular@0.0.0
npm info lifecycle consuming-a-restful-web-service-with-angular@0.0.0~install: consuming-a-restful-web-service-with-angular@0.0.0
npm info lifecycle consuming-a-restful-web-service-with-angular@0.0.0~postinstall: consuming-a-restful-web-service-with-angular@0.0.0
npm info lifecycle consuming-a-restful-web-service-with-angular@0.0.0~prepublish: consuming-a-restful-web-service-with-angular@0.0.0
npm WARN optional SKIPPING OPTIONAL DEPENDENCY: fsevents@^1.0.0 (node_modules/chokidar/node_modules/fsevents):
npm WARN notsup SKIPPING OPTIONAL DEPENDENCY: Unsupported platform for fsevents@1.1.2: wanted {"os":"darwin","arch":"any"} (current: {"os":"linux","arch":"x64"})
npm info ok
Step 1.3 (optional): Create a local GIT Repository
Now is a good time to create a git repository and to commit the initial code.
If you have not installed GIT on your Docker host, depending on the operating system of your Docker host, you might need to install it first (e.g. apt-get update; apt-get install -y git in case of Ubuntu, or yum install -y git in case of CentOS). Alternatively, you may want to use the git I have installed in the container. In that case, prepend a „do“ before the git command, e.g. try cli git --version. However, a git diff does not look nice in a container, so I recommend to install GIT on your Docker host instead.
Now let us initialize the git repo, add all files and commit the changes:
(dockerhost)$ git init
(dockerhost)$ git add .
(dockerhost)$ git commit -m'initial commit'
Now let us start the service in a container:
(dockerhost)$ cli ng serve --host 0.0.0.0
** NG Live Development Server is listening on 0.0.0.0:4200, open your browser on http://localhost:4200/ **
Date: 2017-09-26T20:04:45.036Z
Hash: 24fe32460222f3b3faf2
Time: 15376ms
chunk {inline} inline.bundle.js, inline.bundle.js.map (inline) 5.83 kB [entry] [rendered]
chunk {main} main.bundle.js, main.bundle.js.map (main) 8.88 kB {vendor} [initial] [rendered]
chunk {polyfills} polyfills.bundle.js, polyfills.bundle.js.map (polyfills) 209 kB {inline} [initial] [rendered]
chunk {styles} styles.bundle.js, styles.bundle.js.map (styles) 11.3 kB {inline} [initial] [rendered]
chunk {vendor} vendor.bundle.js, vendor.bundle.js.map (vendor) 2.29 MB [initial] [rendered]

webpack: Compiled successfully.
Step 1.4: Perform end-to-end Tests
Step 1.4.1: Use a Protractor Docker Image to perform the Tests
In the spirit of „test first“ strategies of „behavior-driven development“, let us check the end-to-end tests that come with Angular CLI 1.4.3. We will see that they are broken and need to be adapted.
Like above, we will use a Docker container for the task. This time we will use the Docker image protractor-headless from webnicer. In a second terminal, we first define an alias, enter the project root folder and run protractor.
(dockerhost)$ alias protractor='docker run -it --privileged --rm --net=host -v /dev/shm:/dev/shm -v $(pwd):/protractor webnicer/protractor-headless $@'
(dockerhost)$ cd consuming-a-restful-web-service-with-angular
(dockerhost)$ protractor

[20:20:34] I/direct - Using ChromeDriver directly...
[20:20:34] I/launcher - Running 1 instances of WebDriver
Jasmine started

  consuming-a-restful-web-service-with-angular App
    ? should display welcome message
      - Failed: Error while waiting for Protractor to sync with the page: "Could not find testability for element."
          at /usr/local/lib/node_modules/protractor/built/browser.js:272:23
          at ManagedPromise.invokeCallback_ (/usr/local/lib/node_modules/protractor/node_modules/selenium-webdriver/lib/promise.js:1379:14)
          at TaskQueue.execute_ (/usr/local/lib/node_modules/protractor/node_modules/selenium-webdriver/lib/promise.js:2913:14)
          at TaskQueue.executeNext_ (/usr/local/lib/node_modules/protractor/node_modules/selenium-webdriver/lib/promise.js:2896:21)
          at asyncRun (/usr/local/lib/node_modules/protractor/node_modules/selenium-webdriver/lib/promise.js:2775:27)
          at /usr/local/lib/node_modules/protractor/node_modules/selenium-webdriver/lib/promise.js:639:7
          at process._tickCallback (internal/process/next_tick.js:103:7)Error
          at ElementArrayFinder.applyAction_ (/usr/local/lib/node_modules/protractor/built/element.js:461:27)
          at ElementArrayFinder._this.(anonymous function) [as getText] (/usr/local/lib/node_modules/protractor/built/element.js:103:30)
          at ElementFinder.(anonymous function) [as getText] (/usr/local/lib/node_modules/protractor/built/element.js:829:22)
          at AppPage.getParagraphText (/protractor/e2e/app.po.ts:9:43)
          at Object. (/protractor/e2e/app.e2e-spec.ts:12:17)
          at /usr/local/lib/node_modules/protractor/node_modules/jasminewd2/index.js:94:23
          at new ManagedPromise (/usr/local/lib/node_modules/protractor/node_modules/selenium-webdriver/lib/promise.js:1082:7)
          at controlFlowExecute (/usr/local/lib/node_modules/protractor/node_modules/jasminewd2/index.js:80:18)
          at TaskQueue.execute_ (/usr/local/lib/node_modules/protractor/node_modules/selenium-webdriver/lib/promise.js:2913:14)
          at TaskQueue.executeNext_ (/usr/local/lib/node_modules/protractor/node_modules/selenium-webdriver/lib/promise.js:2896:21)
      From: Task: Run it("should display welcome message") in control flow
          at Object. (/usr/local/lib/node_modules/protractor/node_modules/jasminewd2/index.js:79:14)
          at /usr/local/lib/node_modules/protractor/node_modules/jasminewd2/index.js:16:5
          at ManagedPromise.invokeCallback_ (/usr/local/lib/node_modules/protractor/node_modules/selenium-webdriver/lib/promise.js:1379:14)
          at TaskQueue.execute_ (/usr/local/lib/node_modules/protractor/node_modules/selenium-webdriver/lib/promise.js:2913:14)
          at TaskQueue.executeNext_ (/usr/local/lib/node_modules/protractor/node_modules/selenium-webdriver/lib/promise.js:2896:21)
          at asyncRun (/usr/local/lib/node_modules/protractor/node_modules/selenium-webdriver/lib/promise.js:2775:27)
      From asynchronous test:
      Error
          at Suite. (/protractor/e2e/app.e2e-spec.ts:10:3)
          at Object. (/protractor/e2e/app.e2e-spec.ts:3:1)
          at Module._compile (module.js:570:32)
          at Module.m._compile (/protractor/node_modules/ts-node/src/index.ts:392:23)
          at Module._extensions..js (module.js:579:10)
          at Object.require.extensions.(anonymous function) [as .ts] (/protractor/node_modules/ts-node/src/index.ts:395:12)

**************************************************
*                    Failures                    *
**************************************************

1) consuming-a-restful-web-service-with-angular App should display welcome message
  - Failed: Error while waiting for Protractor to sync with the page: "Could not find testability for element."

Executed 1 of 1 spec (1 FAILED) in 0.878 sec.
[20:20:41] I/launcher - 0 instance(s) of WebDriver still running
[20:20:41] I/launcher - chrome #01 failed 1 test(s)
[20:20:41] I/launcher - overall: 1 failed spec(s)
[20:20:41] E/launcher - Process exited with error code 1
Even though my application is listening on port 4200, we can see that the e2e tests have a problem.
Step 1.4.2: Correct the Protractor sync Issue
As already pointed out in this blog post, we need to add the option
useAllAngular2AppRoots: true
to our protractor.conf.js file. At the end, the file has following content (correction in blue):
// protractor.conf.js
// Protractor configuration file, see link for more information
// https://github.com/angular/protractor/blob/master/lib/config.ts

const { SpecReporter } = require('jasmine-spec-reporter');

exports.config = {
  allScriptsTimeout: 11000,
  specs: [
    './e2e/**/*.e2e-spec.ts'
  ],
  capabilities: {
    'browserName': 'chrome'
  },
  directConnect: true,
  baseUrl: 'http://localhost:4200/',
  useAllAngular2AppRoots: true,
  framework: 'jasmine',
  jasmineNodeOpts: {
    showColors: true,
    defaultTimeoutInterval: 30000,
    print: function() {}
  },
  onPrepare() {
    require('ts-node').register({
      project: 'e2e/tsconfig.e2e.json'
    });
    jasmine.getEnv().addReporter(new SpecReporter({ spec: { displayStacktrace: true } }));
  }
};
After that, the e2e test is still not successful:
$ protractor
[20:30:32] I/direct - Using ChromeDriver directly...
[20:30:32] I/launcher - Running 1 instances of WebDriver
Jasmine started

  consuming-a-restful-web-service-with-angular App
    ? should display welcome message
      - Expected 'Welcome to !' to equal 'Welcome to app!'.
          at Object. (/protractor/e2e/app.e2e-spec.ts:12:37)
          at /usr/local/lib/node_modules/protractor/node_modules/jasminewd2/index.js:94:23
          at new ManagedPromise (/usr/local/lib/node_modules/protractor/node_modules/selenium-webdriver/lib/promise.js:1082:7)
          at controlFlowExecute (/usr/local/lib/node_modules/protractor/node_modules/jasminewd2/index.js:80:18)
          at TaskQueue.execute_ (/usr/local/lib/node_modules/protractor/node_modules/selenium-webdriver/lib/promise.js:2913:14)
          at TaskQueue.executeNext_ (/usr/local/lib/node_modules/protractor/node_modules/selenium-webdriver/lib/promise.js:2896:21)
          at asyncRun (/usr/local/lib/node_modules/protractor/node_modules/selenium-webdriver/lib/promise.js:2820:25)
          at /usr/local/lib/node_modules/protractor/node_modules/selenium-webdriver/lib/promise.js:639:7
          at process._tickCallback (internal/process/next_tick.js:103:7)

**************************************************
*                    Failures                    *
**************************************************

1) consuming-a-restful-web-service-with-angular App should display welcome message
  - Expected 'Welcome to !' to equal 'Welcome to app!'.

Executed 1 of 1 spec (1 FAILED) in 0.848 sec.
[20:30:40] I/launcher - 0 instance(s) of WebDriver still running
[20:30:40] I/launcher - chrome #01 failed 1 test(s)
[20:30:40] I/launcher - overall: 1 failed spec(s)
[20:30:40] E/launcher - Process exited with error code 1
Step 1.4.3: Correct the e2e Test Script
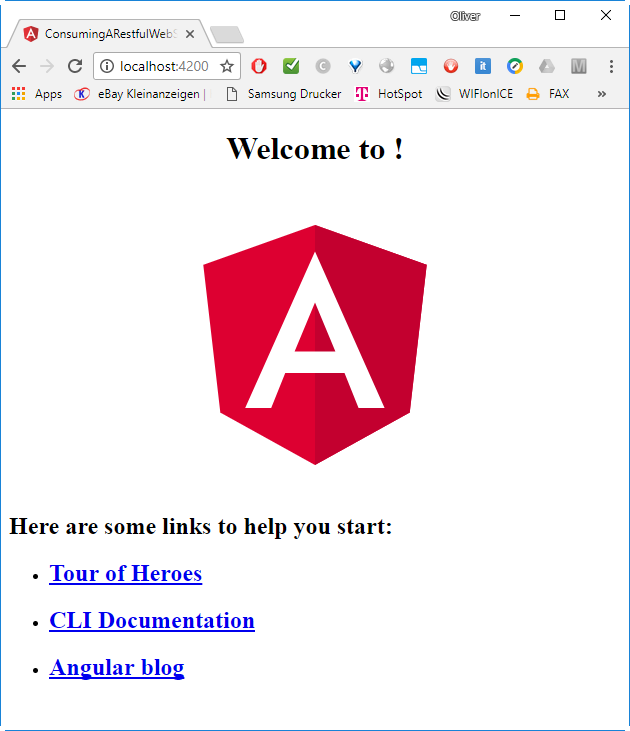
The reason is that the app.component.ts file is not correct. In the HTML template, we find a line
Welcome to {{title}}!
but in the component file, the title is missing:
import { Component, OnInit } from '@angular/core';

@Component({
  selector: 'app-root',
  templateUrl: './app.component.html',
  styleUrls: ['./app.component.css']
})
export class AppComponent implements OnInit {

  constructor() { }

  ngOnInit() {
  }

}
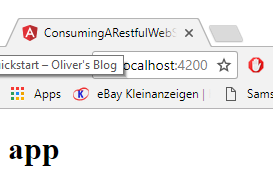
This is leading to following corrupt web page:
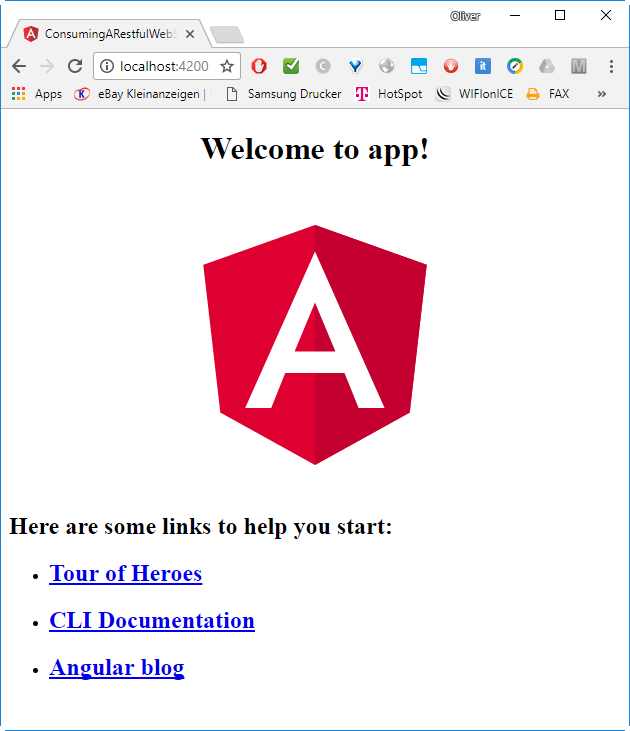
Let us correct this now (in blue):
import { Component, OnInit } from '@angular/core';

@Component({
  selector: 'app-root',
  templateUrl: './app.component.html',
  styleUrls: ['./app.component.css']
})
export class AppComponent implements OnInit {

  title : any = null

  constructor() { }

  ngOnInit() {
     this.title = "app";
  }

}
Now the Web page looks better:
Now the e2e tests are successful:
$ protractor
[20:53:42] I/direct - Using ChromeDriver directly...
[20:53:42] I/launcher - Running 1 instances of WebDriver
Jasmine started

  consuming-a-restful-web-service-with-angular App
    ? should display welcome message

Executed 1 of 1 spec SUCCESS in 0.956 sec.
[20:53:50] I/launcher - 0 instance(s) of WebDriver still running
[20:53:50] I/launcher - chrome #01 passed
The angular CLI installation works as expected now.
Let us save the changes:
(dockerhost)$ git add protractor.conf.js
(dockerhost)$ git commit -m'protractor.conf.js: added useAllAngular2AppRoots: true for avoiding sync problems'
(dockerhost)$ git add src/app/app.component.ts
(dockerhost)$ git commit -m'app component: defined missing title'
Now is the time to sign up with Github and save the project. In my case, I have created following project: a project like follows:
https://github.com/oveits/consuming-a-restful-web-service-with-angular
Once this is done, we can upload the changes as follows:
(dockerhost)$ git remote add origin https://github.com/oveits/consuming-a-restful-web-service-with-angular.git
(dockerhost)$ git push -u origin master
Phase 2: Adapt the end-to-end Tests
In this phase, we will
- based on the input from the WordPress API, we will plan, how the web page should look like from a customer’s point of view.
- We will adapt the e2e tests, so they reflect the (assumed) customer’s expectations.
- We will save the changed code to the remote GIT repository.
Step 2.1: Planning
In an attempt to follow a behavior driven development process, we will write/adapt the end to end tests first, before we perform the changes. For this, let us outline our plan:
- We would like to create a Web page that displays the title and content of a WordPress Article
- the WordPress article of our choice is the first angular blog post I have written: the Angular 4 Hello World Quickstart blog post
- The article will be retrieved dynamically from the WordPress API, a REST API.
Step 2.2: Explore the WordPress REST API
Let us have a look at the WordPress API. The WordPress API can be explored via the WordPress.com REST API console. We can display a list of blog posts like so:
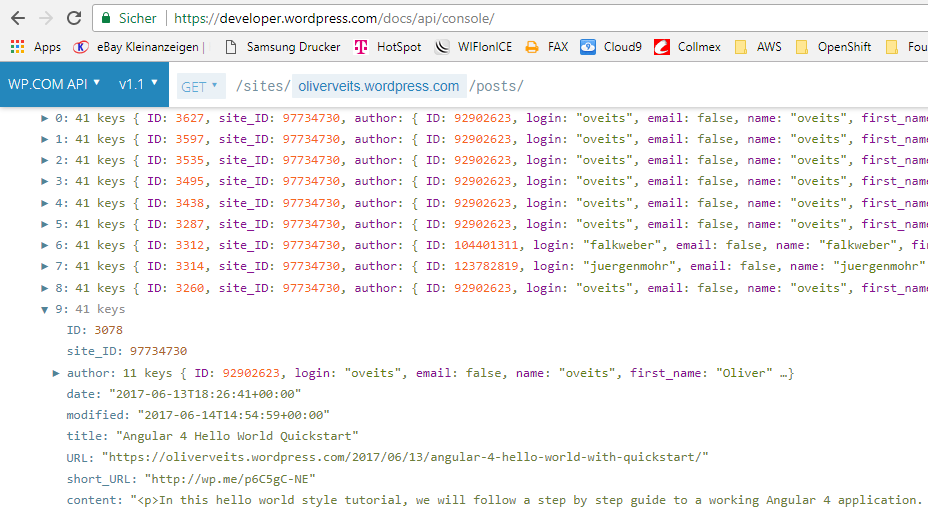
We can see that the blog post we would like to display has the ID 3078 and the title and content star like follows:
- title:
- content:
The single blog post can be retrieved with the URL
https://public-api.wordpress.com/rest/v1.1/sites/vocon-it.com/posts/3078
We can verify this by copying the URL into a Browser:

Step 2.3: Adapt the end-to-end Tests
With the knowledge about the title and content of the blog post, we can re-write the end-to-end (e2e) test. The e2e test is found in the e2e folder:
ls e2e/
app.e2e-spec.ts app.po.ts tsconfig.e2e.json

$ cat e2e/app.e2e-spec.ts
import { AppPage } from './app.po';

describe('consuming-a-restful-web-service-with-angular App', () => {
  let page: AppPage;

  beforeEach(() => {
    page = new AppPage();
  });

  it('should display welcome message', () => {
    page.navigateTo();
    expect(page.getParagraphText()).toEqual('Welcome to app!');
  });
});
Instead of searching for the text ‚Welcome to app‘, let us search for the title „Angular 4 Hello World Quickstart“:
$ cat e2e/app.e2e-spec.ts
import { AppPage } from './app.po';

describe('consuming-a-restful-web-service-with-angular App', () => {
  let page: AppPage;

  beforeEach(() => {
    page = new AppPage();
  });

  it('should display the title', () => {
    page.navigateTo();
    expect(page.getParagraphText()).toContain('Angular 4 Hello World Quickstart');
  });
});
The e2e test should fail now with the message Expected 'Welcome to app!' to contain 'Angular 4 Hello World Quickstart'
$ protractor
[20:46:02] I/direct - Using ChromeDriver directly...
[20:46:02] I/launcher - Running 1 instances of WebDriver
Jasmine started

  consuming-a-restful-web-service-with-angular App
    ? should display welcome message
      - Expected 'Welcome to app!' to contain 'Angular 4 Hello World Quickstart'.
          at Object. (/protractor/e2e/app.e2e-spec.ts:12:37)
          at /usr/local/lib/node_modules/protractor/node_modules/jasminewd2/index.js:94:23
          at new ManagedPromise (/usr/local/lib/node_modules/protractor/node_modules/selenium-webdriver/lib/promise.js:1082:7)
          at controlFlowExecute (/usr/local/lib/node_modules/protractor/node_modules/jasminewd2/index.js:80:18)
          at TaskQueue.execute_ (/usr/local/lib/node_modules/protractor/node_modules/selenium-webdriver/lib/promise.js:2913:14)
          at TaskQueue.executeNext_ (/usr/local/lib/node_modules/protractor/node_modules/selenium-webdriver/lib/promise.js:2896:21)
          at asyncRun (/usr/local/lib/node_modules/protractor/node_modules/selenium-webdriver/lib/promise.js:2820:25)
          at /usr/local/lib/node_modules/protractor/node_modules/selenium-webdriver/lib/promise.js:639:7
          at process._tickCallback (internal/process/next_tick.js:103:7)

**************************************************
*                    Failures                    *
**************************************************

1) consuming-a-restful-web-service-with-angular App should display welcome message
  - Expected 'Welcome to app!' to contain 'Angular 4 Hello World Quickstart'.

Executed 1 of 1 spec (1 FAILED) in 0.907 sec.
[20:46:21] I/launcher - 0 instance(s) of WebDriver still running
[20:46:21] I/launcher - chrome #01 failed 1 test(s)
[20:46:21] I/launcher - overall: 1 failed spec(s)
[20:46:21] E/launcher - Process exited with error code 1
Step 2.4: Save the Changes on a separate GIT Branch
We believe that the e2e tests are correct now, so it is a good time to create a new git feature branch and commit the code:
git checkout -b feature/0001-retrieve-and-display-WordPress-title-from-API
git add .
git commit -m'adapted e2e tests to display WordPress blog title'
git push
Phase 3: Adapt the Code
Now, after having written the e2e tests, let us change the code, so our app fulfills the expectations.
Step 3.1: Define the HTML View
In the spirit of a behavior driven approach, let us define the view first. For that we replace the content of the app’s template file:
$ cat src/app/app.component.html
<h1>{{title}}</h1>
The output of the application now is:
This is because, in the Hello World app, we have set the title to the static value ‚app‘. The e2e tests are not successful and the error ‚Expected ‚app‘ to contain ‚Angular 4 Hello World Quickstart‘.‘ is thrown when we run protractor.
Step 3.2: Subscribe an Observable
As can be seen in many tutorials, we now subscribe to an observable like follows:
$ cat src/app/app.component.ts
import { Component, OnInit } from '@angular/core';

@Component({
  selector: 'app-root',
  templateUrl: './app.component.html',
  styleUrls: ['./app.component.css']
})
export class AppComponent implements OnInit {

  title : any = null

  constructor() { }

  ngOnInit() {
     //this.title = "app";
     this._http.get('https://public-api.wordpress.com/rest/v1.1/sites/vocon-it.com/posts/3078')
                .map((res: Response) => res.json())
                 .subscribe(data => {
                        this.title = data.title;
                        console.log(data);
                });
  }

}
We perform an HTTP GET on the WordPress API’s URL, map the response to a JSON object and subscribe the retrieved data. The data should contain a title, which we assign to the local title variable.
However, we will see in the log:
ERROR in /app/src/app/app.component.ts (16,11): Property '_http' does not exist on type 'AppComponent'.
And in the browser, we see:

Let us fix that now.
Step 3.3: Define private local _http Variable
In angular, we can define the private local _http variable in the constructor:
constructor(private _http: Http) {}Once, this is done, the error message is changed to:
ERROR in /app/src/app/app.component.ts (12,30): Cannot find name 'Http'.
Step 3.4: Import Http Components
The used Http module is not known to our app component. Let us change this now. We add the following line
import { Http } from '@angular/http';to the file src/app/app.component.ts. The error message changes to:
ERROR in /app/src/app/app.component.ts (18,18): Property 'map' does not exist on type 'Observable<Response>'.
Step 3.5: Import map
The map function needs to be imported as well:
import 'rxjs/add/operator/map'
Now we get an illegible error like follows:
ERROR in /app/src/app/app.component.ts (18,6): The type argument for type parameter 'T' cannot be inferred from the usage. Consider specifying the type arguments explicitly.
  Type argument candidate 'Response' is not a valid type argument because it is not a supertype of candidate 'Response'.
    Types of property 'type' are incompatible.
      Type 'ResponseType' is not assignable to type 'ResponseType'. Two different types with this name exist, but they are unrelated.
        Type '"basic"' is not assignable to type 'ResponseType'.
Step 3.6: Import Response Type
We finally can get rid of the quite illegible error message by adding another import:
import { Response } from '@angular/http';However, this still does not lead to the desired result. In the browser we see an empty page:
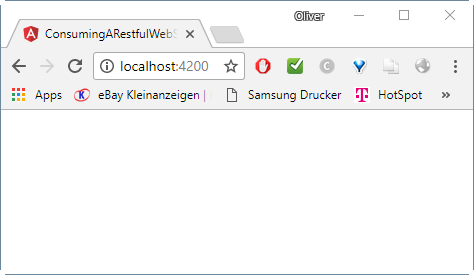
and the e2e tests fail with the following message:
$ protractor
...
Failed: Angular could not be found on the page http://localhost:4200/. If this is not an Angular application, you may need to turn off waiting for Angular. Please see https://github.com/angular/protractor/blob/master/docs/timeouts.md#waiting-for-angular-on-page-load
Step 3.7: Add HttpModule in the app Module
The solution of the above error lies in the src/app/app.module.ts (added parts in blue). We first need to add the HttpModule to the imports, which alters the error message to
$ cat src/app/app.module.ts
import { BrowserModule } from '@angular/platform-browser';
import { NgModule } from '@angular/core';
import { HttpModule }    from '@angular/http';

import { AppComponent } from './app.component';

@NgModule({
  declarations: [
    AppComponent
  ],
  imports: [
    HttpModule,
    BrowserModule
  ],
  providers: [],
  bootstrap: [AppComponent]
})
export class AppModule { }
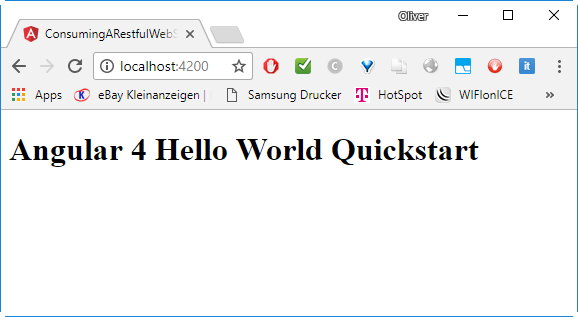
This seems to have been the last stepping stone towards success:
Phase 4: Verify the successful e2e Tests
Now the e2e tests are successful:
$ protractor
[22:16:06] I/direct - Using ChromeDriver directly...
[22:16:06] I/launcher - Running 1 instances of WebDriver
Jasmine started

  consuming-a-restful-web-service-with-angular App
    ? should display welcome message

Executed 1 of 1 spec SUCCESS in 1 sec.
[22:16:14] I/launcher - 0 instance(s) of WebDriver still running
[22:16:14] I/launcher - chrome #01 passed
That is, how the e2e Tests should look like. Success!
Step 4.2: Save the changes to the develop branch on GIT
Since our new feature „retrieve and display a blog title from WordPress API“ has been verified to work fine, it is time to commit the change and push it to the remote repository:
git add .
git commit -m'added all code needed for successful e2e tests'
git push
git checkout -b develop
git push
In addition to that, we can create a new „develop“ branch, if it does not exist yet:
git checkout -b develop
git push
In case the develop branch exist already, you need to merge the code to the instead of creating the develop branch:
git checkout develop
git merge feature/0001-retrieve-and-display-WordPress-title-from-API
git push
It makes sense to allow a merge to the develop branch only if the code is fully tested. This way, we will never break the code in the develop branch.
For large teams, several measures can be taken to make sure that only high quality code enters the develop branch: e.g. on BitBucket GIT, you can allow a merge only, if code has been reviewed and acknowledged by a certain number of team members. Moreover, you can integrate the repository with a Jenkins system: with the correct plugins, you can make sure that a merge is allowed only in case all quality gates (e2e test, unit tests, style, performance, …) in the Jenkins pipeline are met.
However, if you are a hobby developer working on a , it is probably sufficient if you run the tests manually before you merge the changed code into the develop or master branch.
Summary
In this hello world style step-by-step guide, we have learned
- How to create a new Hello World project using Angular CLI, repair the e2e tests and save the changes on GIT.
- How to create/adapt the e2e tests in advance a „test first“ manner.
- How to consume a REST service using Angular 4 and verify the result using the e2e test scripts we have created before.
Next Steps
In part 2 of this series, we will learn how to add and display HTML content to the body of our application. We will see that we cannot just use the method we have used for the title. If we do so, we will see escaped HTML code like follows:
<p>In this hello world style tutorial,…
We will show how to make Angular accept the HTML code and display it correctly.
References:
- Consuming a RESTful Web Service with Angular 4
- Consuming a REST API with Angular Http-Service in Typescript
- WordPress.com REST API console
- AngularJS REST hello world by Spring (Angular 1)
- Article showing how to separate the REST client into its own service: Getting Started With Angular 2 Step by Step: 6 – Consuming Real Data With Http
Appendix A: Adding Docker Support
This is, how I have added Docker support for the application, following my tl:dr of the blog post Angular 4 Docker Example.
A.1 Add Dockerfile and NginX config
git clone https://github.com/oveits/consuming-a-restful-web-service-with-angular
git checkout -b feature/0002-docker-support
curl -O https://raw.githubusercontent.com/avatsaev/angular4-docker-example/master/Dockerfile
curl -O https://raw.githubusercontent.com/avatsaev/angular4-docker-example/master/nginx/default.conf
mkdir nginx
mv default.conf nginx/
remove ‚package-log.json‘ from Dockerfile
git add .
git commit -m 'added Dockerfile and nginx config file'
git push
A.2 Build the Docker Image
On a docker host, I have issued following commands:
docker build . --tag oveits/consuming-a-restful-web-service-with-angular:v0.2
docker push oveits/consuming-a-restful-web-service-with-angular:v0.2
docker tag oveits/consuming-a-restful-web-service-with-angular:v0.2 oveits/consuming-a-restful-web-service-with-angular:latest
docker push oveits/consuming-a-restful-web-service-with-angular:v0.2
docker push oveits/consuming-a-restful-web-service-with-angular:latest
A.3 Run the Service
$ alias consuming='docker run --rm --name consuming-a-restful-web-service-with-angular -d -p 80:80 oveits/consuming-a-restful-web-service-with-angular $@'
$ consuming
A.4 Access the Service
In a browser, head to the public DNS of the image:
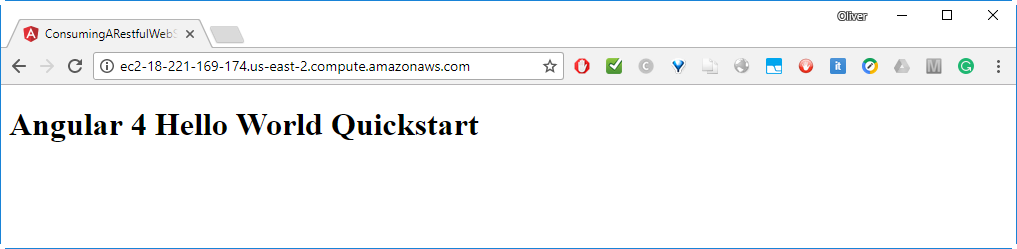
Works!