What, if you could release and deploy fully tested and bullet-proof software on a day by day basis? Isn’t this a huge effort for hobby developers like me? Even for hobby developers, Docker and its ecosystem promises an easy way to automate the integration and deployment of the software. Continuous Integration (CI) and continuous deployment (CD) are made easy.
This blog is exploring a tiny aspect of this automation framework: the containerization of an application and the automatic creation of a Docker image from source code for a Rails Web application as target application. For that,
- we will create and test a so-called Dockerfile that describes all automation steps: e.g. which base image to use, which files to copy, which commands to perform and which ports to expose.
- In a second step, we will create a Link (via a „Webhook“) between the Github Software repository and the Docker Hub docker image repository. This will allow us to automatically create a new Docker image in the background, each time a code change is pushed to the Software repository.
Next possible steps towards full CI/CD (continuous integration/continuous deployment) are discussed a the end of the blog.
Note: the procedure requires Internet downloads of >1 GB. If you are interested in a more lightweight „Hello World“ example with (probably) <15 MB of downloads during the process, you might be interested in this example: https://github.com/oveits/docker-nginx-busybox.
Why Docker?
Here are the reasons, why I have chosen to containerize my web application using Docker:
- similar to Hypervisor based virtualization technologies, container technologies help to create portable application images by bundling libraries with the application and by providing an environment that is independent from other applications.
- compared to Hypervisor-based virtualization technologies, the resulting images are much more lightweight and thus are much easier to handle and share. A layered container design helps to further reduce latencies and download volumes since unchanged layers can be cached.
- when comparing the performance of Rails on Windows and dockerized Rails on Windows, we experience a 50% performance gain. For details, see here.
- when comparing docker with other container technologies, we find that docker is by far the most popular container technology as of today.
See also this blog for more details.
Manual Build from Dockerfile
Prerequisites
- Install docker, if not already done. Using Vagrant, I have created this blog that shows how this can be done in less than 10 Minutes, if Vagrant and Virtualbox is installed. Here we will need only a single host, so you can skip the etcd discovery part and the change of the num_instances variable.
You may also want to test the new official way of installing Docker using the Docker Toolbox (at the time I had started with Docker, the official way of installing Docker on Windows was based on boot2docker and had resulted in a nightmare…). - Install git on the docker host, if it is not installed already (check with „git –version“ on the docker host’s command line interface).
Fork and download the Rails App from Github
In the docker host, clone the application’s repository and change the working directory by issuing following commands:
git clone https://github.com/oveits/ProvisioningEngine
cd ProvisioningEngine
Dockerfile
Note, that the Dockerfile is already part of the git repository, you have cloned above, so this sub-chapter is for your information only.
The Dockerfile describes the automation steps during creation of a docker image. Among others, the Dockerfile specifies
- the base image (i.e. the official „rails“ image in this case),
- the commands that are run within the image container during the build process,
- the files to be copied from the docker host to the image container,
- the TCP ports to be exposed to the outside world,
- the default command that is run within a container (e.g. started with the „docker run“).
In our case, the Dockerfile looks like follows:
FROM rails

# update the operating system:
RUN apt-get update

# if you need "vi" and "less" for easier troubleshooting later on:
RUN apt-get install -y vim; apt-get install -y less

# copy the ProvisioningEngine app to the container:
ADD . /ProvisioningEngine

# Define working directory:
WORKDIR /ProvisioningEngine

# Install the Rails Gems and prepare the database:
RUN bundle install; bundle exec rake db:migrate RAILS_ENV=development

# expose tcp port 80
EXPOSE 80

# default command: run the web server on port 80:
CMD ["rails", "server", "-p", "80"]
Build Docker Image
Now we will build the image. We assume that we have direct Internet access over a NAT firewall, but with no need to pass a HTTP proxy here. In case, a HTTP proxy is involved, note that both, the docker host as well as the container image needs to be prepared for that.
docker build --tag=provisioningengine_manual:latest .
You will see in the log that a new image layer is created at each step. This may take a while.
Test the Docker Image
On the docker host, stop any container that might be running on port 80 (check with „docker ps“, stop the container with the command „docker stop <container-id>“). Then perform:
ID=$(docker run -d -p 80:80 provisioningengine_manual); sleep 5; docker logs $ID
Verify that the Web Server is operational
Now test the web server by issuing the command
curl localhost
on the docker host command line. The output should look like
<html><body>You are being <a href="http://localhost/customers">redirected</a>.</body></html>
Troubleshooting Steps
The logs can be retrieved any time by repeating the „docker logs“ command. In case there was no output because the container exits right away (i.e. „docker ps“ returns a list without the running container based on the image provisioningengine_manual) and you want to find out, why, you can perform an interactive session:
docker run -it -p 80:80 provisioningengine_manual
In case you want to get access to the Linux shell in the container (in this case, the rails server can be started manually by issuing „rails server -p 80“), start a container with
docker run -it -p 80:80 provisioningengine_manual /bin/bash
Automatically Triggered Build
Prerequisites
- Install docker, if not already done. Using Vagrant, I have created this blog that shows how this can be done in less than 10 Minutes, if Vagrant and Virtualbox is installed. Here we will need only a single host, so you can skip the etcd discovery part and the change of the num_instances variable.
You may also want to test the new official way of installing Docker using the Docker Toolbox (at the time I had started with Docker, the official way of installing Docker on Windows was based on boot2docker and had resulted in a nightmare…). - Sign up for Github and Docker Hub, if not already done.
Steps for linking Github and Docker Hub
- Fork the git repository https://github.com/oveits/ProvisioningEngine (button on the upper right). This is needed, since you will trigger a new Docker image build process by committing a software change to your repository.
- On your Git Hub repository project home (in my case this was https://github.com/oveits/ProvisioningEngine) goto
-> (on the right)->
->
-> choose Docker
-> enter your Docker Hub password and confirm - On Docker Hub Home, left of your username
-> Create
-> Choose „Create Automated Build“ from drop down list
-> Choose your repository
-> Enter short description (required)
-> Create
Test the Link between Github and Docker Hub
Test the automatic build trigger by perform a change the master branch. In my case, I have created a new git repository branch, performed a set of changes (add a Dockerfile and others) and I have migrated back the branch to the master branch. However, for a simple test, you can also perform an online change and commit of the README.rdoc file on the master branch of your forked Github repository.
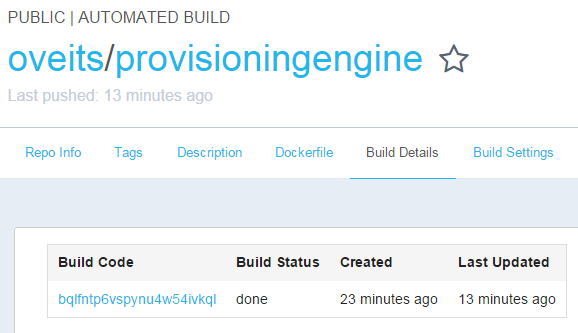
This should trigger a new Docker image build (this may take a while). Check the results on the Docker Hub Build Details tab of the newly created docker repository.
After some time, the Build Status should turn „done“.
Test the Docker Image
Test the docker image by issuing following commands (change „oveits“ to your Docker Hub username)
ID=$(docker run -d -p 80:80 oveits/ProvisioningEngine); echo $ID
Check the container status and the logs with
docker ps
docker logs $ID
And connect to the server by issuing the command
curl localhost
on the docker host. The answer should look like
<html><body>You are being <a href="http://localhost/customers">redirected</a>.</body></html>
Done.
Connecting from an Internet Browser
Docker networking can be somewhat confusing. With the
-p 80:80
option of the docker run command above, we have instructed docker to map the container port 80 to the docker host port 80.
However, in order to reach this port, the IP address of the docker host must be reachable from the Internet browser, obviously.
On the docker host, find the IP addresses by issuing an
ifconfig
command. In my case, this results in an output like (abbreviated):
core@core-01 ~/docker-nginx-busybox $ ifconfig
docker0: flags=4163<UP,BROADCAST,RUNNING,MULTICAST>  mtu 1500
        inet 10.1.42.1  netmask 255.255.0.0  broadcast 0.0.0.0              <--- not reachable from the outside!!
        ...

eth0: flags=4163<UP,BROADCAST,RUNNING,MULTICAST>  mtu 1500
        inet 10.0.2.15  netmask 255.255.255.0  broadcast 10.0.2.255         <--- not reachable from the outside!!
        ...

eth1: flags=4163<UP,BROADCAST,RUNNING,MULTICAST>  mtu 1500
        inet 172.17.8.101  netmask 255.255.255.0  broadcast 172.17.8.255    <--- host-only network -> only reachable from the Virtualbox host
        ...
In my case, the docker host is a Virtualbox CoreOS VM running on a Windows host, created using Vagrant. The addresses of docker0 (is reachable only from docker containers running on the host) and eth0 (is a NATed Virtualbox network) are not reachable from the Windows host. Therefore, within the Vagrantfile, I had made sure that the VM is equipped with an additional Ethernet interface eth1 (host only Virtualbox network), that is reachable from the Windows machine. This is the case here:

If I want the docker host to be reachable from outside, additional care must be taken with respect to routing. Using a bridged network instead of a host only network can help here, but you can also create a static NAT/PAT within Virtualbox that maps the Window’s address to the docker host port.
Summary
We have shown how to automate the Docker build process by adding an appropriate Dockerfile to the application, save the application software on Github, and link Github with the Docker Hub image repository. Now, any time a code change is pushed to Github, a new Docker image will be built automatically.
Next Steps towards Continuous Integration
A continuous integration (CI) and continuous deployment (CD) process involves other steps like branching the software, pull requests, merging, automatic testing a.s.o.

As a starting point, you might want to check out part 2 and part 3 of this nice post of Michael Herman, which gives an introduction on CI and CD based on the CircleCI framework.
Other CI/CD frameworks are discussed in the answers of the following posted question:
I guess, I will give TravisCI and/or CircleCI a try…