
In this blog post, we will deploy and get started with Jenkins, the most popular open source tool for Continuous Integration and Continuous Deployment. As a modern way of installing, we install a Docker host and deploy a Jenkins Docker container on this host. Then we will log in and install commonly used plugins, before we poke around and prepare for the next step, i.e. creating an automated build process for creating, testing and deploying software.
This blog post series is divided into following parts:
What is Jenkins?
Jenkins is the leading open source automation server mostly used in continuous integration and continuous deployment pipelines. Jenkins provides hundreds of plugins to support building, deploying and automating any project.
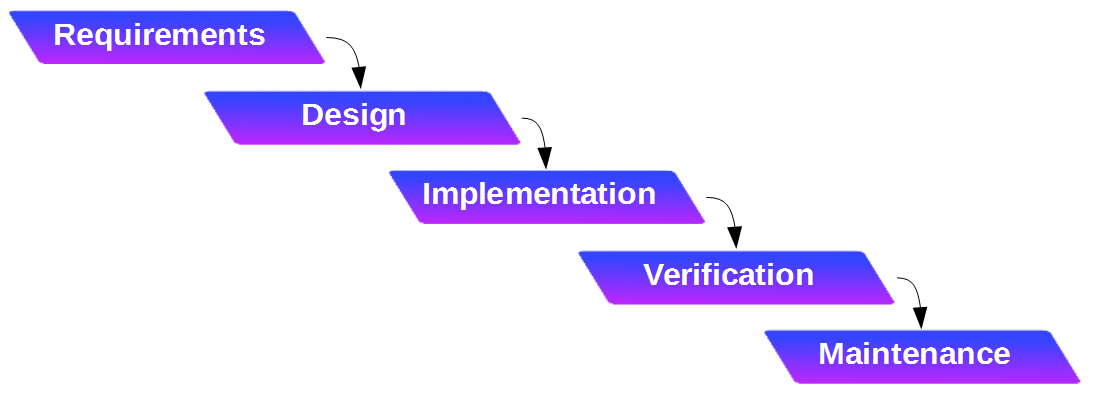
Waterfall Process
In former times, software version life cycle was often counted in many months or years: a set of required features for a new version was defined, and then all of those features were first designed, then implemented, verified, delivered and maintained. In this software development process called waterfall process, each of the phase could take weeks or even months.
Agile Process
Nowadays, most new software is created in an agile process. Unlike in the waterfall process, the time and other resources for a process cycle, the so-called sprint, is fixed: often to two or four weeks. A quite small set of features is implemented during each sprint, but all phases from design over implementation, test to delivery are accomplished in a single sprint. The great advantage of the agile methodology is that you can deliver a fully tested software version every two or four weeks. This is giving your customer the chance to see the progress and the developers can get early feedback, which makes sure they do not run into a wrong direction.

Jenkins for Build, Test and Deployment Automation
Since all processes, including software build, test and deployment, are performed every two or four weeks, this is an ideal playground for automation tools like Jenkins: it does not make sense to occupy a person with those tedious repeated tasks, if it can also be done by a computer.
Here comes Jenkins into play: After the developer commits a code change to the repository, Jenkins will detect this change and will trigger the build and test process. The results are immediately sent to the developer. Since the steps are automated now, the developer can trigger the process after each small, incremental change. He gets early feedback, if he has broken the software unintentionally, which makes troubleshooting much easier.
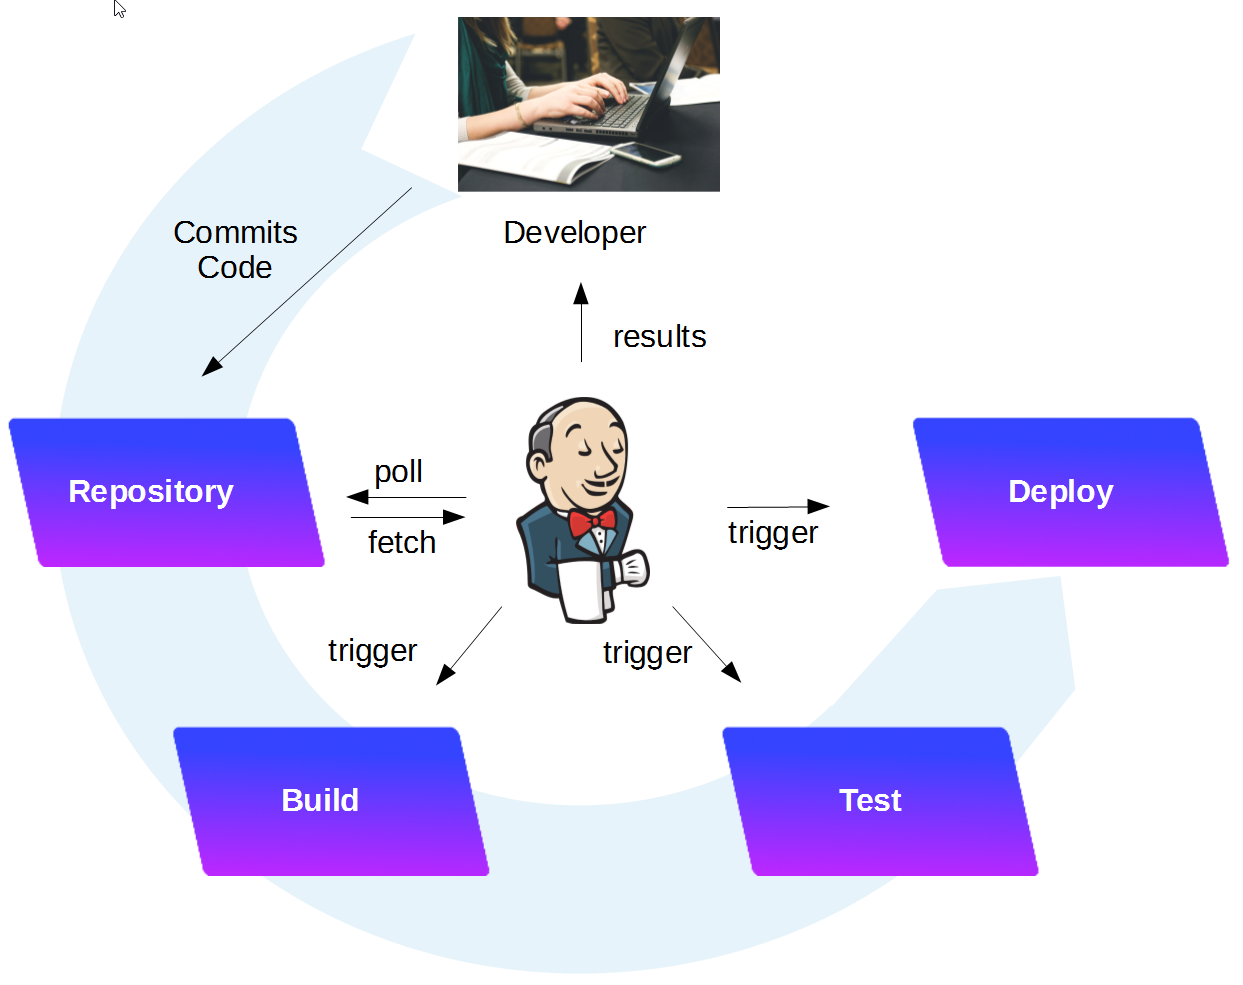
If all tests were successful, Jenkins can automatically deliver and deploy the software to a staging system or even to a production system.
The whole process is called continuous integration (build and test automation with feedback), continuous delivery (deployment can be done „automated“ with a push of a button) or continuous deployment (deployment is performed automatically with no manual intervention).
Installing Jenkins the Docker Way
Tools used
- Vagrant 1.8.6
- Virtualbox 5.0.20
- Docker 1.12.1
- Jenkins 2.19.3
Prerequisites:
- Free DRAM overall >~ 1 GB, better 2 GB (Vagrant, VirtualBox and Jenkins container)
- If Docker host is available already: free DRAM of host before starting the Jenkins container >~ 600MB, better 1 GB
Step 1: Install a Docker Host via Vagrant and Connect to the Host via SSH
If you are using an existing docker host, you can skip this step. Make sure that your host has enough memory.
We will run Jenkins in a Docker container in order to allow for maximum interoperability. This way, we always can use the latest Jenkins version without the need to control the java version used.
If you are new to Docker, you might want to read this blog post.
Installing Docker on Windows and Mac can be a real challenge, but no worries: we will show an easy way here, that is much quicker than the one described in Docker’s official documentation:
Prerequisites of this step:
- I recommend to have direct access to the Internet: via Firewall, but without HTTP proxy. However, if you cannot get rid of your HTTP proxy, read this blog post.
- Administration rights on you computer.
Steps to install a Docker Host VirtualBox VM:
Download and install Virtualbox (if the installation fails with error message „Setup Wizard ended prematurely“, see Appendix A of this blog post: Virtualbox Installation Workaround below)
1. Download and Install Vagrant (requires a reboot)
2. Download Vagrant Box containing an Ubuntu-based Docker Host and create a VirtualBox VM like follows:
basesystem# mkdir ubuntu-trusty64-docker ; cd ubuntu-trusty64-docker
basesystem# vagrant init williamyeh/ubuntu-trusty64-docker
basesystem# vagrant up
basesystem# vagrant ssh
Now you are logged into the Docker host and we are ready for the next step: to create the Ansible Docker image.
Note: I have experienced problems with the vi editor when running
vagrant sshin a Windows terminal. In case of Windows, consider to follow Appendix C of this blog post and to use putty instead.
Step 2 (optional): Download Jenkins Image
This extra download step is optional, since the Docker image will be downloaded automatically in step 3, if it is not already found on the system:
(dockerhost)$ sudo docker pull jenkins
Using default tag: latest
latest: Pulling from library/jenkins
Digest: sha256:8820149b54bfc5d05146b82150b5fdab583eef3e0499fb4ed630f77647a42942
Status: Image is up to date for jenkins:latest
The version of the downloaded Jenkins image can be checked with following command:
(dockerhost)$ sudo docker run -it --rm jenkins --version
2.19.3
We are using version 2.9.13 currently. If you want to make sure that you use the exact same version as I have used in this blog, you can use the imagename jenkins:2.19.3 in all docker commands instead of jenkins only.
Note: The content of the jenkins image can be reviewed on this link. There, we find that the image has an entrypoint
/bin/tini -- /usr/local/bin/jenkins.sh, which we could override with the--entrypoint bashoption, if we wanted to start a bash shell in the jenkins image. However, in Step 3, we will keep the entrypoint for now.
Step 3: Start Jenkins in interactive Terminal Mode
In this step, we will run Jenkins interactively (with -it switch instead of -d switch) to better see, what is happening. But first, we check that the port we will use is free:
(dockerhost)$ sudo docker ps
CONTAINER ID        IMAGE                    COMMAND                  CREATED             STATUS              PORTS                                            NAMES
0ec82b4ca2fd        google/cadvisor:latest   "/usr/bin/cadvisor -l"   2 days ago          Up 2 days           0.0.0.0:8080->8080/tcp                           cadvisor
...
Since we see that one of the standard ports of Jenkins (8080, 50000) is already occupied and I do not want to confuse the readers of this blog post by mapping the port to another host port, I just stop the cadvisor container for this „hello world“:
(dockerhost)$ sudo docker stop cadvisor
cadvisor
Jenkins will be in need of a persistent storage. For that, we create a new folder on the Docker host:
(dockerhost)$ mkdir jenkins_home; cd jenkins_home
Note: The content of the jenkins image can be reviewed on this link. There, we find that the image has an entrypoint
/bin/tini -- /usr/local/bin/jenkins.sh, which we could override with the--entrypoint bashoption, if we wanted to start a bash shell in the jenkins image.
We start the Jenkins container with the jenkins_home Docker host volume mapped to /var/jenkins_home:
(dockerhost)$ sudo docker run -it --rm --name jenkins -p8080:8080 -p50000:50000 -v`pwd`:/var/jenkins_home jenkins
Running from: /usr/share/jenkins/jenkins.war
webroot: EnvVars.masterEnvVars.get("JENKINS_HOME")
Nov 30, 2016 6:12:14 PM Main deleteWinstoneTempContents
WARNING: Failed to delete the temporary Winstone file /tmp/winstone/jenkins.war
Nov 30, 2016 6:12:14 PM org.eclipse.jetty.util.log.JavaUtilLog info
INFO: Logging initialized @347ms
Nov 30, 2016 6:12:14 PM winstone.Logger logInternal
INFO: Beginning extraction from war file
Nov 30, 2016 6:12:14 PM org.eclipse.jetty.util.log.JavaUtilLog warn
WARNING: Empty contextPath
Nov 30, 2016 6:12:14 PM org.eclipse.jetty.util.log.JavaUtilLog info
INFO: jetty-9.2.z-SNAPSHOT
Nov 30, 2016 6:12:16 PM org.eclipse.jetty.util.log.JavaUtilLog info
INFO: NO JSP Support for /, did not find org.eclipse.jetty.jsp.JettyJspServlet
Jenkins home directory: /var/jenkins_home found at: EnvVars.masterEnvVars.get("JENKINS_HOME")
Nov 30, 2016 6:12:17 PM org.eclipse.jetty.util.log.JavaUtilLog info
INFO: Started w.@7674f035{/,file:/var/jenkins_home/war/,AVAILABLE}{/var/jenkins_home/war}
Nov 30, 2016 6:12:17 PM org.eclipse.jetty.util.log.JavaUtilLog info
INFO: Started ServerConnector@548d708a{HTTP/1.1}{0.0.0.0:8080}
Nov 30, 2016 6:12:17 PM org.eclipse.jetty.util.log.JavaUtilLog info
INFO: Started @3258ms
Nov 30, 2016 6:12:17 PM winstone.Logger logInternal
INFO: Winstone Servlet Engine v2.0 running: controlPort=disabled
Nov 30, 2016 6:12:17 PM jenkins.InitReactorRunner$1 onAttained
INFO: Started initialization
Nov 30, 2016 6:12:17 PM jenkins.InitReactorRunner$1 onAttained
INFO: Listed all plugins
Nov 30, 2016 6:12:19 PM jenkins.InitReactorRunner$1 onAttained
INFO: Prepared all plugins
Nov 30, 2016 6:12:19 PM jenkins.InitReactorRunner$1 onAttained
INFO: Started all plugins
Nov 30, 2016 6:12:19 PM jenkins.InitReactorRunner$1 onAttained
INFO: Augmented all extensions
Nov 30, 2016 6:12:20 PM jenkins.InitReactorRunner$1 onAttained
INFO: Loaded all jobs
Nov 30, 2016 6:12:20 PM hudson.model.AsyncPeriodicWork$1 run
INFO: Started Download metadata
Nov 30, 2016 6:12:20 PM hudson.model.AsyncPeriodicWork$1 run
INFO: Finished Download metadata. 97 ms
Nov 30, 2016 6:12:20 PM org.jenkinsci.main.modules.sshd.SSHD start
INFO: Started SSHD at port 44955
Nov 30, 2016 6:12:21 PM jenkins.util.groovy.GroovyHookScript execute
INFO: Executing /var/jenkins_home/init.groovy.d/tcp-slave-agent-port.groovy
Nov 30, 2016 6:12:22 PM jenkins.InitReactorRunner$1 onAttained
INFO: Completed initialization
Nov 30, 2016 6:12:22 PM org.springframework.context.support.AbstractApplicationContext prepareRefresh
INFO: Refreshing org.springframework.web.context.support.StaticWebApplicationContext@453fc3cf: display name [Root WebApplicationContext]; startup date [Wed Nov 30 18:12:22 UTC 2016]; root of context hierarchy
Nov 30, 2016 6:12:22 PM org.springframework.context.support.AbstractApplicationContext obtainFreshBeanFactory
INFO: Bean factory for application context [org.springframework.web.context.support.StaticWebApplicationContext@453fc3cf]: org.springframework.beans.factory.support.DefaultListableBeanFactory@79a53f4b
Nov 30, 2016 6:12:22 PM org.springframework.beans.factory.support.DefaultListableBeanFactory preInstantiateSingletons
INFO: Pre-instantiating singletons in org.springframework.beans.factory.support.DefaultListableBeanFactory@79a53f4b: defining beans [authenticationManager]; root of factory hierarchy
Nov 30, 2016 6:12:22 PM org.springframework.context.support.AbstractApplicationContext prepareRefresh
INFO: Refreshing org.springframework.web.context.support.StaticWebApplicationContext@7ea44b7: display name [Root WebApplicationContext]; startup date [Wed Nov 30 18:12:22 UTC 2016]; root of context hierarchy
Nov 30, 2016 6:12:22 PM org.springframework.context.support.AbstractApplicationContext obtainFreshBeanFactory
INFO: Bean factory for application context [org.springframework.web.context.support.StaticWebApplicationContext@7ea44b7]: org.springframework.beans.factory.support.DefaultListableBeanFactory@12544046
Nov 30, 2016 6:12:22 PM org.springframework.beans.factory.support.DefaultListableBeanFactory preInstantiateSingletons
INFO: Pre-instantiating singletons in org.springframework.beans.factory.support.DefaultListableBeanFactory@12544046: defining beans [filter,legacy]; root of factory hierarchy
Nov 30, 2016 6:12:22 PM jenkins.install.SetupWizard init
INFO:

*************************************************************
*************************************************************
*************************************************************

Jenkins initial setup is required. An admin user has been created and a password generated.
Please use the following password to proceed to installation:

0c4a8413a47943ac935a4902e3b8167e

This may also be found at: /var/jenkins_home/secrets/initialAdminPassword

*************************************************************
*************************************************************
*************************************************************

Nov 30, 2016 6:12:27 PM hudson.model.UpdateSite updateData
INFO: Obtained the latest update center data file for UpdateSource default
Nov 30, 2016 6:12:27 PM hudson.WebAppMain$3 run
INFO: Jenkins is fully up and running
--> setting agent port for jnlp
--> setting agent port for jnlp... done
Step 4: Open Jenkins in a Browser
Now we want to connect to the Jenkins portal. For that, open a browser and open the URL
<your_jenkins_host>:8080
In our case, Jenkins is running in a container and we have mapped the container-port 8080 to the local port 8080 of the Docker host. On the Docker host, we can open the URL.
localhost:8080
Note: In case of Vagrant with VirtualBox, per default, there is only a NAT-based interface and you need to create port-forwarding for any port you want to reach from outside (also the local machine you are working on is to be considered as outside). In this case, we need to add an entry in the port forwarding list of VirtualBox:

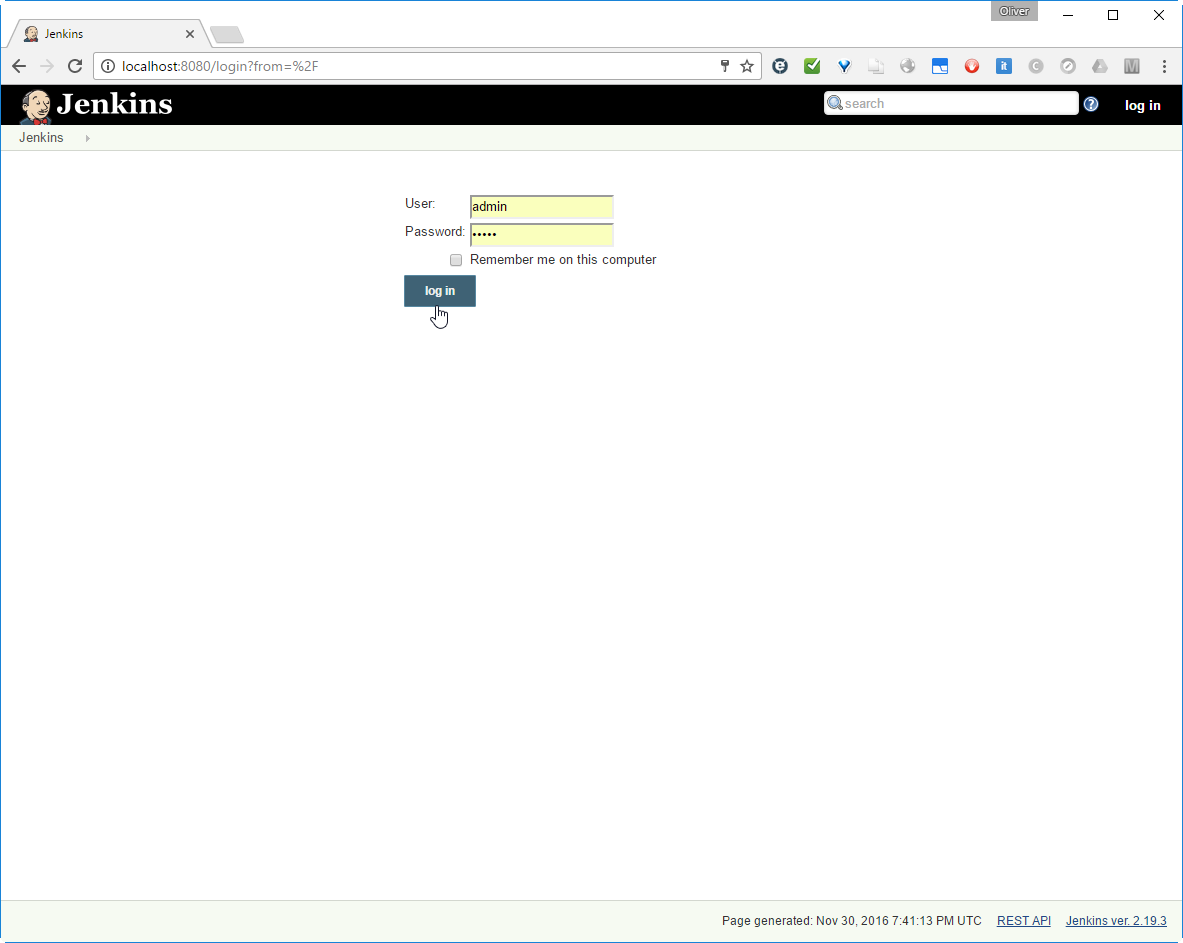
The Jenkins login screen will open:
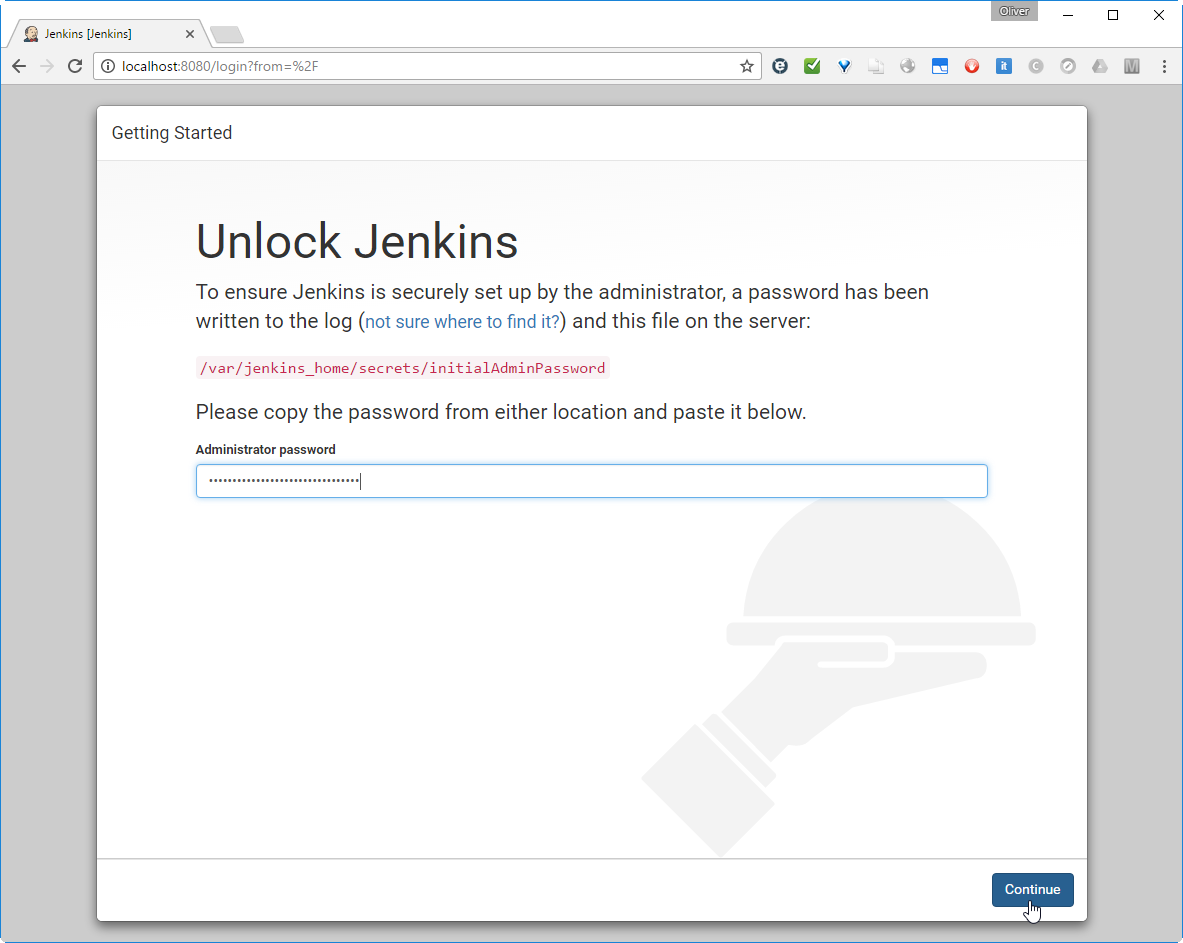
The admin password can be retrieved from the startup log, we have seen above (0c4a8413a47943ac935a4902e3b8167e), or we can find it by typing
(dockerhost: .../jenkins_home)$ cat secrets/initialAdminPassword
0c4a8413a47943ac935a4902e3b8167e
on the mapped jenkins_home folder on the Docker host.
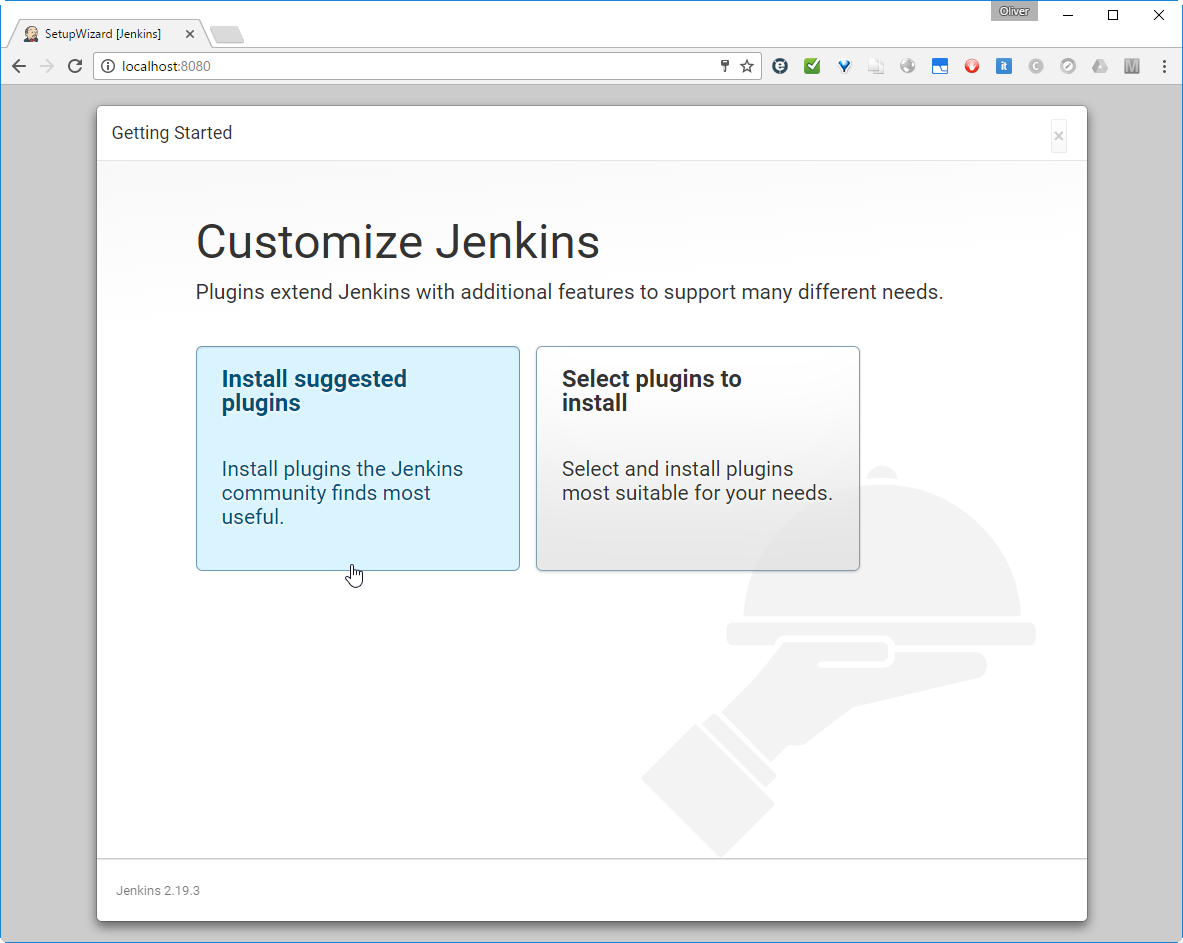
Step 5: Install Plugins
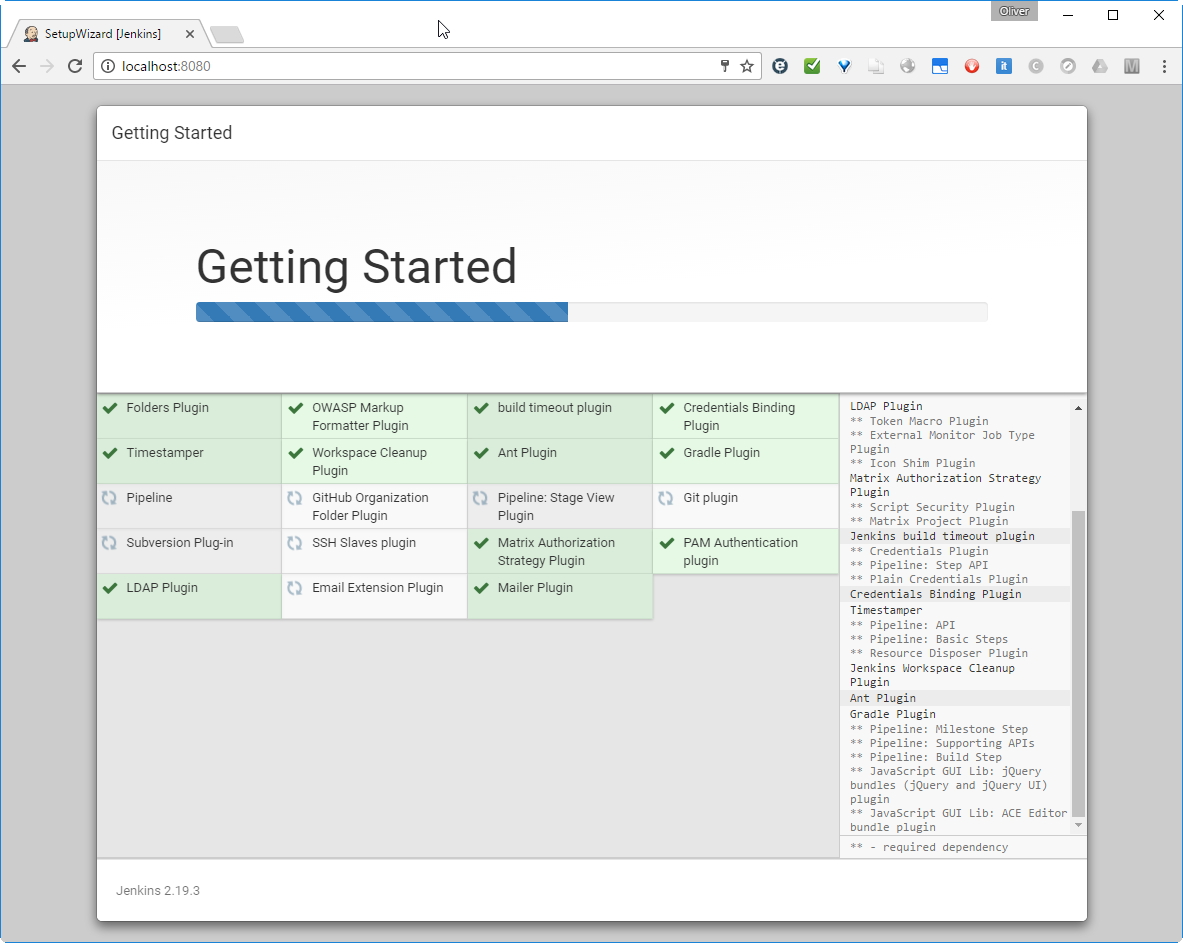
Let us install the suggested plugins:
This may take a while to finish:
Step 6: Create an Admin User and log in
Then we reach a page, where we can create an Admin user:
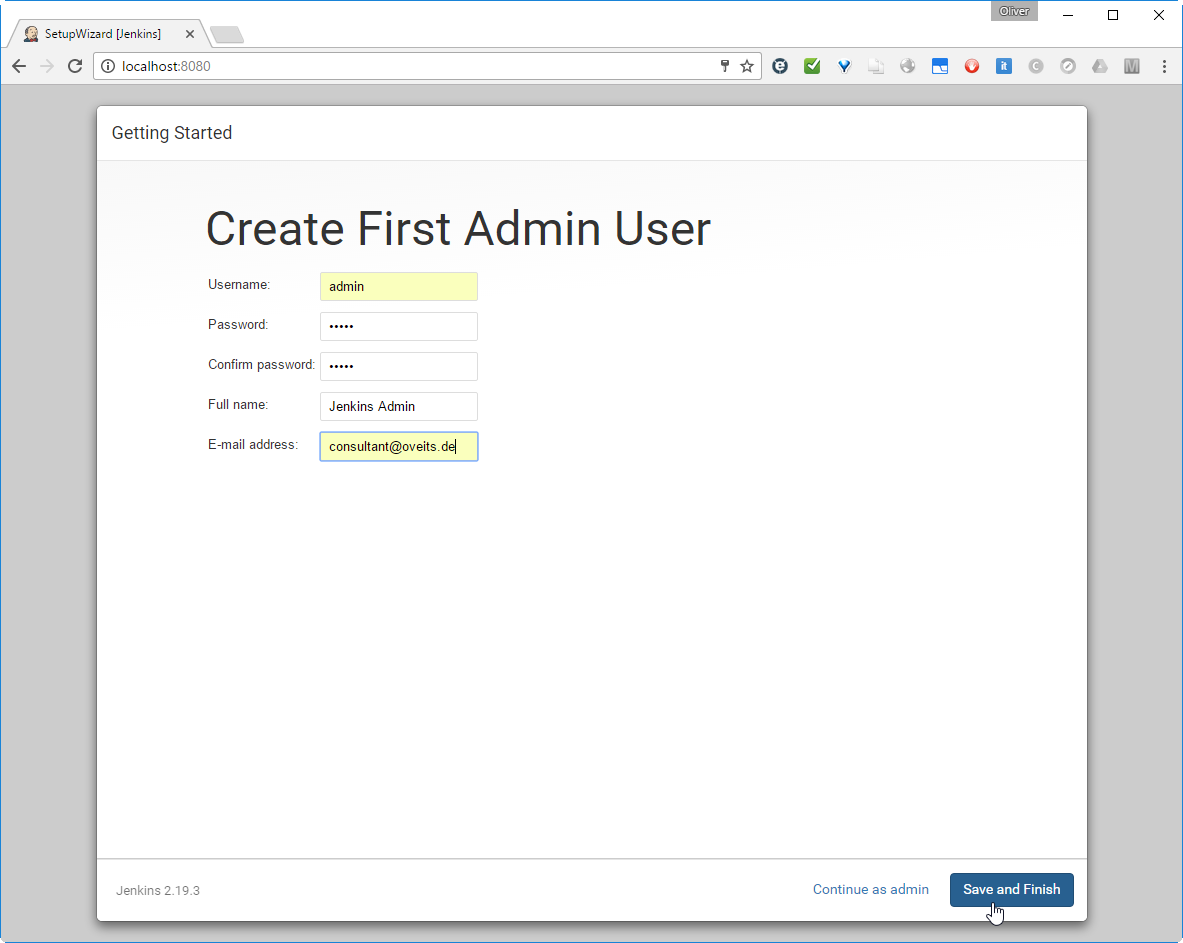
Let us do so and save and finish.
Note: After this step, I have deleted the Jenkins container and started a new container attached to the same Jenkins Home directory. After that, all configuration and plugins were still available and we can delete containers after usage without loosing relevant information.
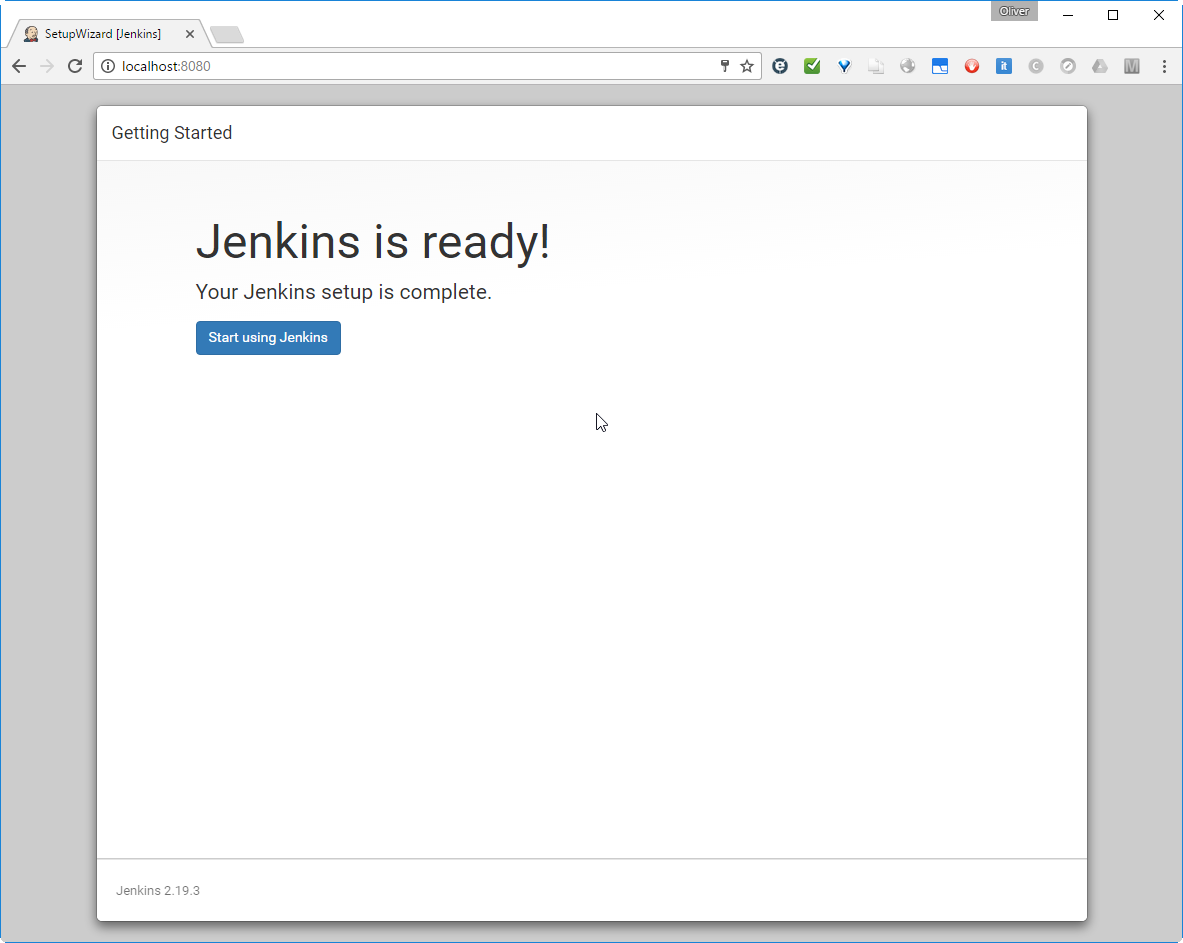
I have had a dinner break at this point. Maybe this is the reason I got following message when clicking the „Start using Jenkins“ button?
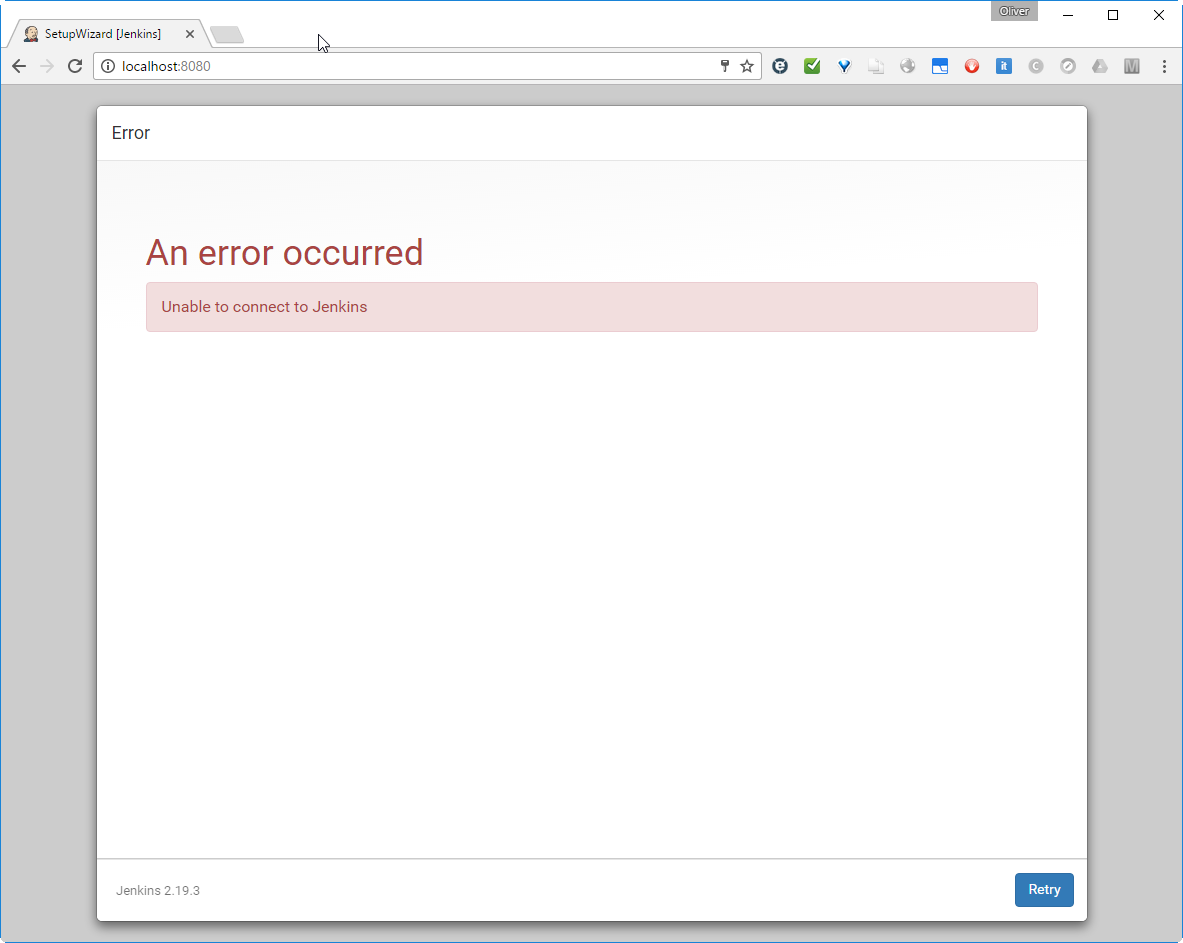
What ever. After clicking „retry“, we reach the login page:
Coming Soon: Create a New Job
In the next, upcoming blog post, we will create our first Jenkins job. I plan to trigger the Maven and/or Gradle build of a Java executable file upon detection of a code change.

Summary
In this blog post we have performed following tasks:
- installed a Docker host using Vagrant and VirtualBox
- downloaded and installed Jenkins the Docker way
- installed often used Plugins
- created an Admin account
In order to avoid any compatibility issues with the java version on the host, we have run Jenkins in a Docker container. In order to better see what happens under the hood, we have chosen to run the Docker container in interactive terminal mode. We have had an intermediate error „Unable to connect to Jenkins“, but this error was unreproducible and gone after the next click.
Further Reading:
- Part 2 of this Series: creating our first Jenkins job: GitHub download and Software build
- Part 3 of this Series: Periodic and a
- Jenkins Homepage
- 1:45 Jenkins tutorial on YouTube
- Jenkins for Beginners series on YouTube
- Tutorialspoint’s Jenkins Tutorial for absolute Beginners
- Nice blog by Philipp Hauer on Continuous Delivery based on Jenkins (uses Philipp’s scripts saved on Github)