
Today, we will show how to use Checkstyle for improving the style of Java code. First, we will add Checkstyle to Gradle in order to create XML reports for a single build. Jenkins allows us to visualize the results of more than one test/build run into historic reports. After that, we will show, how a developer can use the Eclipse Checkstyle plugin in order to create better code:
This blog post series is divided into following parts:
- Part 1: Installation and Configuration of Jenkins, loading Plugins
- Part 2: Creating our first Jenkins job: GitHub download and Software build
- Part 3: Periodic and automatically triggered Builds
- Part 4.1: running automated tests: Functional Tests via Java JUnit
- Part 4.2: running automated tests: Code Quality Test via Checkstyle (this post)
- Part 4.3: running automated tests: Performance Tests with JMeter (work in progress)
- …
What is Jenkins?
Jenkins is the leading open source automation server mostly used in continuous integration and continuous deployment pipelines. Jenkins provides hundreds of plugins to support building, deploying and automating any project.
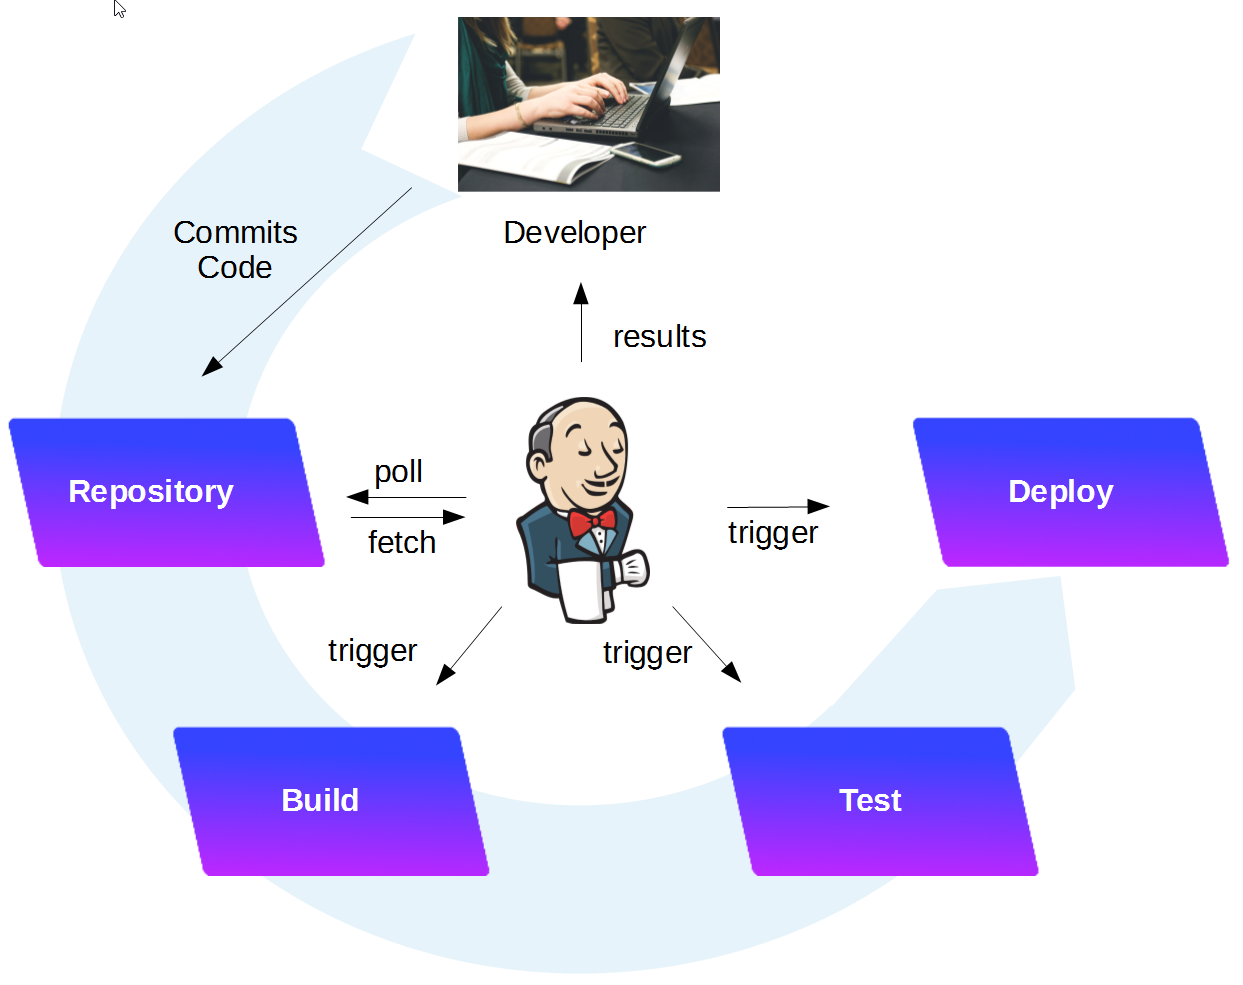
A typical workflow is visualized above: a developer checks in the code changes into the repository. Jenkins will detect the change, build (compile) the software, test it and prepare to deploy it on a system. Depending on the configuration, the deployment is triggered by a human person, or automatically performed by Jenkins.
For more information, see the introduction found in part 1 of this blog series.
Checking Code with Checkstyle
In this post, we will show how to configure Jenkins for automated code checking as part of the Post-Build Tests:

After this tutorial has been followed, we will have learned how to apply standard or custom checks on the code quality using Checkstyle in Eclipse and Jenkins.
Tools & Versions used
- Vagrant 1.8.6
- Virtualbox 5.0.20
- Docker 1.12.1
- Jenkins 2.32.1
- Checkstyle Plug-in 3.47
- Eclipse Kepler Service Release 2 (Build id: 20140224-0627)
- Checkstyle Plug-in 7.2.0.201611082205
Prerequisites:
Step 1: Start Jenkins in interactive Terminal Mode
Make sure that port 8080 is unused on the Docker host. If you were following all steps in part 1 of the series, you might need to stop cadvisor:
(dockerhost)$ sudo docker stop cadvisor
I assume that jenkins_home is already created, all popular plugins are installed and an Admin user has been created as shown in part 1 of the blog series. We start the Jenkins container with the jenkins_home Docker host volume mapped to /var/jenkins_home:
(dockerhost)$ cd <path_to_jenkins_home> # in my case: cd /vagrant/jenkins_home/
(dockerhost:jenkins_home)$ sudo docker run -it --rm --name jenkins -p8080:8080 -p50000:50000 -v`pwd`:/var/jenkins_home jenkins
Running from: /usr/share/jenkins/jenkins.war
...
--> setting agent port for jnlp
--> setting agent port for jnlp... done
Step 2: Open Jenkins in a Browser
Now we want to connect to the Jenkins portal. For that, open a browser and open the URL
<your_jenkins_host>:8080
In our case, Jenkins is running in a container and we have mapped the container-port 8080 to the local port 8080 of the Docker host. On the Docker host, we can open the URL.
localhost:8080
Note: In case of Vagrant with VirtualBox, per default, there is only a NAT-based interface and you need to create port-forwarding for any port you want to reach from outside (also the local machine you are working on is to be considered as outside). In this case, we need to add an entry in the port forwarding list of VirtualBox:
We have created this entry in part 1 already, but I have seen that the entries were gone again, which seems to be a VirtualBox bug. I have added it again now.

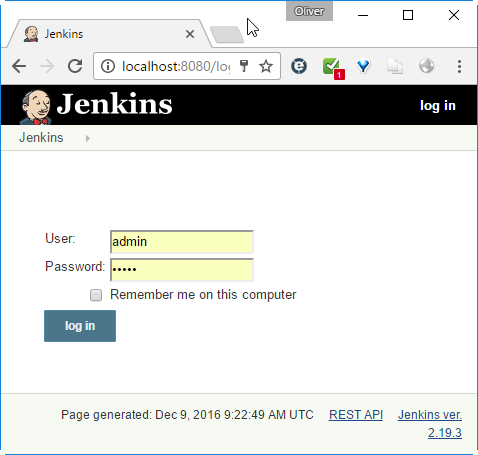
Log in with the admin account we have created in the last session:
Step 3: Code Analysis: Checkstyle
With Gradle, we can invoke the Checkstyle plugin as follows:
Step 3.1: Prepare Gradle for performing Checkstyle
Add to build.gradle:
apply plugin: 'checkstyle'

tasks.withType(Checkstyle) {
 ignoreFailures = true
 reports {
 html.enabled = true
 }
}
We have set ignoreFailures to true, since we do not want the Gradle build to fail for now. We are just interested in the Checkstyle reports for now.
We can download an example Checkstyle configuration file from the Apache Camel repository, for example:
git clone <yourprojectURL>
mkdir -p <yourprojectDir>/config/checkstyle/
curl https://raw.githubusercontent.com/apache/camel/master/buildingtools/src/main/resources/camel-checkstyle.xml > <yourprojectDir>/config/checkstyle/checkstyle.xml
Step 3.2 (optional): Test Checkstyle locally
If you have no Git and/or no Gradle installed, you may want to skip this step and directly proceed to the next step, so Jenkins is performing this task for you.
We can locally invoke CheckStyle as follows:
gradle check
Step 3.3: Configure Jenkins to invoke Checkstyle
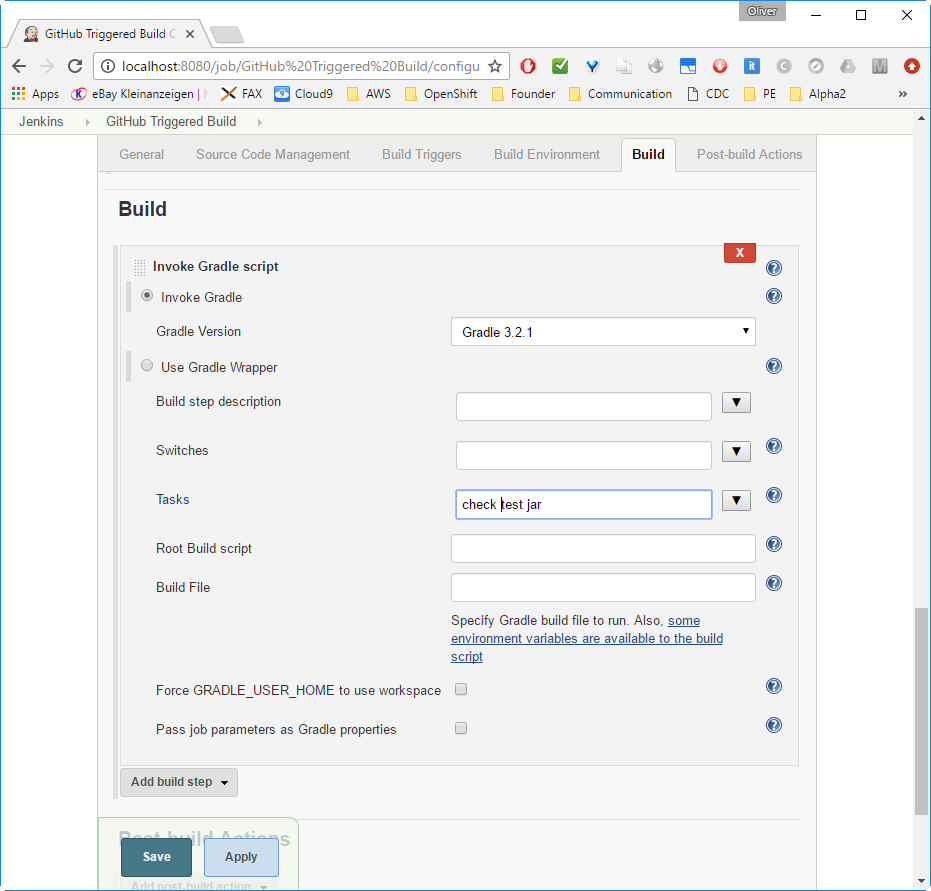
Adding Gradle Checkstyle tests to be performed before each build is as simple as performing Step 4.1 and then adding „check“ as a goal to the list of Jenkins Build Gradle Tasks:
On Dashboard -> Click on Project name -> Configure -> Build, add „check“ before the jar task:
Click ![]() .
.
Now we verify the setting by either checking changed code into the SW repository (now is a good time to commit and push the changes performed in Step 4.1) or by clicking „Build now“ -> Click on Build Link in Build History -> Console Output in the Project home:
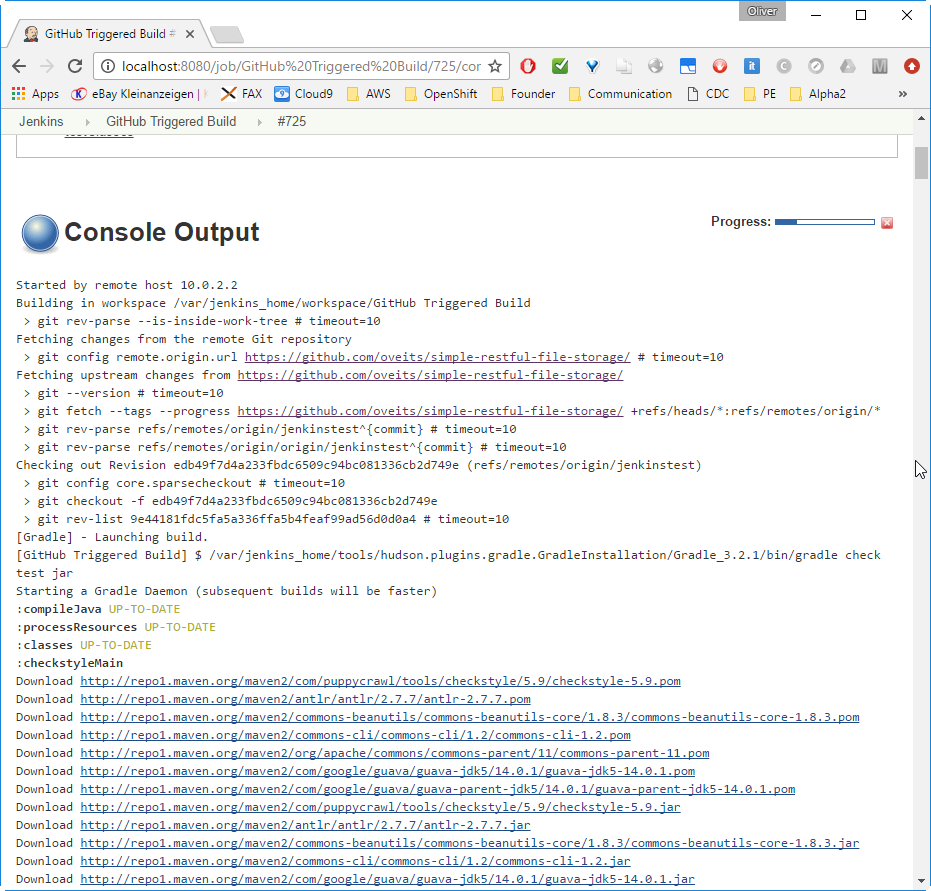

We have received a very long list of CheckStyle Errors, but, as configured, the build does not fail nevertheless.
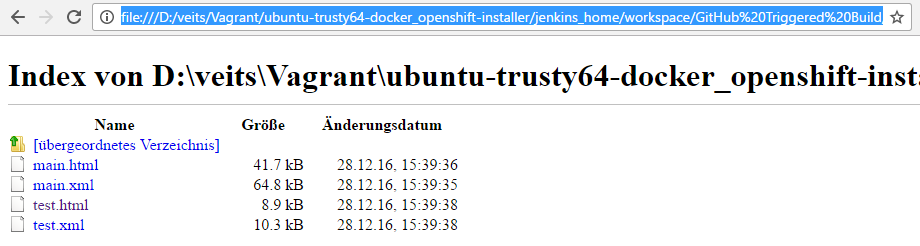
At the same time, CheckStyle Reports should be available on Jenkins now:
The Links specified in the output are only available on Jenkins, but since Jenkins is running as a Docker container on Vagrant VM residing in
D:\veits\Vagrant\ubuntu-trusty64-docker_openshift-installer\jenkins_home
I need to access the files on
file:///D:/veits/Vagrant/ubuntu-trusty64-docker_openshift-installer/jenkins_home/workspace/GitHub%20Triggered%20Build/build/reports/checkstyle/
And on main.html we find:

Wow, it seems like I really need to clean the code…
Step 4: Visualize the CheckStyle Warnings and Errors to the Developer
Usually Jenkins is not running as a Docker container on the Developer’s PC or Notebook, so he has no access to the above report files. We need to publish the statistics via the Jenkins portal. For that, we need to install the CheckStyle Jenkins plugin:
Step 4.1 (optional): Install the „Static Analysis Utilities“
Note: I have not tried it out, but I believe that this step is not necessary, since the next step will automatically install all plugins the Checksytle plug-in depends on.
On Jenkins -> Manage Jenkins -> Manage Plugins -> Available
In the Filter field, type „Static Analysis U“
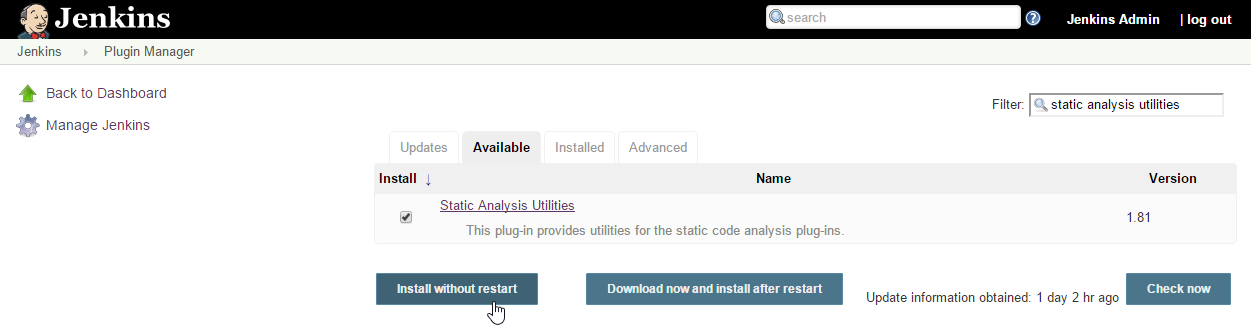
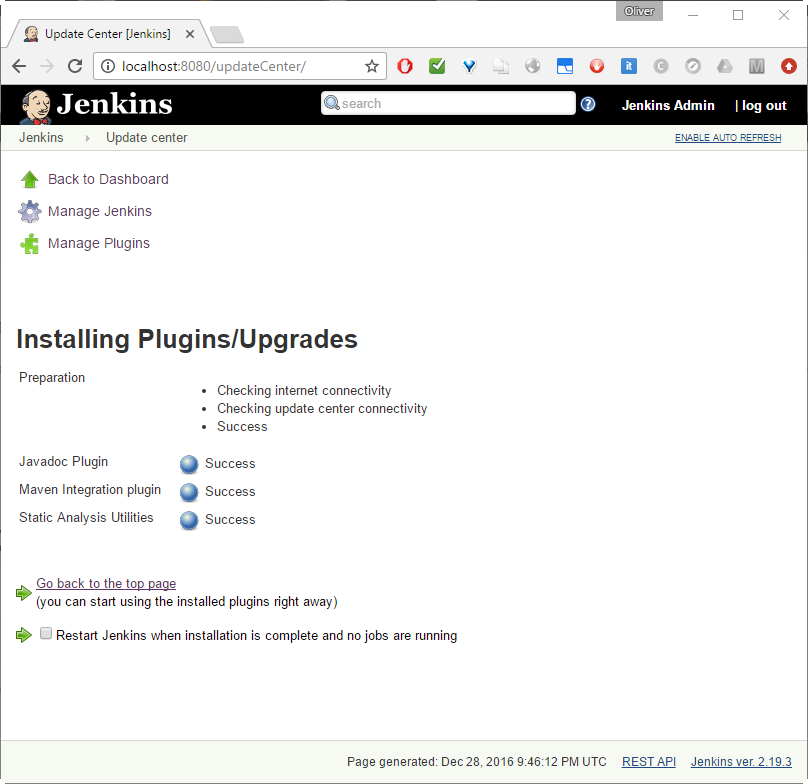
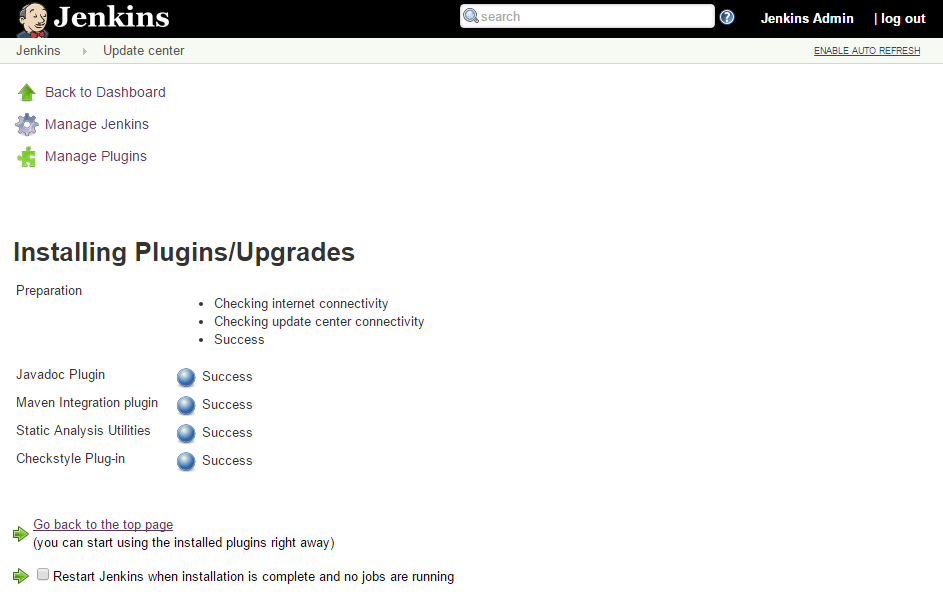
Check the checkbox of „Static Analysis Utilities“ and Install without restart.
Step 4.2: Install Checkstyle Plugin
On Jenkins -> Manage Jenkins -> Manage Plugins -> Available
In the Filter field, type „Checkstyle “ (with white space at the end; this will limit the number of hits):
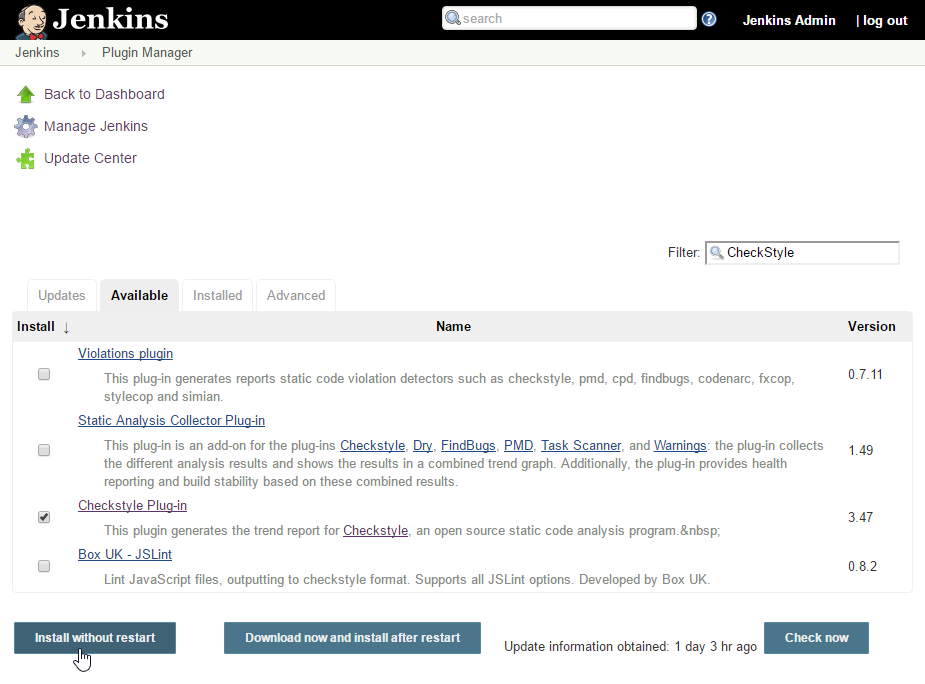
Check the checkbox of „Checkstyle Plug-in“ and Install without restart.
Step 4.3: Configure Checkstyle Reporting in Jenkins
On Dashboard -> <your Project> -> Configure -> Post-build Actions -> ![]() , choose
, choose

Now add the path, where Gradle is placing its result xml files:
**/build/reports/checkstyle/*.xml

And click ![]() .
.
Step 4.4: Manually trigger a new Build
On the Project page, click „Build now“, then click on the build and then „Console output“:
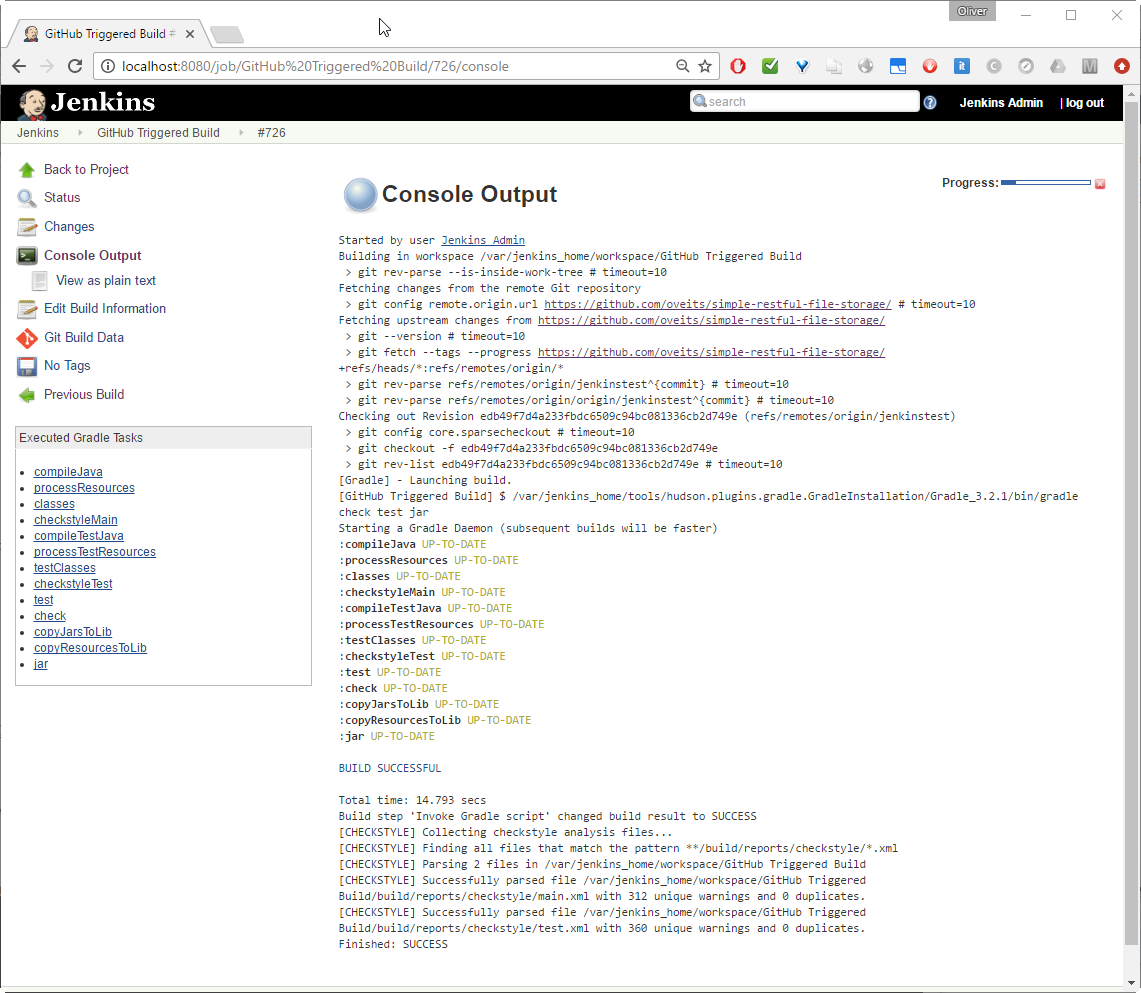
We now can see [CHECKSTYLE] messages after the build, telling us, that the reports were collected. Now, where can we see them?
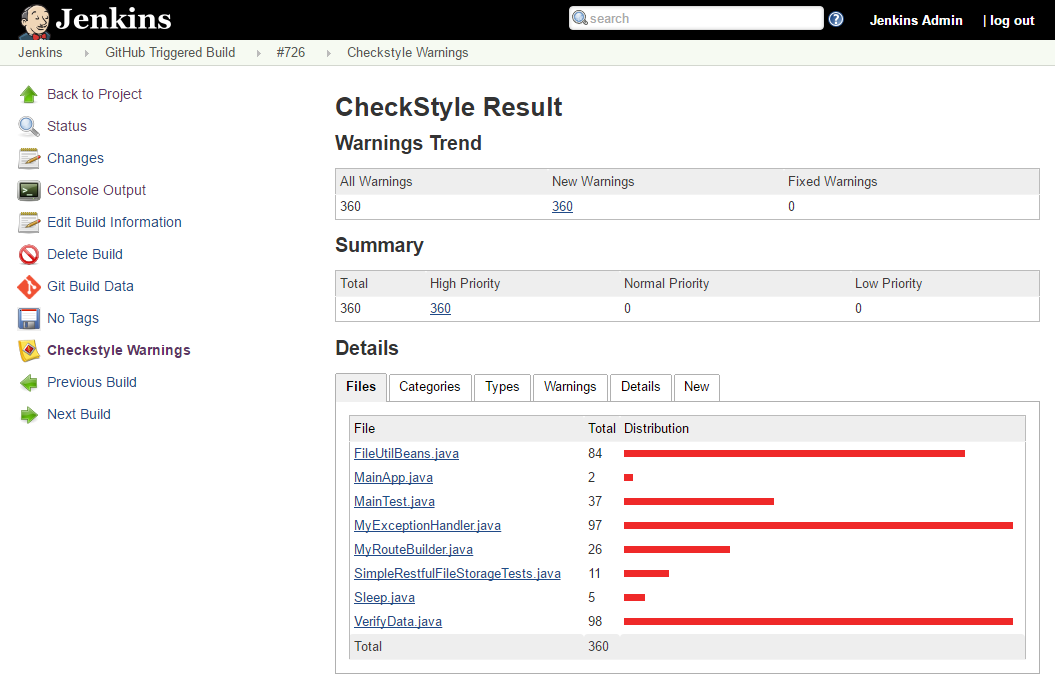
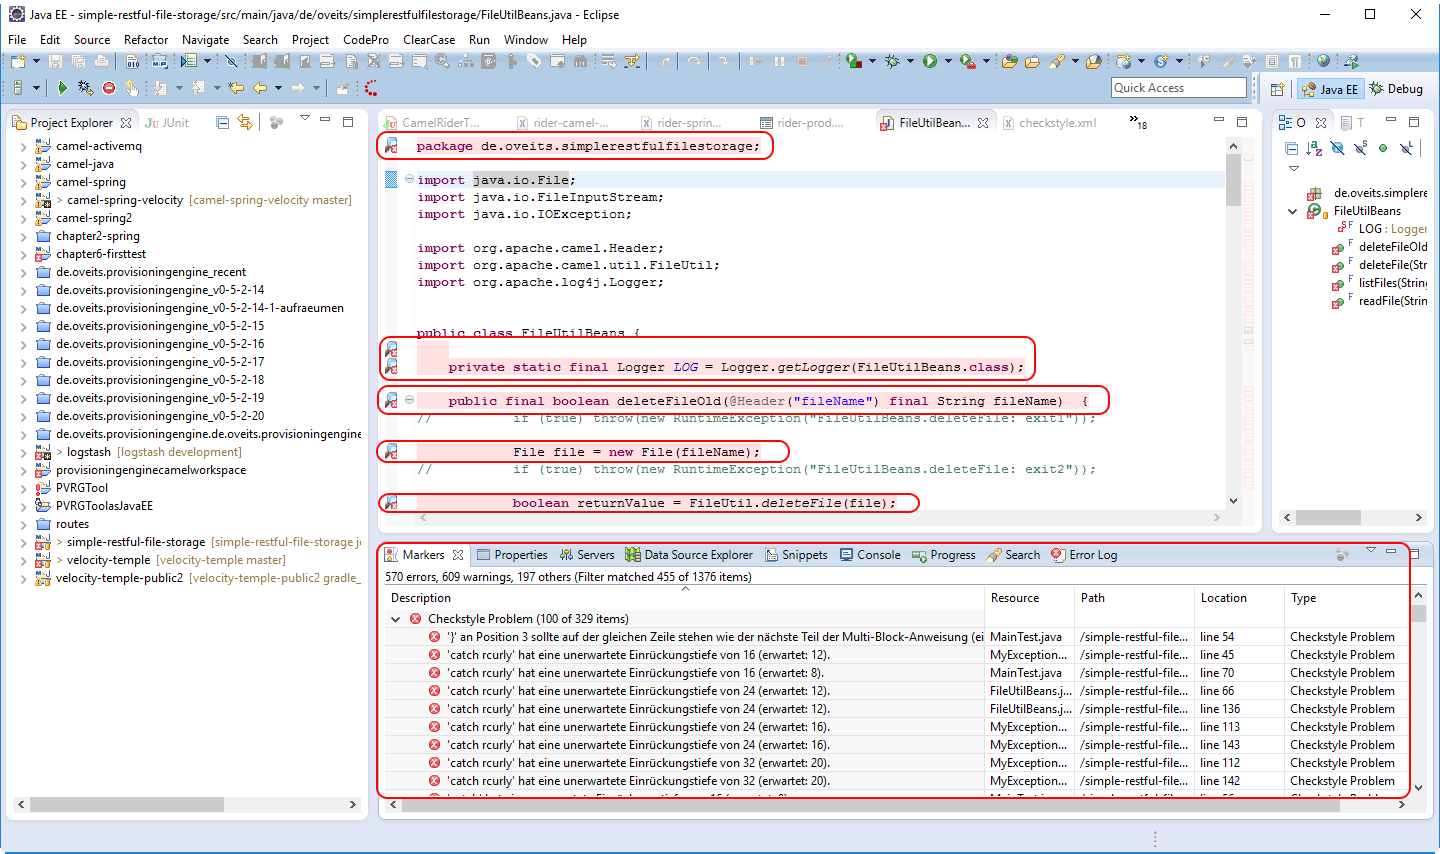
Step 4.5: Review Checkstyle Statistics
On the Project page, choose Status:
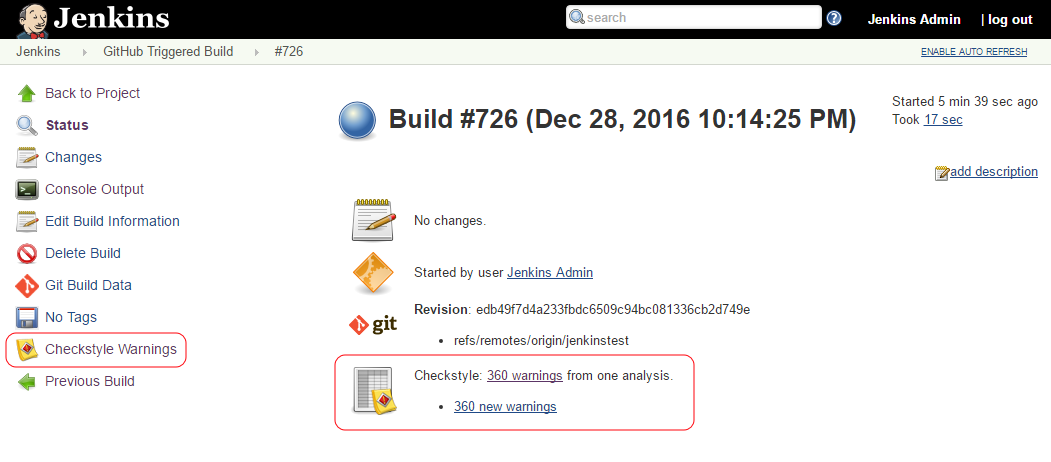
and click on Checkstyle Warnings on the left, or the warnings link in the center of the page, and we get a graphical representation of the Checkstyle statistics:
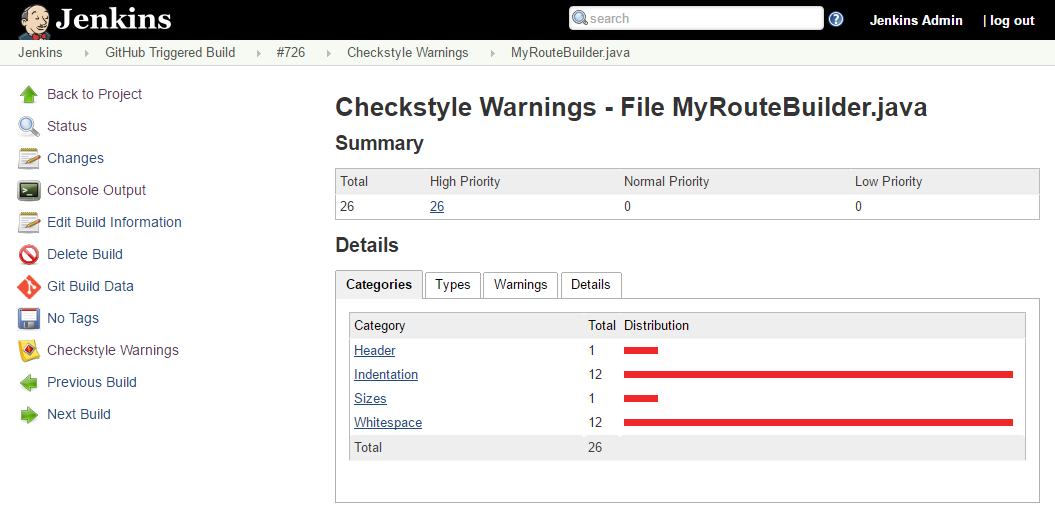
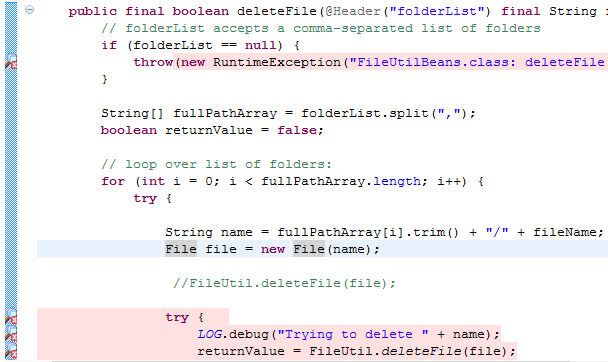
When clicking on one of the File Links (MyRouteBuilder.java in this case), we can get an overview of the Warning types for this file:
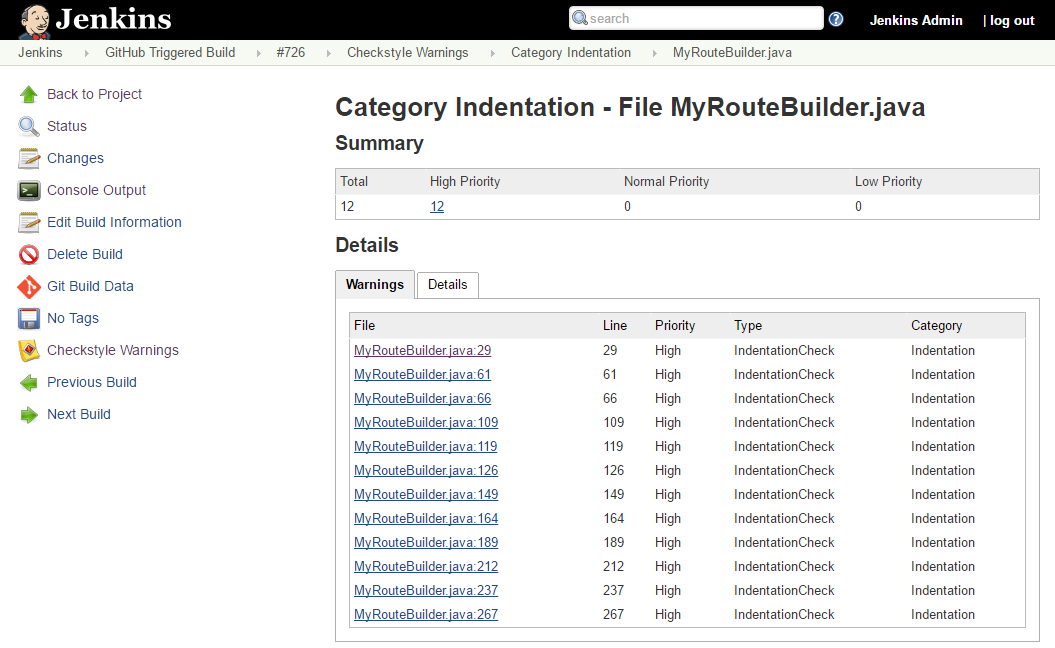
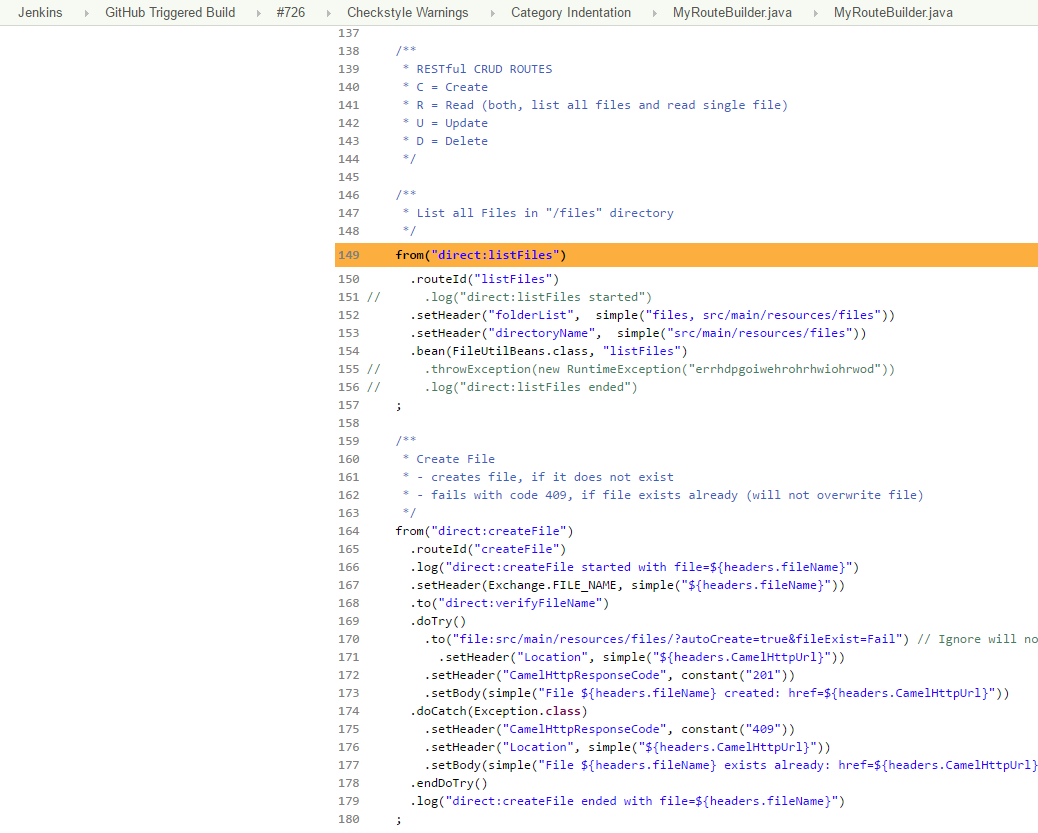
We choose the category Indentation and get details on the warnings:
and after clicking on one of the links in the Warnings field, we see the java code causing the warning:
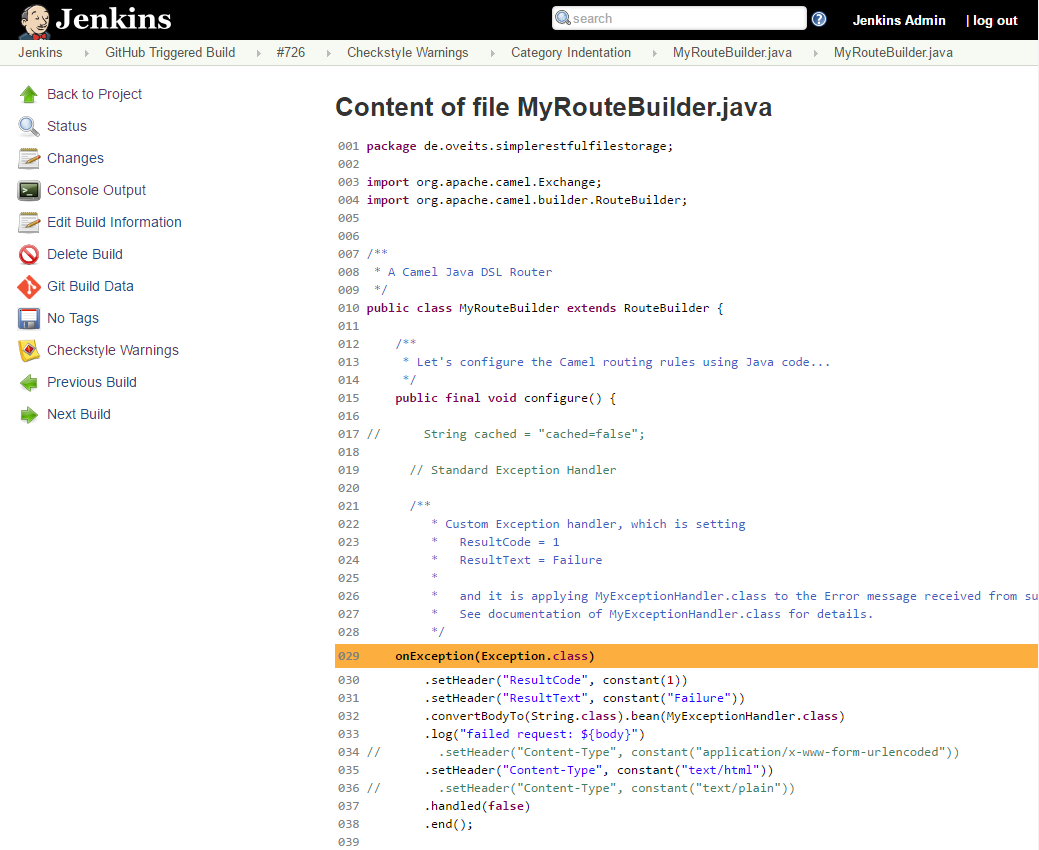
Okay, Camel’s Checkstyle configuration does not like my style of grouping each route’s first line with a smaller indent than the rest of the route:
And it does not seem to accept my style of putting the ; in a new line at the end of a route as seen by choosing the Whitespace category and then choosing an occurence:
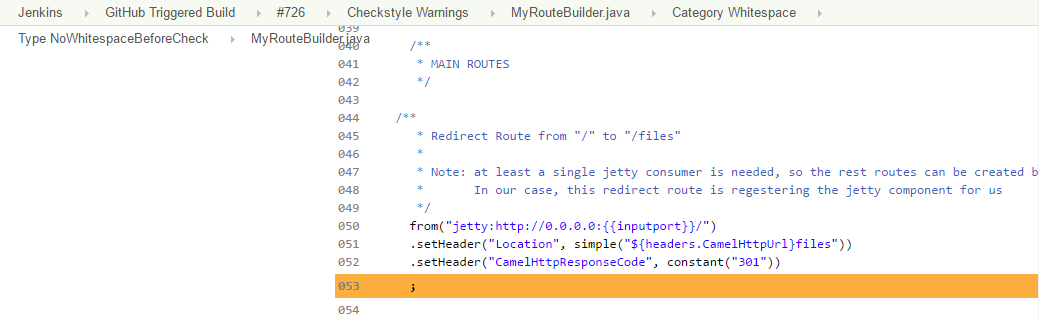
I either need to change this style, or I need to adapte the checkstyle.xml configuration file to ignore those warnings.
Step 5: Improve Code Style
For the developer, it is very inconvenient to use the Jenkins Checkstyle messages from the console and match them with the code. We need something better than that: the Eclipse Checkstyle plugin.
Step 5.1: Install Eclipse Checkstyle Plugin via local Installation
Since the recommended installation via Marketplace did not work in my case (see Appendix A), I have followed some hints about a local installation found on StackOverflow:
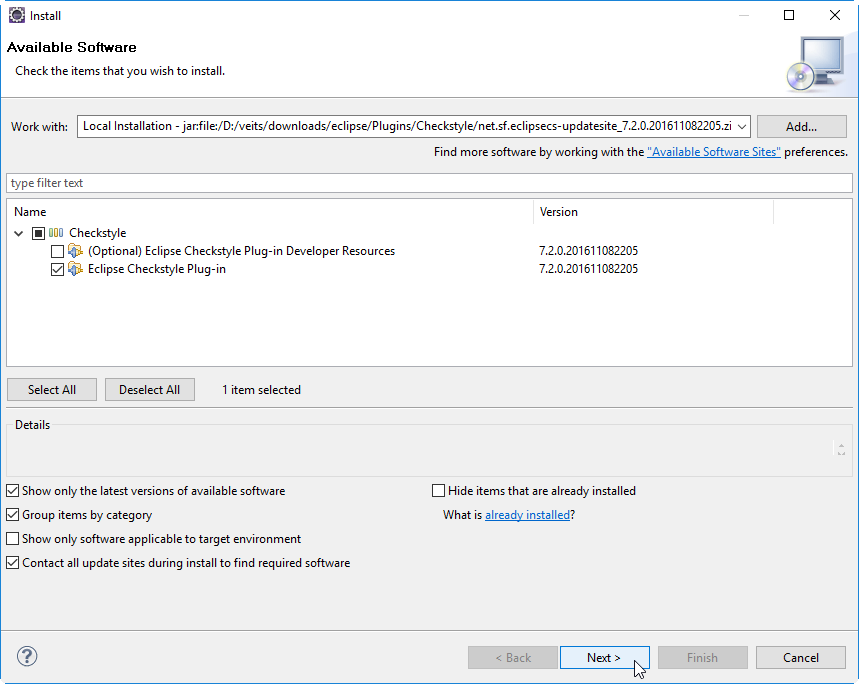
Download Checkstyle from Sourceforge.
In the next window, you are asked to specify some credentials we do not have. However, you can just ignore the window and click Cancel:

->Cancel
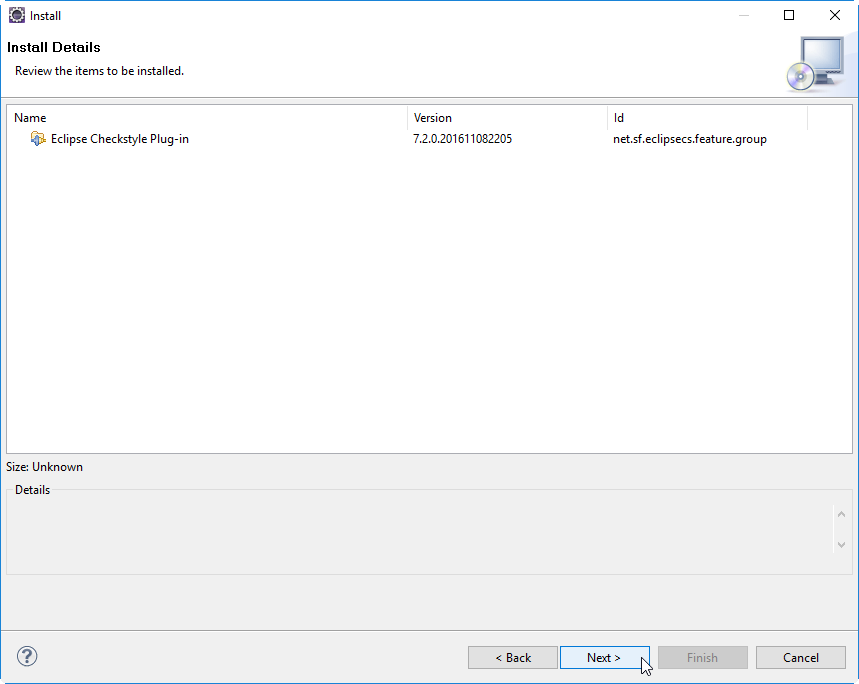
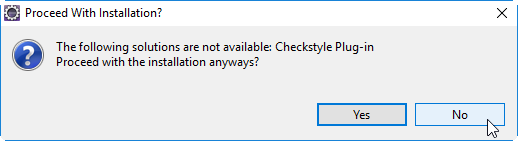
Then the installation proceeds:

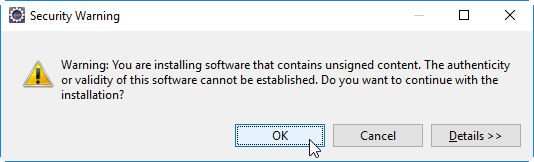
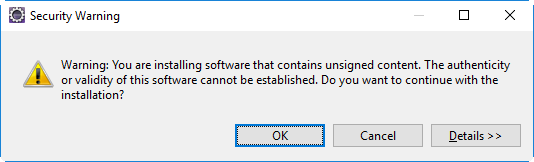
Now I had to klick OK on security warnings twice:
At the end, I had to restart Eclipse:
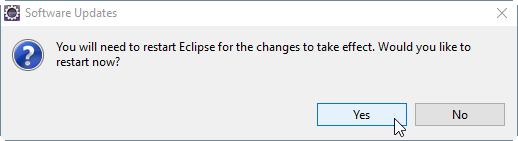
Now, the Checkstyle plugin is installed on Eclipse.
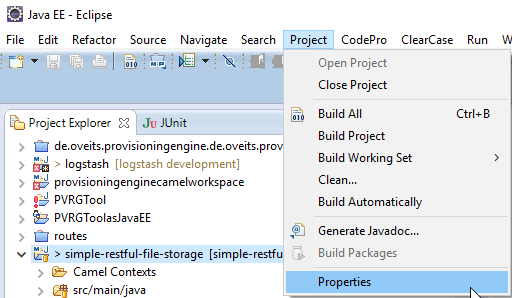
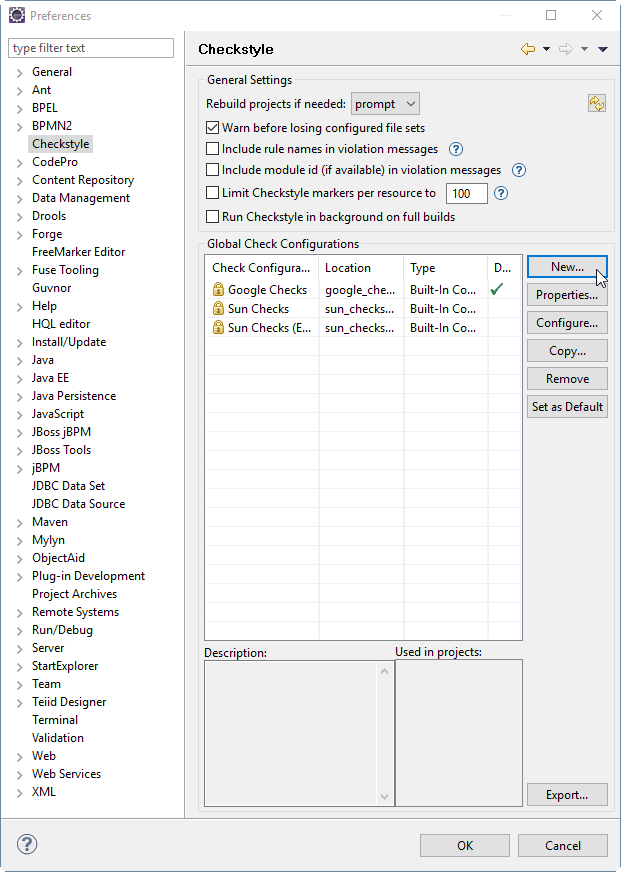
Step 5.2: Configure Project for Checkstyle Usage
The project in question must be enabled for Checkstyle usage by editing the Project Properties:
Choosing the Checkstyle style. For now, let us choose the Google Checks in the drop-down list:
Then confirm that the project is being re-built:
Now the code is more yellow than white, with many hints how to improve the code:
However, the hints do not go away, if you correct the code. Do we need to rebuild again? Let us test:

Google style does not like that there is no empty line before the package line (sorry, in German):
![]()
So, let us add an empty line and save the file. However, the style warning does not change:

Let us rebuild the project:

Yes, after the re-build: the warning has disappeared:

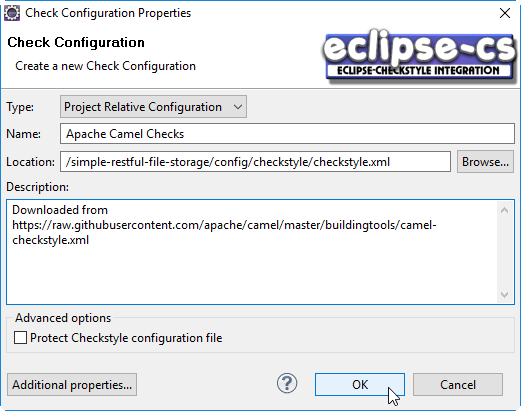
Step 5.3: Download and Create Custom Checkstyle Profile in Eclipse
In the Jenkins Checkstyle tests above, we have used following custom Checkstyle configuration file:
$ curl https://raw.githubusercontent.com/apache/camel/master/buildingtools/src/main/resources/camel-checkstyle.xml > <yourprojectDir>/config/checkstyle/checkstyle.xml
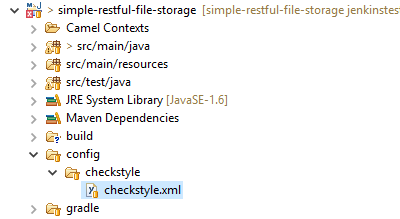
I.e. the Checkstyle file is found on <yourprojectDir>/config/checkstyle/checkstyle.xml
Correct:

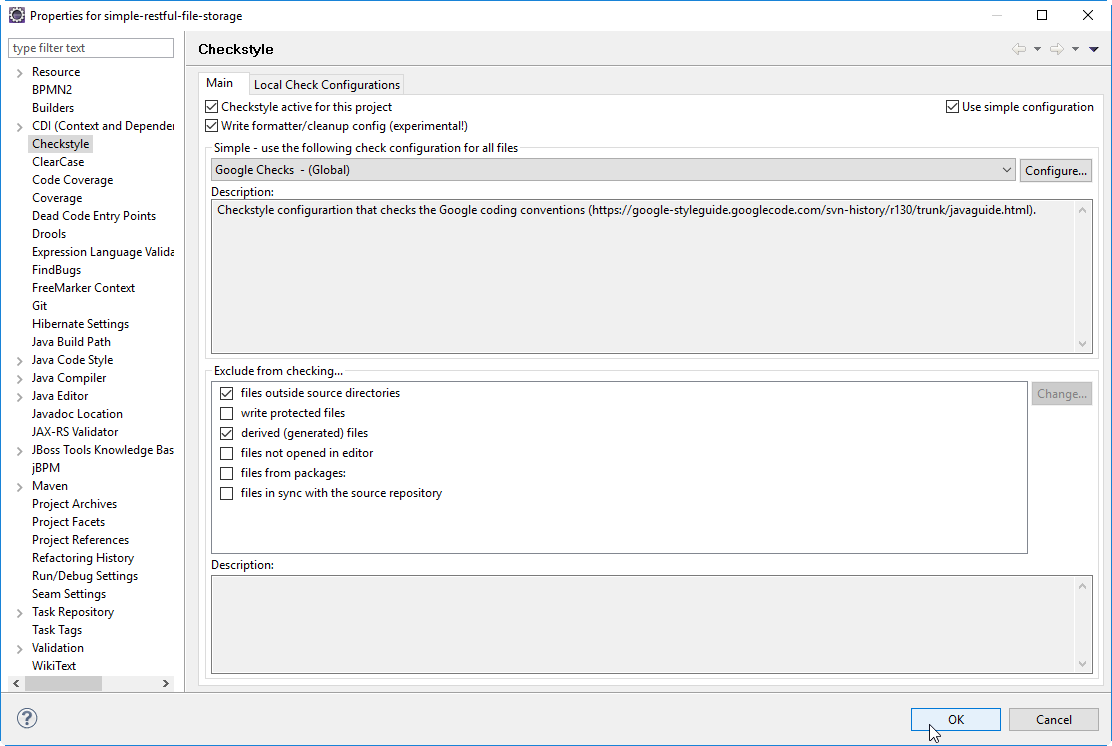
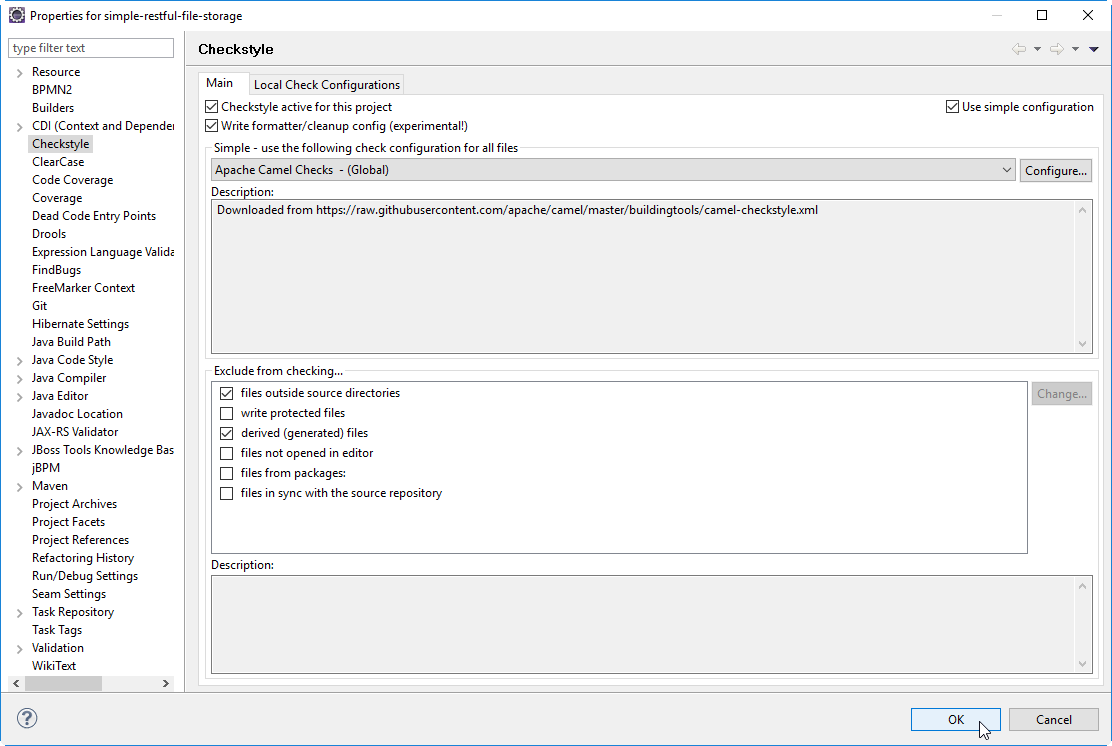
Step 5.4: Assign Custom Checkstyle Profile to the Project
To assign the new Checkstyle profile to the project, we change the project’s Checkstyle properties by
Project->Properties -> Checkstyle
-> Choose new Checkstyle profile -> OK
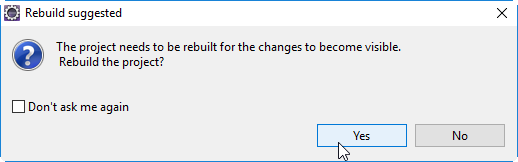
On the Rebuild suggested window -> Yes
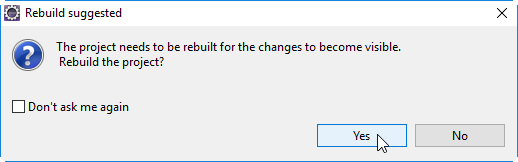
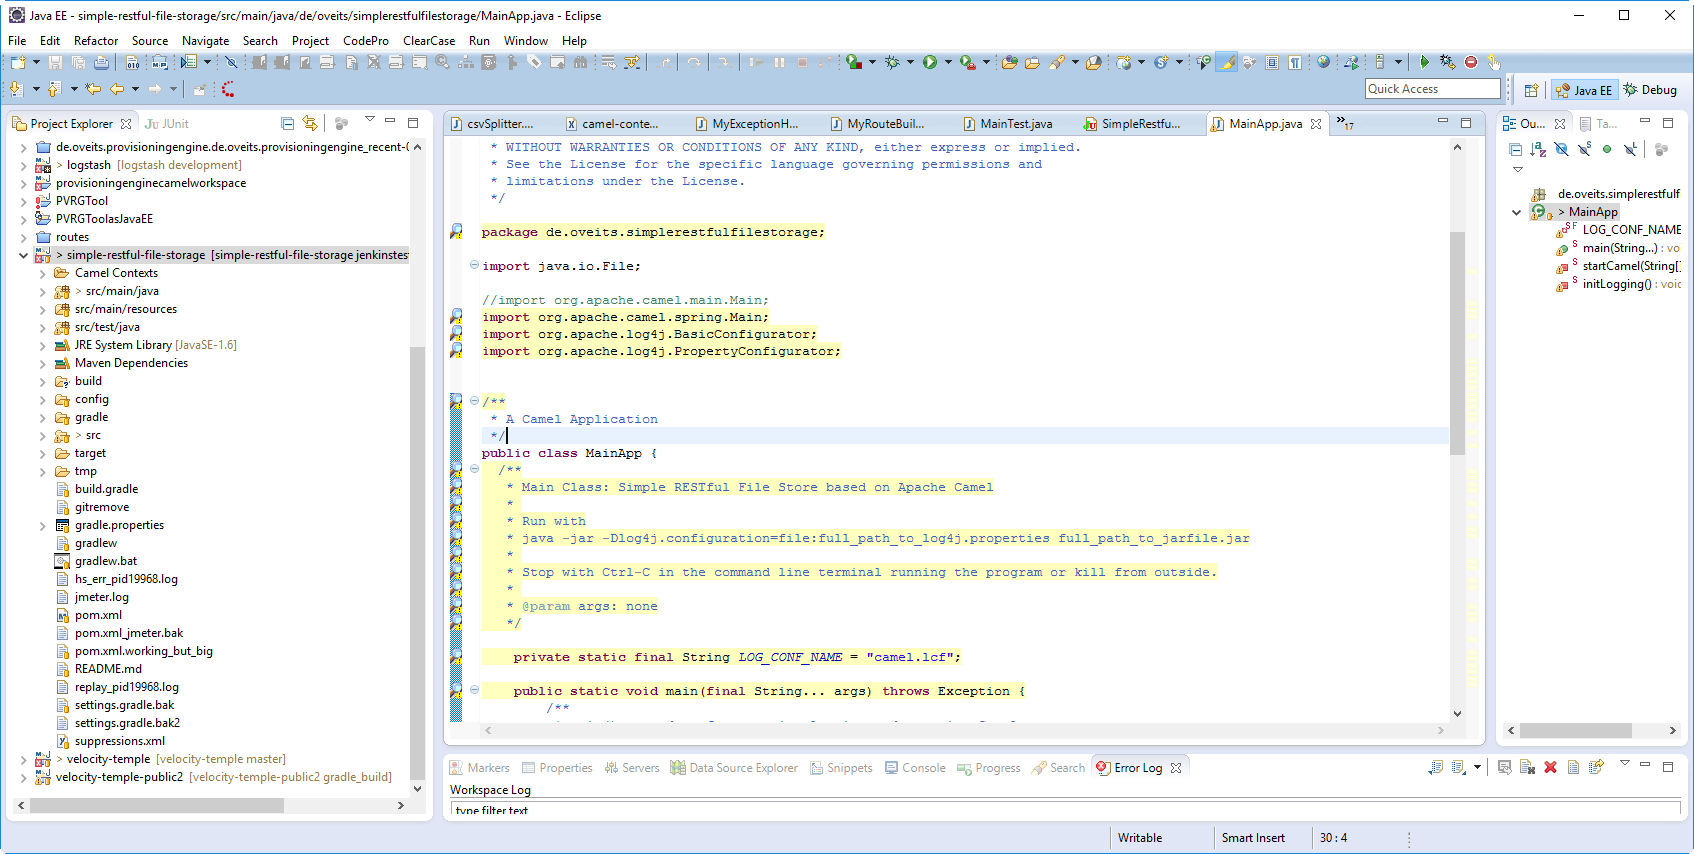
This works fine:
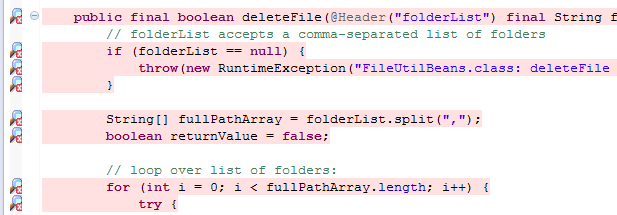
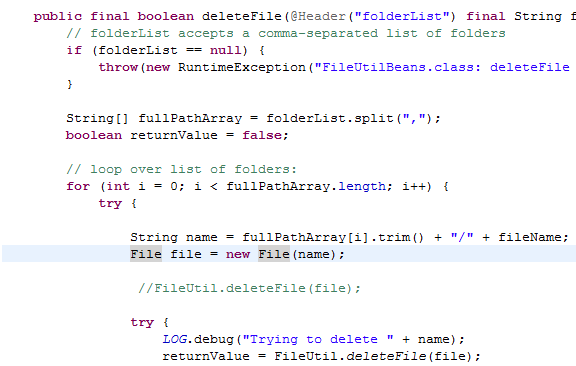
In the code, we can see the Checkstyle warnings. To get more information on the specific Checkstyle warning, the warning text can be retrieved via the mouse over function on the left of the code line, or on the markers tab on the lower pane of Eclipse.
Step 5.5: Improve Code Style
Step 5.5.1: Change Code
In order to test, how the developer can improve the code style, let us replace some of the tabs by four spaces here:
Save the file now.
Step 5.5.2: Update Maven
Unfortunately, the Checkstyle warnings update process is a little cumbersome for custom Checkstyle profiles, it seems: we need to
- save the changed file,
- update Maven and
- rebuild the project.
Let us update Maven first:
right-click the project folder in the left pane -> Maven -> Update Project -> OK


Then all Checkstyle markers are gone (although I have not changed all occurrences of a tab):
Step 5.5.3 Rebuild the Project
To get the Checkstyle warnings back, we need to rebuild the project:
Project -> Build Project
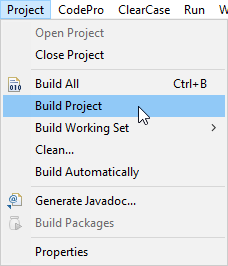
Now we can see that some of the Checkstyle warnings are gone:
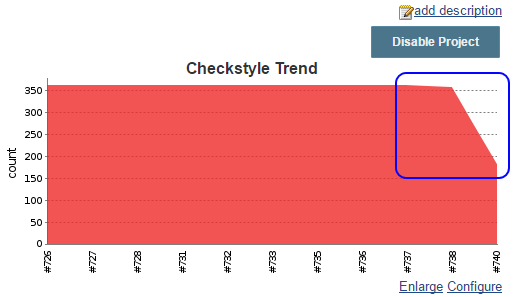
Next time, you check in the code to the Gir repository, you will see that the number of Checkstyle warnings we get from Jenkins via Gradle will decrease…
Step 6: Verify Jenkins Results
Since we have improved the source code, we expect the Jenkins Checkstyle warnings to decrease. We can verify this by doing the following:
-> save, commit and push the improved code -> log into Jenkins -> check out the build process that is triggered by the code push (or we can manually trigger the build process by clicking project -> Build now)
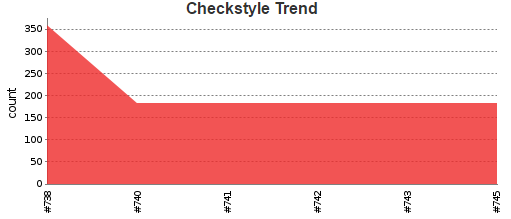
On the dashboard, we will see, that the Checkstyle statistics have (very) slightly improved:
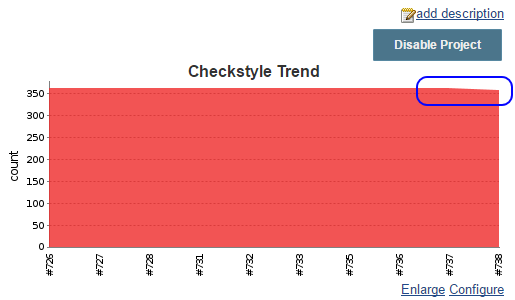
On the upper right edge of the figure, the number of warnings is slightly lower. The code quality is far from being perfect, but we now have all tools and plugins needed to improve the situation.
After changing all tabs by 4 spaces each, the number of Checkstyle violations goes down by ~50%. That is a good start.
Perfect, we have learned how to use the Checkstyle plugin for Eclipse in order to produce better code. And the Jenkins Checkstyle plugin allows us to admire the progress we make.
😉
Appendix A: Problems with installing Checkstyle Eclipse Plugin via Marketplace
Note: this way of installation is recommended officially, but has failed in my case. If you hit the same problem, try the local installation as described in step 5.1 above.
To improve the style, it would be much too cumbersome to click through all 360 style warnings, edit the Java code, build the Code and check again. It is much better to give the programmer immediate feedback of the warning within the IDE. I am using Eclipse, so I need to install the Checkstyle Eclipse plugin as follows:
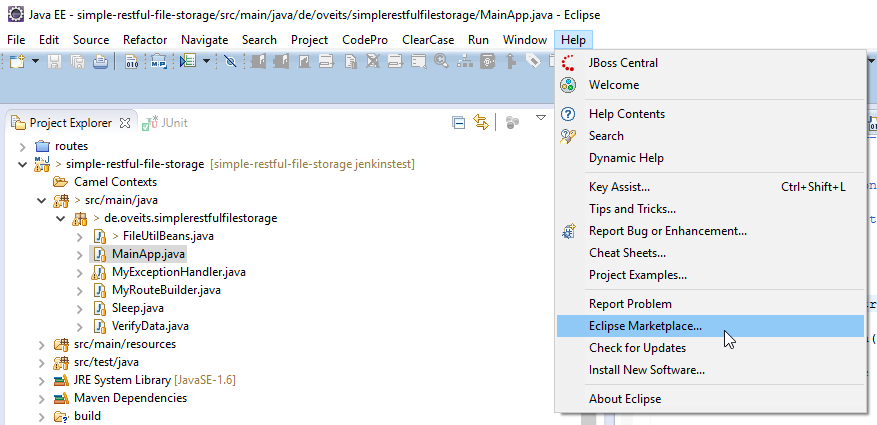
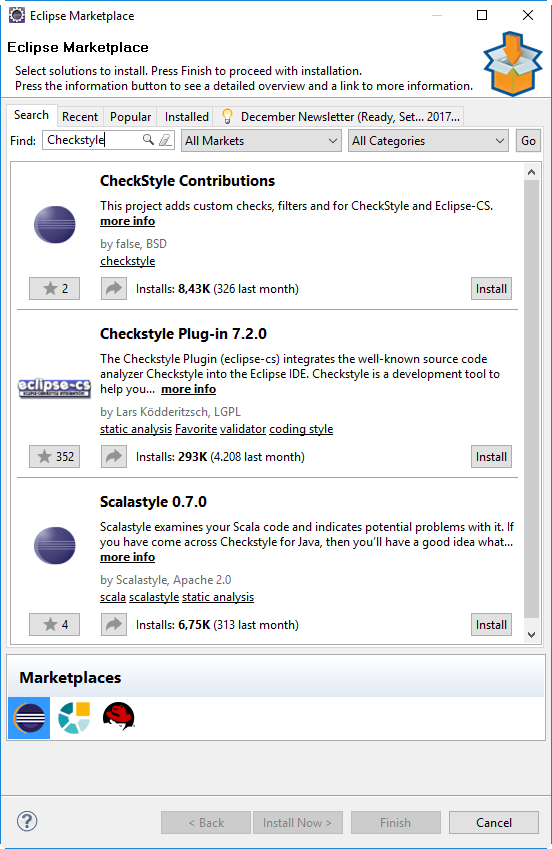
Choose Eclipse -> Help -> Eclipse Marketplace
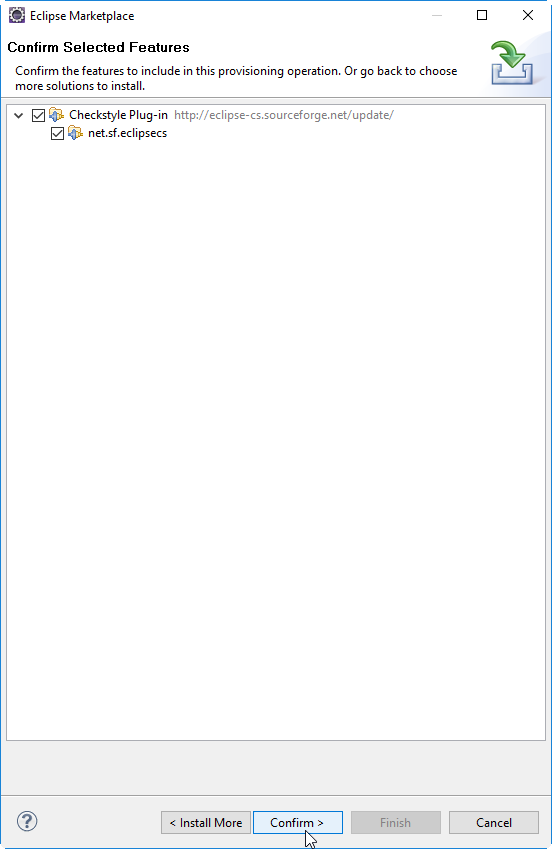
Search for „Checkstyle“ and click install:

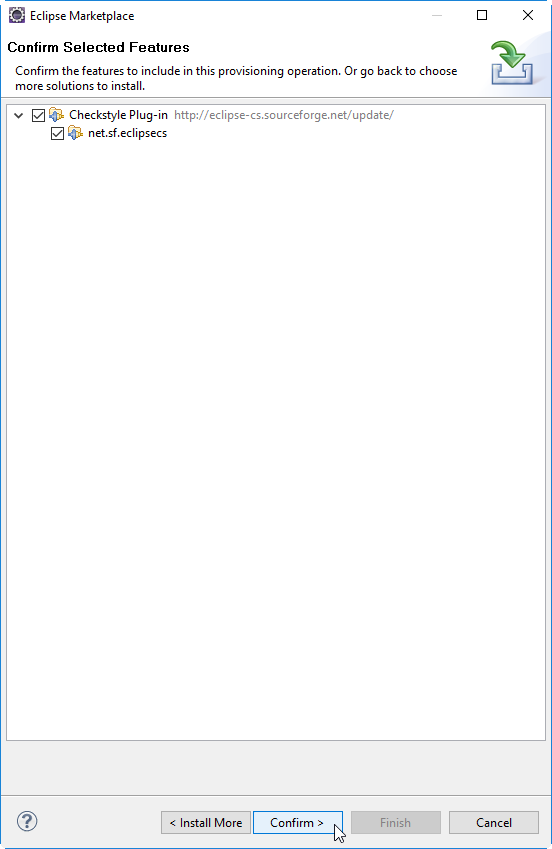
And then „confirm“:
What is that?

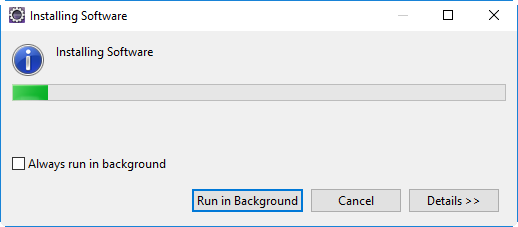
I install it anyway. At this point, it is hanging quite a while:
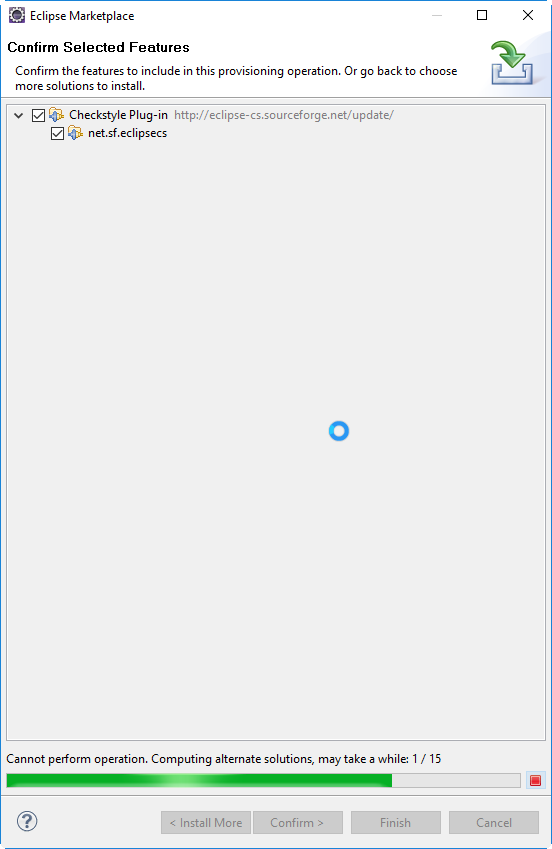
so, let me get a morning coffee…
After approximately two minutes, I can see it to proceed to 4 / 15. Good sign.
After the coffee, I still see 4 / 15. Not a good sign:
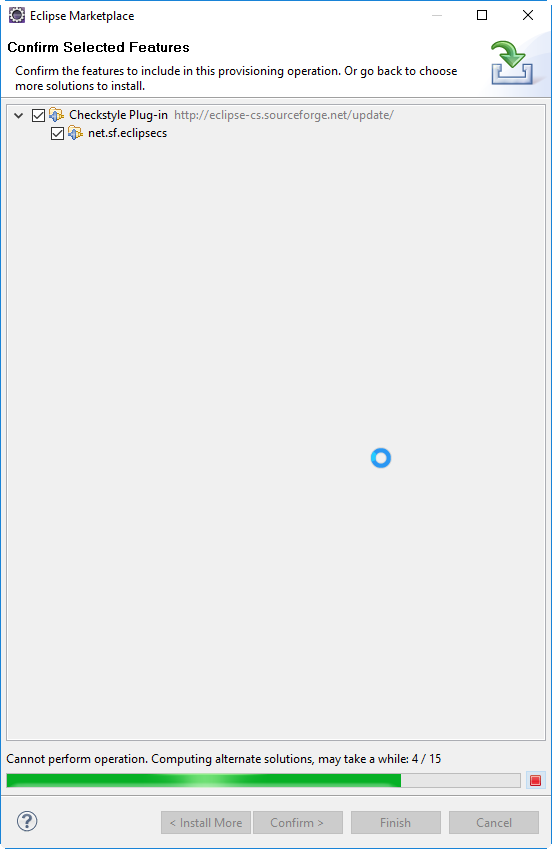
Meanwhile I am researching the steps needed for performance testing…
After 2 hours or so: 6/15
This will take all day!

…
Some hours later, I checked again, and I have seen the following:

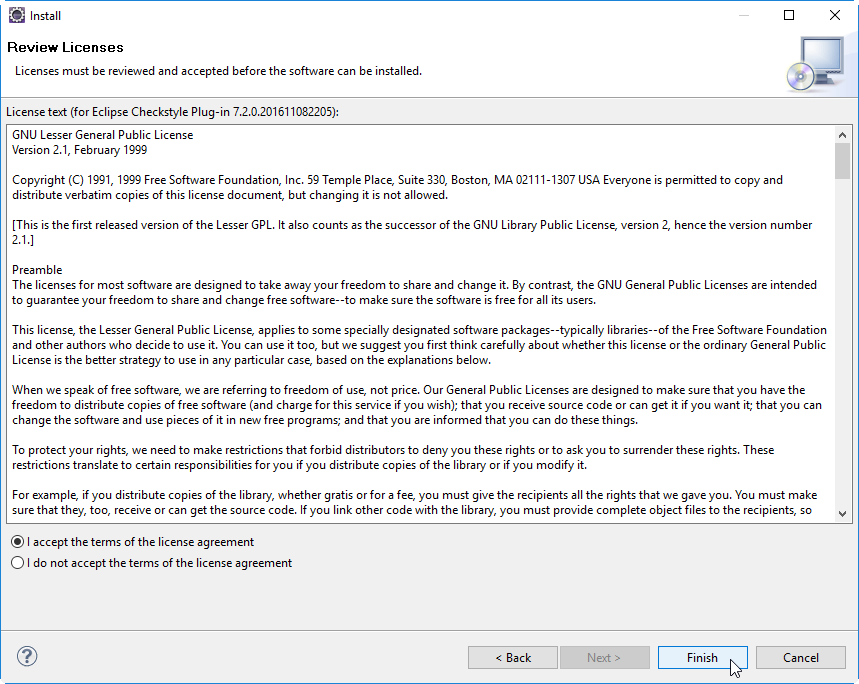
I have confirmed, confirmed the license:
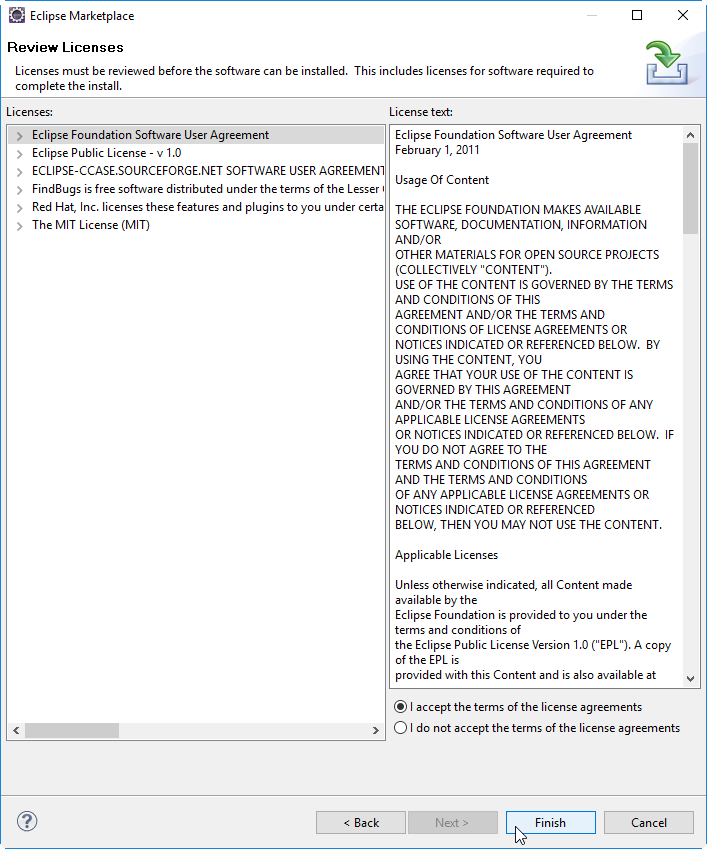
And have pressed Finish.
Then software gets installed:
I hope I will not break my good old Eclipse installation (it is installed locally, not in a virtual machine or container and it has ever worked better than any new version I have tested…).
After a two or three minutes:
I have confirmed with „OK“…
Then I had been asked to restart Eclipse and I have confirmed.
Problem: however, Checkstyle is still not installed:
Help -> Eclipse Marketplace
Let us try again by clicking „Install“:
This does not work
Workaround
Instead of installing Checkstyle via the Eclipse marketplace, better install the Eclipse Checkstyle Plugin via download (see Step 5.1)
Summary
In this blog post we have performed following tasks:
- Started Jenkins in a Docker container
- Installed the Checkstyle Gradle Plugin to create Checkstyle plugins as XML files
- Installed the Checkstyle Jenkins Plugin to summarize the XML files into graphical historic reports
- Installed the Checkstyle Eclipse Plugin to be able to improve the code
- Installed custom Checkstyle policies
- Visualized the Code Improvement
- were happy
All steps apart from the installation of the Eclipse Checkstyle plugin were quite straightforward. For the Eclipse Checkstyle installation, we had to revert back to a local download and installation method described in step 5.1: the installation via Eclipse marketplace had failed. At the end, we could reduce the number of Checkstyle warnings by 50% without much effort.
Further Reading
- Blog with tips on how to create better code: Through the eyes of sonar: Exception handling
- Jenkins Homepage
- Part 1 of this Series: Installation and Configuration of Jenkins, loading plugins
- Part 2 of this Series: Creating our first Jenkins job: GitHub download and Software build
- Part 3 of this Series: Periodic vs Triggered Builds
- Part 4.1 of this Series: JUnit Reports via Jenkins
- SonarQube: a graphical interface for Checkstyle and more