This blog post shows how you can run and manage your Docker images on vocon Cloud Desktop. We will launch an Ubuntu container, install git software as a root user and create and save the resulting Docker image on Docker Hub. Then we launch a Linux container based on the new Docker image.
Step 1: Launch an Ubuntu Terminal on vocon Cloud
vocon Cloud offers Linux environments running in your standard web browser. For that, click the following action card on cloud.vocon-it.com and register, if needed:

Behind the scenes, an Ubuntu 20.04 Linux container is started. This usually takes only 20 sec or so (however, due to a known bug it sometimes takes up to 2.5 minutes. Please be patient), You will be redirected to a vocon Cloud Desktop with an Ubuntu 20.04 terminal:

You will see that Podman is pulling an Ubuntu Docker image before it launches a Linux container based on that image. For your convenience, the command apt-get update is already performed within that container.
Step 2: Install any Software
Now you can install any software available in the Ubuntu software repository. Let us install git:
apt-get install -y git

Step 3: Save your Changes (Commit&Push)
Now let us save your changes. For that, we need to run a terminal parallel to the original Ubuntu Terminal.
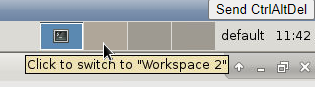
You might want to run the new Terminal in a separate workspace for easier switching between the two terminals in that case you need to click in another workspace on the upper right corner of the desktop:
The simplest way to start a terminal is via –> the Applications –> Terminal Emulator menu item…

…or via a right-click on the desktop:

Now retrieve the image container ID via the podman ps command:

Now register to hub.docker.io to retrieve a Docker hub username, if needed. Then we commit the changes to a new image tag based on this username. We log in and push the new image to the Docker hub like follows:
$ podman login
Username: <YOUR_DOCKER_HUB_USERNAME>
Password: <YOUR_DOCKER_HUB_PASSWORD>

$ podman commit <CONTAINER_ID> <YOUR_DOCKER_HUB_USERNAME>/<CHOOSE_ANY_IMAGE_NAME>:<OPTIONAL_IMAGE_TAG>
$ podman push <YOUR_DOCKER_HUB_USERNAME>/<CHOOSE_ANY_IMAGE_NAME>:<OPTIONAL_IMAGE_TAG>

Step 4: Start your custom Image Container
The next time you log into the Ubuntu container on vocon Cloud, you will see that the installed software is not available in the default Ubuntu container. However, you can start your container from your saved image instead as follows:
podman run --rm -it <YOUR_DOCKER.IO_USERNAME>/<CHOOSE_ANY_IMAGE_NAME>:<OPTIONAL_IMAGE_TAG> <COMMAND>

As you can see the software you have installed in a previous step is still available. And you can start working from there.
We trust that you stick to the usage rules. Have fun!
Feedback is welcome: support@vocon-it.com.