This is part 2 of a blog post series, in which we will explore, how to automate Amazon Web Services (AWS) by using the Vagrant AWS provider plugin.
Note that part 2 is self-contained: it contains all information that is needed to accomplish the tasks at hand without the need to go through part 1 first. Those of you, who have started with part 1 may jump directly to the chapter AWS Automation using Vagrant (step by step guide).
The series is divided into four parts:
- In Part 1: AWS EC2 Introduction, introduces Amazon Web Services EC2 (AWS EC2) and will show how to sign into a free trial of Amazon, create, start, shut down and terminate a virtual machine on the AWS EC2 console.
- Part 2: Automate AWS using Vagrant (this post) will lead you through the process how to use Vagrant to perform the same tasks you have performed in part 1, but now we will use local Vagrantfiles in order to automate the process. Please be sure to check out part 4, which shows a much simpler way to perform the same using Terraform.
- Part 3: Deploy Docker Host on AWS using Vagrant shows, how Vagrant helps you to go beyond simple creation, startup, shutdown and termination of a virtual machine. In less than 10 minutes, you will be able to install a Docker host on AWS. With a few additional clicks on the AWS EC2 console, you are ready to start your first Docker container in the AWS cloud.
- Part 4: Automate AWS using Terraform is showing that spinning up a virtual machine instance on AWS using Terraform is even simpler than using the Vagrant AWS plugin we have used in part 2 and 3. Additionally, Terraform opens up the we will be able to use the same tool to provision our resources to other clouds like Azure and Google Cloud.
At the end, you will have running a Docker host in the public cloud, allowing you to load any of the images from Docker Hub instead of installing any software.
Document Versions
- V2016-04-01: initial published version
- V2016-04-14 : added Automate the Security Rule Update chapter
- V2016-04-21: added Next Steps chapter
- V2016-05-06: added more details and screenshots for Step 7: create user and add access rights; added Document Versions chapter.
Contents of Part 2
In this blog post we will explore, how to get started with Amazon Web Services (AWS). After signing in to a free trial of Amazon, we will show how to create, spin up and terminate virtual machines in the cloud using Amazon’s AWS EC2 web based console. After that, a step by step guide will lead us through the process of performing the same tasks in an automated way using Vagrant.
While the shown tasks could also be performed with AWS CLI commands, Vagrant potentially allows for more sophisticated provisioning tasks like Software Installation and upload & execution of arbitrary shell scripts.
- Why this guide?
- Why Amazon Web Services?
- Getting started with AWS
- AWS Automation using Vagrant (step by step guide)
- Appendix
- Installing the AWS CLI
- Automate the Security Rule Update (chapter added 2016-04-14)
- Troubleshooting Steps
- Summary
- Next Steps (updated 2016-04-21)
Why offering yet another ‚Hello World‘ for Amazon Web Service Automation using Vagrant?
The reason is, that the other guides I have found do not start start from scratch and I have learned the hard way that the they assume that you already have created an AWS user with the appropriate rights. Since I benefit from all those other Evangelists out there helping me with my projects, I feel obliged to pay back my share.
Many thanks to Brian Cantoni, who has shared with us a (much shorter) Quick Start Guide on the same topic. Part 2 (this post) of my detailed step by step guide is based on his work.
Why Amazon Web Services?
According to Gartner’s 2015 report, Amazon Web Services is the leader in the IaaS space, followed by Microsoft Azure. See below the Gartner’s magic quadrant on IaaS:

Source: Gartner (May 2015)
There are many articles out there that compare AWS with Microsoft Azure. From reading those articles, the following over-simplified summary has burnt its traces into my brain:
Amazon Web Services vs. Microsoft Azure is like Open Source Linux world vs. the commercial Microsoft Software world. For a long time, we will need both sides of the world.
Now that we have decided to begin with the open source side of the world, let us get started.
Signing into Amazon Web Services
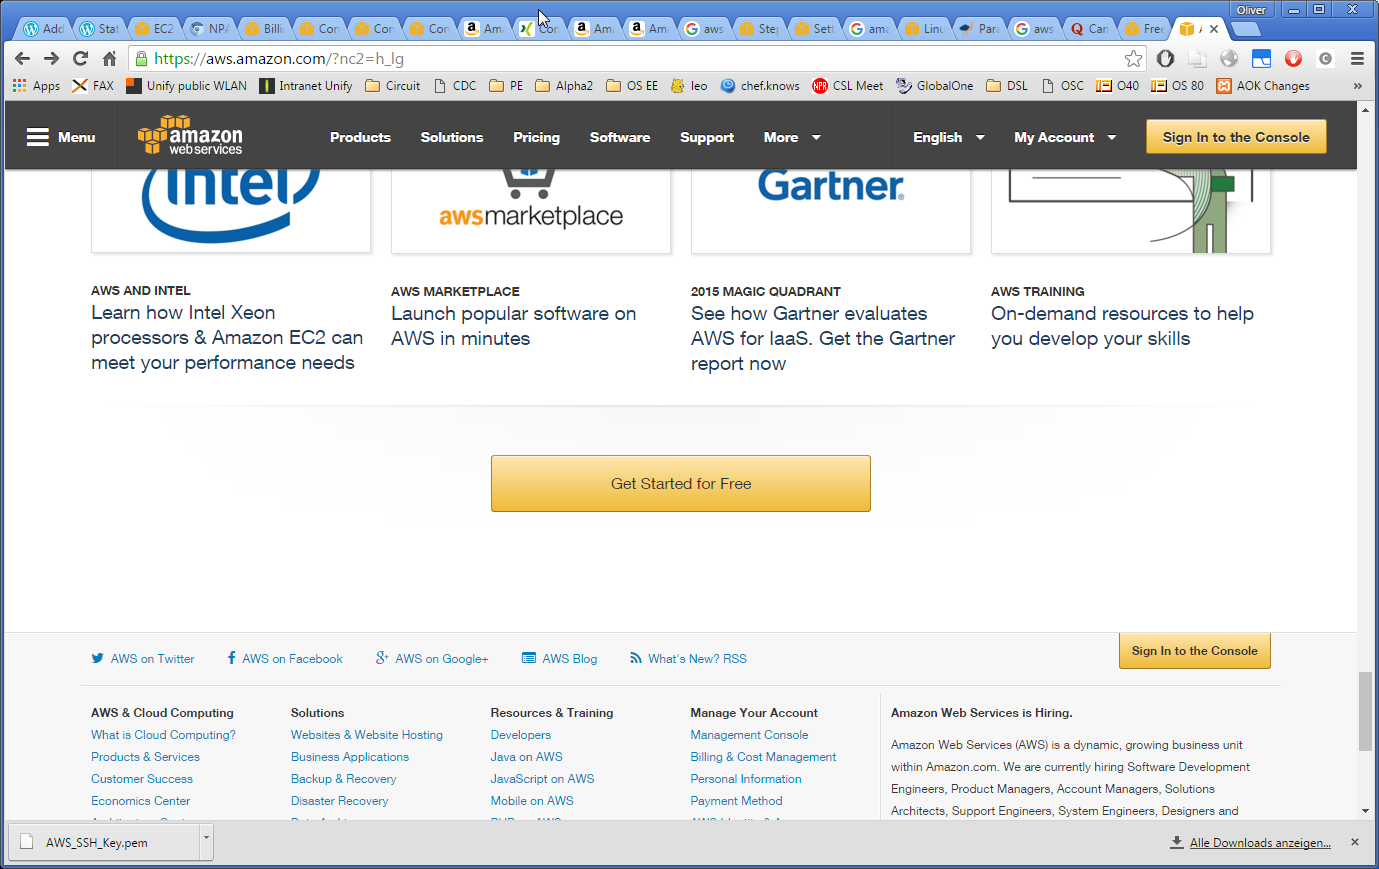
In order to get started, you need to sign into the Amazon Web Services, if not already done so. For that, visit https://aws.amazon.com/, scroll down and push the Get Started for Free button. This is starting a free tier trial account for up to 12 months and up to two time 750 hrs of computing time; Linux and Windows 2012 server on a small virtual machine.
Note that you will be offered options that are free along with other services that are not for free, so you need to be a little bit careful. Vagrant with its easy automation will help us to minimize the resources needed.
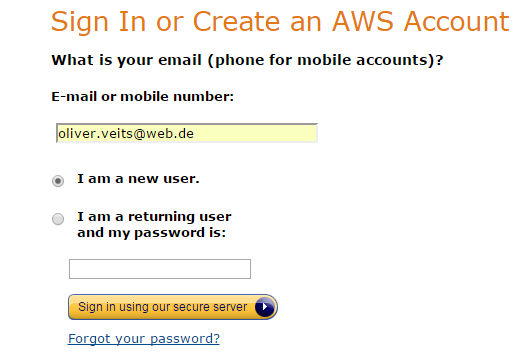
I had signed into AWS long ago, but as far as I remember, you need to choose „I am a new User“, add your email address and desired password and a set of personal data (I am not sure whether I had to add my credit card, since I am an Amazon customer anyway).
If you are interested to creating, launching, stopping and terminating virtual machine instances using the Amazon EC2 console (a web portal), you might want to have a look to part 1 of this series:
In this part 2 of the series, we will concentrate on automating the tasks.
AWS Automation using Vagrant
Now we will use Vagrant in order to automate the installation of an image. Before trying it myself, I had expected that I can spin up any existing Vagrant box (that is Vagrant’s name of a Vagrant image) on AWS. However, I have learned now that this is not the case: instead, we will need to use a dummy Vagrant box supporting the AWS provider, which in turn will be used to spin up an existing AWS image (a so-called AMI) in the cloud. No Vagrant box is being uploaded to the cloud during the process.
Let us start:
Step 0: Set HTTP proxy, if needed
Note, that the Vagrant setup will not finish successfully in step 10.1, if your local machine does not have SSH access over the Internet to your AWS EC2 instance. If you are located behind a HTTP proxy, you will be able to start and terminate an AWS instance via Vagrant, but Vagrant will hang infinitely and you will not be able to provision the AWS instance.
If you have no other chance and you are located behind a HTTP proxy, and you want to test how to start and terminate an AWS instance only, you can run following commands before trying to install and use Vagrant:
On *nix systems:
export http_proxy='http://myproxy.dns.name:8080'
export https_proxy='http://myproxy.dns.name:8080'
On Windows:
set http_proxy='http://myproxy.dns.name:8080'
set https_proxy='http://myproxy.dns.name:8080'
Replace myproxy.dns.name and 8080 by the IP address or DNS name and port owned by the HTTP proxy in your environment.
Step 1: It is best, if you have direct Internet access (behind a firewall, but without any HTTP proxy). Install Vagrant on your local machine. The installation procedure depends on your operating system and is described here.
Step 2: Install the Vagrant AWS plugin
vagrant plugin install vagrant-aws
Step 3: download the dummy Vagrant box
Vagrant boxes need to be built for the provider you use. Most Vagrant boxes do not support the provider AWS. The easiest way to work around this issue is to load a dummy box that supports the AWS provider and to override the image that is spin up in the Cloud by using an override command in the Vagrantfile. There, you will point to one of the available Amazon images (called AMIs) on AWS EC2. But for now, let us download the dummy Vagrant box
vagrant box add dummy https://github.com/mitchellh/vagrant-aws/raw/master/dummy.box
Step 4: Create a directory and within the directory, issue the command
vagrant init
This will create a template Vagrantfile in the directory.
Step 5: Adapt the Vagrantfile
Step 5.1: Add following lines into the Vagrantfile that has just been created:
# Vagrantfile
Vagrant.configure(2) do |config|
 config.vm.provider :aws do |aws, override|
   aws.access_key_id = ENV['AWS_KEY']
   aws.secret_access_key = ENV['AWS_SECRET']
   aws.keypair_name = ENV['AWS_KEYNAME']
   aws.ami = "ami-a7fdfee2"
   aws.region = "us-west-1"
   aws.instance_type = "t2.micro"

   override.vm.box = "dummy"
   override.ssh.username = "ubuntu"
   override.ssh.private_key_path = ENV['AWS_KEYPATH']
 end
Step 5.2: Note that you need to adapt the aws.region to the region you have signed in. See here a list of regions AWS offers. In my case, this was:
aws.region = "eu-central-1"
Step 5.3: In addition, you will need to update the aws.ami value to the one you have seen in the EC2 console when choosing the image after pressing the Lauch Instance button. In my case, this was
aws.ami = "ami-87564feb"
Step 6: Define the AWS credentials
Step 6.1: Create a file called ‚aws-credentials‘ with following content:
export AWS_KEY='your-key'
export AWS_SECRET='your-secret'
export AWS_KEYNAME='your-keyname'
export AWS_KEYPATH='your-keypath'
Step 6.2: Find the AWS Key ID and Secret Access Key
On the users tab of the IAM console, click the create new users button and create a user of your choice. You will automatically be displayed the ‚Access Key ID‘ and the ‚Secret Access Key‘. In the file above, replace 'your-key' and 'your-secret' by those values.
Step 6.3: Add SSH Key pair name and SSH Key path
On the EC2 console -> Network Securit-> Key Pairs, create and download a new SSH key. You will be prompted for a SSH Key name and the download path. In the ‚aws-credentials‘, replace 'your-keyname' and 'your-keypath' by those values.
Step 7: Add a user and apply the appropriate permissions
This step is not described in the Quick Start guides I have come across and this has caused some errors I will show in the Appendix as a reference. In order to avoid running into the errors, do the following:
Step 7.1: Create a new user on the AWS IAM Users page , if not already done.
Step 7.2: Assign the needed access rights to the user like follows:
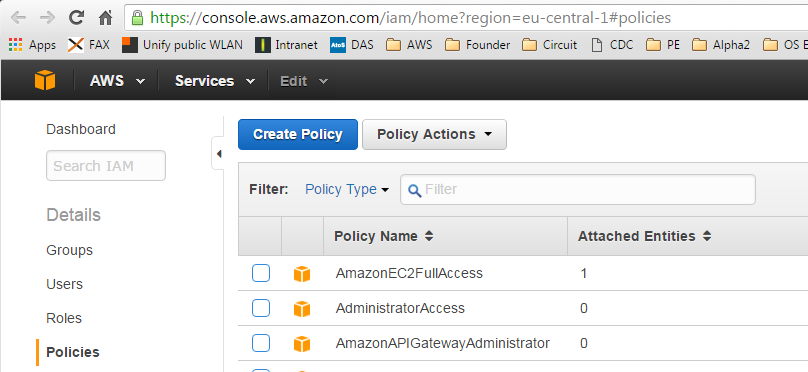
Adapt and goto the AWS IAM Link https://console.aws.amazon.com/iam/home?region=eu-central-1#policies. The link needs to be adapted to your region; e.g. change eu-central-1 by the right one from the region list that applies to your account.
Click the „Get Started“ button, if the list of policies is not visible already. After that, you should see the list of policies and a filter field:
In the Filter field, search for the term AmazonEC2FullAccess.
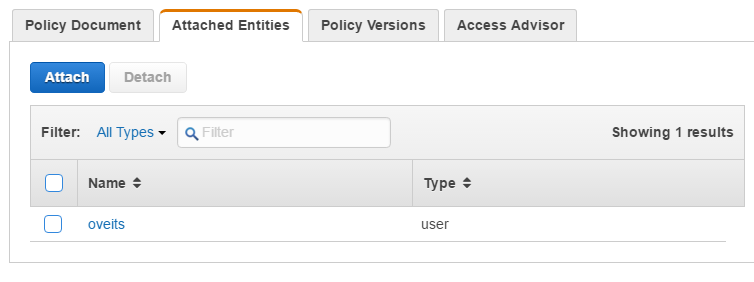
Click on the AmazonEC2FullAccess Policy Name and then choose the tab Attached Identities.
Click the Attach button and attach the main user (in the screenshot above, my main user „oveits“ is already attached; in your case, the list will be empty, most likely).
Step 8: Write credentials into Environment variables
In step 6, we have created and edited a file called aws-credentials. Now is the time to write the values into the environment variables by issuing the command
source aws-credentials
Step 9: Create and spin up the virtual machine on AWS
Note: if you get a nokogiri/nokogiri LoadError at this step, see the Appendix below.
Now we should have prepared everything that we can create and spin up a virtual machine with a single command:
$vagrant up --provider=aws
Bringing machine 'default' up with 'aws' provider...
==> default: Warning! The AWS provider doesn't support any of the Vagrant
==> default: high-level network configurations (`config.vm.network`). They
==> default: will be silently ignored.
==> default: Launching an instance with the following settings...
==> default: -- Type: t2.micro
==> default: -- AMI: ami-87564feb
==> default: -- Region: eu-central-1
==> default: -- Keypair: AWS_SSH_Key
==> default: -- Block Device Mapping: []
==> default: -- Terminate On Shutdown: false
==> default: -- Monitoring: false
==> default: -- EBS optimized: false
==> default: -- Source Destination check:
==> default: -- Assigning a public IP address in a VPC: false
==> default: -- VPC tenancy specification: default
==> default: Waiting for instance to become "ready"...
==> default: Waiting for SSH to become available...
Note: the console might hang at this state for a long time (e.g. 20 minutes). Do not send a Ctrl-C to the terminal in this case, since this will terminate the instance again. Note that opening a new terminal does not help, since Vagrant does not allow to send a new command as long as the vagrant up has not finished. If it takes longer than 20 minutes, then check, whether your local machine has SSH access to the Internet.
If you have checked that you have general SSH access to the Internet, but the Vagrant console hangs at the „Waiting for SSH“ state, do not worry yet: we will update the security setting of the AWS instance in step 10.1 below, before Vagrant can detect that the instance is available. For now, we will ignore the hanging Vagrant console. Instead, we will go to the EC2 console. There, you will see that we already have created an instance already (‚0 Running Instances‘ is replaced by ‚1 Running Instances‘):

Even though the ‚vagrant up‘ command might be still hanging in the ‚Waiting for SSH‘ status, the instance is up and running. After clicking on the „1 Running Instances“ link we will see something like:

Step 10: Access the virtual machine via SSH:
Step 10.1: Updating the security group
In this step, we will adapt the security group manually in order to allow SSH access to the instance. Note that in Appendix B, we show how this step can be automated with a shell script. But now, let us perform the step manually.
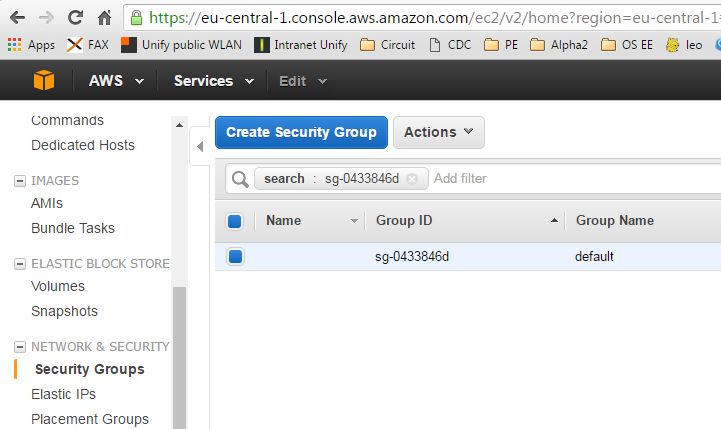
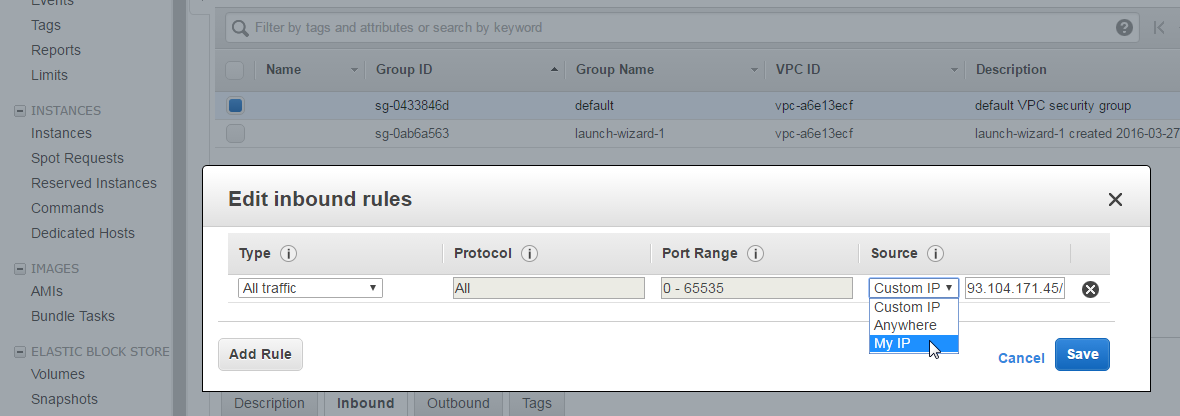
In the EC2 console, under Network&Security -> Security Groups (in my case in EU Central 1: https://eu-central-1.console.aws.amazon.com/ec2/v2/home?region=eu-central-1#SecurityGroups:sort=groupId), we can find the default security group. We need to edit the inbound rule to allow the current source IP address. For that, select the policy group, click on the „Inbound“ tab on the bottom, specify „My IP“ as source and save the policy:
Now check in the console, where you had performed the ‚vagrant up‘ command. The command should have finished by now. If the Vagrant console is still hanging, now is the right time to get worried. 😉
In this case, please also check out the note in Step 0.
$vagrant up --provider=aws

Bringing machine 'default' up with 'aws' provider...
...
==> default: Machine is booted and ready for use!
No host IP was given to the Vagrant core NFS helper. This is an internal error that should be reported as a bug.
For now, we can savely ignore the NFS bug, since we do not need NFS yet…
Step 10.2: Connect via SSH
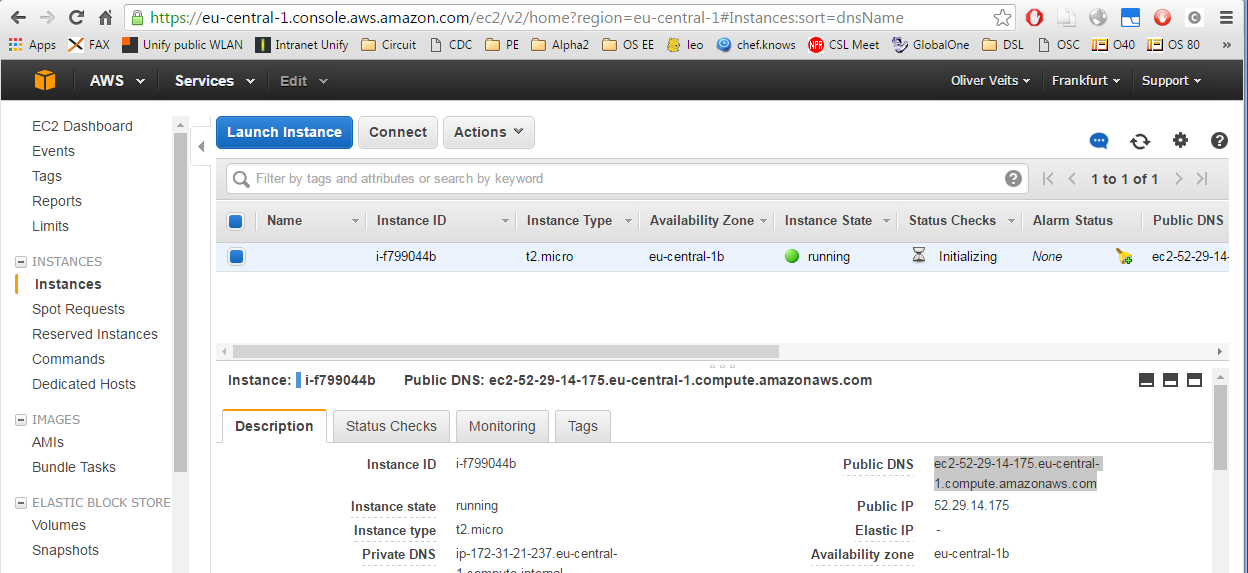
Now you can SSH into the machine. You need to specify the username=ubuntu, the IP address or FQDN of the machine and the SSH key path we have created in step 6.3. The IP address or FQDN can be read on the EC2 console Instances Description tab:
Note the IP address and the Public DNS will change every time the image is started.
Step 10.2 a) Connection via Vagrant
This is the simplest way to connect to your image: on the console of your local machine, just type
vagrant ssh
and you will be in, as long as the security policy permits this.
$vagrant ssh
Welcome to Ubuntu 14.04.3 LTS (GNU/Linux 3.13.0-74-generic x86_64)

 * Documentation: https://help.ubuntu.com/

 System information as of Fri Apr 1 20:47:44 UTC 2016

 System load: 0.0 Processes: 99
 Usage of /: 10.0% of 7.74GB Users logged in: 1
 Memory usage: 6% IP address for eth0: 172.31.21.237
 Swap usage: 0%

 Graph this data and manage this system at:
 https://landscape.canonical.com/

 Get cloud support with Ubuntu Advantage Cloud Guest:
 http://www.ubuntu.com/business/services/cloud

0 packages can be updated.
0 updates are security updates.


Last login: Fri Apr 1 20:47:45 2016 from ppp-93-104-168-193.dynamic.mnet-online.de
ubuntu@ip-172-31-21-237:~$
Note that vagrant ssh does not play well with editors like vim on a Windows command shell. See below Step 10.2 c), how to use putty instead.
Step 10.2. b) Connection via a *nix operating client
Alternatively, on a *nix machine or on a bash shell on Windows, you can connect via the *nix built-in SSH client. The following command line connection worked for me on a bash shell on my Windows machine. Replace the path to the private PEM file and the public DNS name, so that it works for you as well:
$ssh ubuntu@ec2-52-29-14-175.eu-central-1.compute.amazonaws.com -i /g/veits/PC/PKI/AWS/AWS_SSH_Key.pem
The authenticity of host 'ec2-52-29-14-175.eu-central-1.compute.amazonaws.com (52.29.14.175)' can't be established.
ECDSA key fingerprint is e2:34:6c:92:e6:5d:73:b0:95:cc:1f:b7:43:bb:54:39.
Are you sure you want to continue connecting (yes/no)? yes
Warning: Permanently added 'ec2-52-29-14-175.eu-central-1.compute.amazonaws.com,52.29.14.175' (ECDSA) to the list of known hosts.
Welcome to Ubuntu 14.04.3 LTS (GNU/Linux 3.13.0-74-generic x86_64)

 * Documentation:  https://help.ubuntu.com/

  System information as of Fri Apr  1 20:38:25 UTC 2016

  System load:  0.08              Processes:           98
  Usage of /:   10.0% of 7.74GB   Users logged in:     0
  Memory usage: 6%                IP address for eth0: 172.31.21.237
  Swap usage:   0%

  Graph this data and manage this system at:
    https://landscape.canonical.com/

  Get cloud support with Ubuntu Advantage Cloud Guest:
    http://www.ubuntu.com/business/services/cloud

0 packages can be updated.
0 updates are security updates.
ubuntu@ip-172-31-21-237:~$
Step 10.2 c) Alternatively, perform a SSH Connection via putty on Windows:
Since I am using a Windows machine and the formatting of a ssh session in a CMD console using ‚vagrant ssh‘ does not work well (especially, if you try to use vim), I prefer to use putty on Windows.
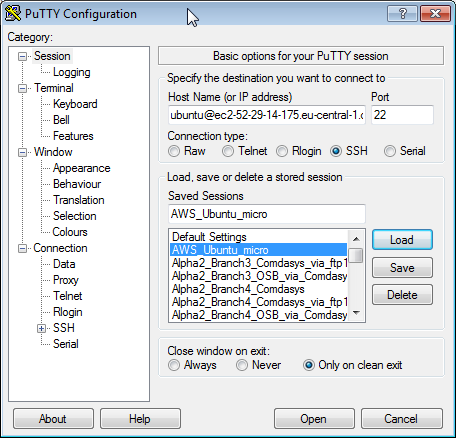
In putty, add the host ubuntu@<public DNS>:
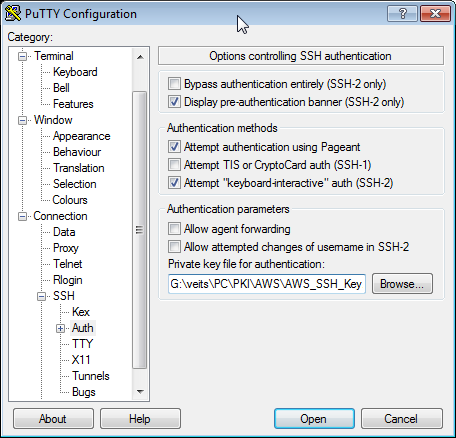
and add the path to the private key file on Connection->SSH->Auth->Private key file for authentication:
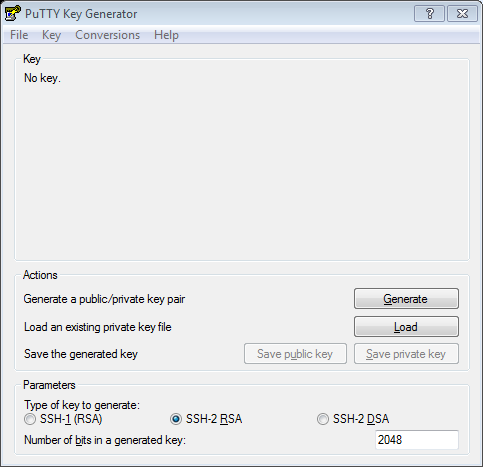
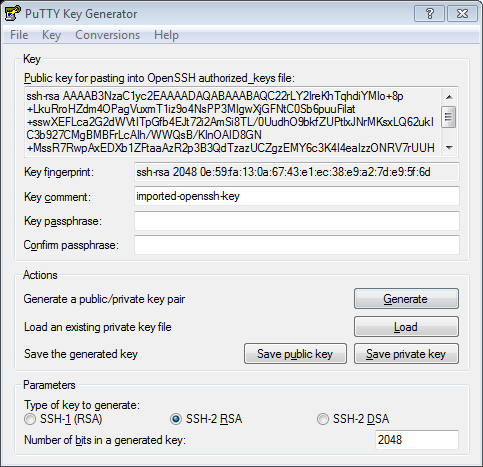
Note that the pem file needs to be converted to a ppk format putty understands. For that, import the pem file using Putty Key Generator (puttygen) via Conversions->Import Key->choose pem file -> Save private key with ppk extension.
Now add the path to the ppk file to Connection->SSH->Auth->Private key file for authentication: in the putty client, press the „yes“ button, and we are logged in:
Step 11: Destroy the Instance on AWS
In order to save money (or trial workhours in our case), let us destroy the image again by using Vagrant:
$vagrant destroy
 default: Are you sure you want to destroy the 'default' VM? [y/N] y
==> default: Terminating the instance...
That was very quick (less than a second) and we see that the image is shutting down:

Within 2-3 minutes we see, that the machine is terminated and I have learned from googling around that the image will be deleted in the next 10 to 15 minutes.

In the terminated and/or deleted status, the instance does not create any cost and I can go to bed.
Appendix A: Installing the AWS CLI
The AWS CLI local installation has helped me with troubleshooting the issues I had during the setup. If you need the AWS CLI, you can see here how to install it.
After that, you need to add the credentials like follows:
$ aws configure
AWS Access Key ID [****************FJMQ]:
AWS Secret Access Key [****************DVVn]:
Default region name [eu-central-1a]: eu-central-1
Default output format [None]:
The following command had helped me to find out I had a wrong region in the Vagrantfile:
$ aws ec2 describe-key-pairs --key-name AWS_SSH_Key
 A client error (UnauthorizedOperation) occurred when calling the DescribeKeyPairs operation: You are not authorized to perform this operation.
Appendix B: Automate the Security Rule Update
Above, we have shown that you either
- need to allow all SSH traffic from anywhere or
- to update the rules to only allow your current source IP address in the WAS EC2 console every time your source IP address changes (once a day in most home networks).
Option 1. is insecure and option 2. is cumbersome. In this appendix, we will show, how option 2. can be automated. Here is a step by step guide:
Step B.1: Install AWS CLI
For that, follow the instructions in Appendix A: install the AWS CLI and add the keys
Step B.2: Verify the AWS user rights
Make sure the AWS user has the needed rights/permissions. rights. For that, follow the instructions in Step 7 of the main document and add AmazonEC2FullAccess for the main user, if not already done.
Step B.3: Test that you can see the security policies
In order to be quicker, you also can skip step B.3 to B.5 and jump directly to B.6 for creating shell scripts that add and remove security rules. However, steps B.3 to B.5 help you understand, what we are doing in the scripts and help verifying that each single command is successful.
On the local command line, perform the command
aws ec2 describe-security-groups
A long answer that starts like follows should be seen:
{
    "SecurityGroups": [
        {
            "IpPermissionsEgress": [
                    ...(egress rules)...
            ],
            "Description": "default VPC security group",
            "IpPermissions": [
                    ...(ingress rules)...
            ],
"GroupName": "default",
"VpcId": "vpc-a6e13ecf",
"OwnerId": "923026411698",
"GroupId": "sg-0433846d"
},
...(other security groups)...
}Step B.4: Test how to add and remove a new ingress rule
Now we can add a new ingress rule, see also the AWS doc on this topic. First we will simulate the add by specifying the –dry-run option:
$aws ec2 authorize-security-group-ingress --dry-run --group-id sg-0433846d --ip-permissions '[{"IpProtocol": "tcp", "FromPort": 22, "ToPort": 22, "IpRanges": [{"CidrIp": "11.22.33.44/32"}]}]'

A client error (DryRunOperation) occurred when calling the AuthorizeSecurityGroupEgress operation: Request would have succeeded, but DryRun flag is set.
This was the right answer. Note that you will need to use your own –group-id as shown in the output of the default security rule above. The IP address does not matter in the moment, since we are testing the API only for now.
Now we run the command again without –dry-run:
aws ec2 authorize-security-group-ingress --group-id sg-0433846d --ip-permissions '[{"IpProtocol": "tcp", "FromPort": 22, "ToPort": 22, "IpRanges": [{"CidrIp": "11.22.33.44/32"}]}]'If everything works right, there will be no response and you will reach the prompt again. You can use the aws ec2 describe-security-groups command again in order to check that a new ingress rule has been added.
Now we will test that the rule is removed again by issuing the command
aws ec2 revoke-security-group-ingress --group-id sg-0433846d --ip-permissions '[{"IpProtocol": "tcp", "FromPort": 22, "ToPort": 22, "IpRanges": [{"CidrIp": "11.22.33.44/32"}]}]'I.e., we just need to replace „authorize“ by „revoke“. You can use the aws ec2 describe-security-groups command again in order to check that a new ingress rule has been removed.
Step B.5: Find your public IP address
This step will work only on a Linux shell (also a bash shell on Windows will work, though).
You could log into your home network’s NAT router in order to find you own Internet IP address. However, there is a more clever way to find the Internet public IP address, as shown in this link): just ask one of the Internet services http://ipinfo.io/ip or http://checkip.dyndns.org. Those can also be tested in an Internet browser. The ipinfo.io service has proven to respond much faster than the checkip service. Let us concentrate on the ipinfo service.
Using a bash shell, and assuming that curl or wget is intalled we will write the current public Internet IP address to a variable via one of the following commands:
currentIP=`wget http://ipinfo.io/ip -qO -`
# or equivalent:
currentIP=`curl -s http://ipinfo.io/ip`
In the following step, we will use the the wget version in the shell scripts.
Step B.6: Put it all together
Step B.6.1: Create a shell script that will add the right rule
Now let us create a file named addSecurityRule.sh with following content:
#!/bin/bash
# addSecurityRule.sh
[ -r lastIP ] && [ -r removeSecurityRule.sh ] && ./removeSecurityRule.sh
currentIP=`wget http://ipinfo.io/ip -qO -`
aws ec2 authorize-security-group-ingress --group-id sg-0433846d --ip-permissions "[{\"IpProtocol\": \"tcp\", \"FromPort\": 22, \"ToPort\": 22, \"IpRanges\": [{\"CidrIp\": \"$currentIP/32\"}]}]" && echo $currentIP > lastIP
The line with removeSecurityRule.sh will remove a security rule, before creating a new one, if applicable. The currentIP line will detect the current public IP address as seen from the Internet (with courtesy of this link). Finally, the aws ec2 line will add the current public IP address to the ones who are allowed to access the instances via SSH.
Step B.6.2: Create a shell script that will remove the rule
The following script named „removeSecurityRule.sh“ will remove the security rule again. Note that this step is important, since a security group supports only up to 50 rules, and we need to clean the security group again, after a rule is not needed anymore.
#!/bin/bash
# removeSecurityRule.sh
if [ -r lastIP ]; then
 currentIP=`cat lastIP`
 aws ec2 revoke-security-group-ingress --group-id sg-0433846d --ip-permissions "[{\"IpProtocol\": \"tcp\", \"FromPort\": 22, \"ToPort\": 22, \"IpRanges\": [{\"CidrIp\": \"$currentIP/32\"}]}]" && echo $currentIP > lastIP
else
 echo "$0: no file named lastIP found!"
 exit 1
fi
Now, with those scripts available, we just need to issue a command
./addSecurityRule.sh
before issuing the other commands
source aws-credentials
vagrant up
Appendix C: Troubleshooting Steps / Errors
Because the other quick guides were missing some steps, I was running in two errors:
C.1 Wrong region leading to: „The key pair ‚AWS_SSH_Key‘ does not exist“
$vagrant up --provider=aws
Bringing machine 'default' up with 'aws' provider...
==> default: Warning! The AWS provider doesn't support any of the Vagrant
==> default: high-level network configurations (`config.vm.network`). They
==> default: will be silently ignored.
==> default: Launching an instance with the following settings...
==> default: -- Type: t2.micro
==> default: -- AMI: ami-a7fdfee2
==> default: -- Region: us-west-1
==> default: -- Keypair: AWS_SSH_Key
==> default: -- Block Device Mapping: []
==> default: -- Terminate On Shutdown: false
==> default: -- Monitoring: false
==> default: -- EBS optimized: false
==> default: -- Source Destination check:
==> default: -- Assigning a public IP address in a VPC: false
==> default: -- VPC tenancy specification: default
C:/Users/vo062111/.vagrant.d/gems/gems/excon-0.49.0/lib/excon/middlewares/expects.rb:6:in `response_call': The key pair 'AWS_SSH_Key' does not exist (Fog::Compute::AWS::NotFound)
 from C:/Users/vo062111/.vagrant.d/gems/gems/excon-0.49.0/lib/excon/middlewares/response_parser.rb:8:in `response_call'
 from C:/Users/vo062111/.vagrant.d/gems/gems/excon-0.49.0/lib/excon/connection.rb:389:in `response'
 from C:/Users/vo062111/.vagrant.d/gems/gems/excon-0.49.0/lib/excon/connection.rb:253:in `request'
 from C:/Users/vo062111/.vagrant.d/gems/gems/fog-xml-0.1.2/lib/fog/xml/sax_parser_connection.rb:35:in `request'
 from C:/Users/vo062111/.vagrant.d/gems/gems/fog-xml-0.1.2/lib/fog/xml/connection.rb:7:in `request'
 from C:/Users/vo062111/.vagrant.d/gems/gems/fog-aws-0.9.2/lib/fog/aws/compute.rb:525:in `_request'
 from C:/Users/vo062111/.vagrant.d/gems/gems/fog-aws-0.9.2/lib/fog/aws/compute.rb:520:in `request'
 ...
This was, because I had the wrong region configured in the Vagrant file. I have changed this to
aws.region = "eu-central-1"
In addition, the AMI was wrong. In the EC2 console, I find after pressing Launch Instance:

Therefore I have changed the AMI to
aws.ami = "ami-87564feb"
Then again:
$vagrant up --provider=aws
Bringing machine 'default' up with 'aws' provider...
==> default: Warning! The AWS provider doesn't support any of the Vagrant
==> default: high-level network configurations (`config.vm.network`). They
==> default: will be silently ignored.
==> default: Launching an instance with the following settings...
==> default: -- Type: t2.micro
==> default: -- AMI: ami-87564feb
==> default: -- Region: eu-central-1
==> default: -- Keypair: AWS_SSH_Key
==> default: -- Block Device Mapping: []
==> default: -- Terminate On Shutdown: false
==> default: -- Monitoring: false
==> default: -- EBS optimized: false
==> default: -- Source Destination check:
==> default: -- Assigning a public IP address in a VPC: false
==> default: -- VPC tenancy specification: default
There was an error talking to AWS. The error message is shown
below:

UnauthorizedOperation => You are not authorized to perform this operation. Encoded authorization failure message: txYvhypUYdsHX-FIv1N2GGtnAMcIKBbjGrG9PHmCIhG33l8IMxmEhc0W4NuS_ST-5U
Wb-ApATEe56XxQWB2xVu289LKRrT08FhXZHziH_QLGgPb-THBTn0lonbRcsLtkGZurjMzflVYbddqiM34XI0x4aR_VqHWAKLIl3p4Kk3A2Oovu_u4tLT-qYBZ0lovD0bvFH8geve4gpvNI63SSyyWbfBvMI5sQ7SOQ_3E_sYMH8lJ2nhpSPI
OKpcC9fGOJ3EQZBJwlg-76UplZZdlJzGtGTl2XL8lc5OtdqeTNuqivMJbz-GxXH5p0XUvpdeNA-utYJPmWWiGubghz44n_NMuXk58W4p7hlrNDDMu3YGGqMBMKWUUUXAA6SM1o-nm2SNq-xqeZWWrvweRwGzEdBKYz-4jwdmUbSyC3F9rmGs
7vQFKe2lcz9yQwmKTlOfOBDxXsHke5wBu-ii1misYh_ljI0uTiuQc0PlR9IS6jy8A6Raavb3XTYwUlSrqbzefmprEiAkLlvKiCsdNQP8VNbCLtxKUhL3g
C.2 Missing Permissions leading to: „UnauthorizedOperation => You are not authorized to perform this operation“
Then I tried to attach the policy AmazonEC2FullAccess to the user oveits on https://console.aws.amazon.com/iam/home?region=eu-central-1#policies
Search for AmazonEC2FullAccess on the IAM policies link https://console.aws.amazon.com/iam/home?region=eu-central-1#policies (you need adapt the link to your region!)
Select and choose attach, then select the user you have created above.
Then I was trying again, and it worked as described in Step 9.
C.3 Error: „cannot load such file — nokogiri/nokogiri (LoadError)“
When I have tried to issue
vagrant up --provision
I have run into the error
C:/HashiCorp/Vagrant/embedded/gems/gems/nokogiri-1.6.3.1-x86-mingw32/lib/nokogiri.rb:29:in `require': cannot load such file -- nokogiri/nokogiri (LoadError)
 from C:/HashiCorp/Vagrant/embedded/gems/gems/nokogiri-1.6.3.1-x86-mingw32/lib/nokogiri.rb:29:in `rescue in <top (required)>'
 from C:/HashiCorp/Vagrant/embedded/gems/gems/nokogiri-1.6.3.1-x86-mingw32/lib/nokogiri.rb:25:in `<top (required)>'
 from D:/veits/Vagrant/.vagrant.d/gems/gems/fog-xml-0.1.2/lib/fog/xml.rb:2:in `require'
 from D:/veits/Vagrant/.vagrant.d/gems/gems/fog-xml-0.1.2/lib/fog/xml.rb:2:in `<top (required)>'
 from D:/veits/Vagrant/.vagrant.d/gems/gems/fog-1.38.0/lib/fog.rb:13:in `require'
 from D:/veits/Vagrant/.vagrant.d/gems/gems/fog-1.38.0/lib/fog.rb:13:in `<top (required)>'
...
I had this error after installing Vagrant 1.8.1 on a new Windows 10 machine. This error seems to be related with this Vagrant issue. After upgrading Vagrant to 1.8.6 by downloading the new version and installing it over the old 1.8.1 version, the problem was resolved.
C.4 Error: An access key ID must be specified via „access_key_id“
This and similar error messages will occur, if Step 6.1 was not accomplished before issuing ‚vagrant up“. This causes the environment variables AWS_KEY and AWS_SECRET etc. to be not defined.
C.5 No host IP was given to the Vagrant core NFS helper. This is an internal error that should be reported as a bug.
Seen after upgrading Vagrant to 1.8.6 and issuing the command ‚vagrant up –provider=aws‘. This error is reported here to be a bug of the aws plugin. As workaround, they discuss to add following override line to the Vagrantfile:
config.vm.provider :aws do |aws, override|
   ...
   override.nfs.functional = false
end
However, if you do so, you run into the next problem: „No synced folder implementation is available for your synced folders“.
Therefore, I have chosen to ignore the error message, since it does not prevent the instance to be launched successfully, as you can verify in the AWS console. If the security settings on AWS are correct, you also can connect to the instance succesfully via ‚vagrant ssh‘.
Summary
According to Gartner, Amazon Web Services (AWS) is the No. one service in public cloud IaaS space. Amazon is offering a „free tier“ test account for up to 12 months and up to 750 hrs of a t2.micro Linux instance as well as 750 hrs of a t2.micro Windows 2012 instance. For more details, check the free tier limits page. For services outside the free tier limits, check the AWS simple monthly (cost) calculator.
Per default, AWS is assigning a dynamic private and a dynamic public IP address. The public IP address will change every time you restart the instance.
Deleting an instance is done by „Terminating“ it. For 10 to 20 minutes, the terminated instance will still be visible in the instance dashboard as „Terminated“. The sense and non-sense of this is discussed in this forum post.
I have shown that Vagrant can be used as a means to automate the management of AWS images, including creation, starting and terminating the image. Each of those task will take only a single command on your local machine’s command line, once the first nine steps of this guide are accomplished.
Note that Vagrant is not uploading any Vagrant boxes, as those, who know Vagrant, might expect. Instead, it is only used as a user front end to create, spin up and terminate the existing AWS images (AMIs).
Next Steps (Brainstorming):
- Done: see Appendix B: Automate the Security Rule Update
learn how to automate the update of the security policy to only allow the current local IP. - Done: see Part 3: Provisioning (Installation of software) on an AWS Instance via Vagrant
- install a Docker host using scripts found on https://github.com/William-Yeh/docker-enabled-vagrant, my favorite Docker host in terms of performance (see performance comparison with CoreOS on this blog post).


That cleared up a few issues I was having with the process, thank you
This whole set of posts was incredibly useful to me. Thanks! I have written up my own guide to using Vagrant and EC2, and I thought you might want to take a look and perhaps link to it: https://sites.google.com/a/brianhagerty.com/webdev/development-platform/vagrant/vagrant-aws
If you have any comments, I welcome them. I link to and discuss your posts.
Hi Brian,
thanks a lot for telling me that the posts are useful. I see an ever-growing number of clicks, but I seldom get comments.
I have scanned through your article. Nice work!
My own blog post’s chapter Appendix C seems to be a little bit confusing, since it combines two independent errors into one chapter:
1) Error message „UnauthorizedOperation => You are not authorized to perform this operation“: this is caused be the the user not having the right permissions
2) Error message „The key pair ‚AWS_SSH_Key‘ does not exist“ or similar: can be caused by the key pair being defined in one region, but the Vagrantfile trying to create an instance in another region.
I think you have mixed up those two errors in your post, telling with respect to your „UnauthorizedOperation“ the following: „Oliver Veits likewise attributes similar errors to a wrong region and AMI“. This is not correct, I think. Can you please change that?
Have you had the chance to look at part 4 of the series? In that one, I am performing similar automation tasks using Terraform. In the moment I am working on a solution how to automatically create AWS virtual machine instances together with their own VPC, security rules, internet gateway etc.
Best Regards,
Oliver
Hi oveits,
I have some doubt on below step.
Step 6.1: Create a file called ‘aws-credentials’ with following content:
can you please share the path for this file.
I have created notepad file in path : C:\Users\ACER with name aws-credentials and content for the file is as follows
——————————————
aws-credential
export AWS_KEY=’AKIAJUW2H7TUGFMWJ2SQ‘
export AWS_SECRET=’40uzdJ4kkP1R4Iy4EcR2iZILqkh3XyHckPvVil9i‘
export AWS_KEYNAME=’guruom_new_key.pem‘
export AWS_KEYPATH=’C:\Users\ACER\Downloads‘
—————————————-
My Vagrant file is as follows
Vagrant.configure(„2“) do |config|
Vagrant.configure(„2“) do |config|
config.vm.provider :aws do |aws, override|
aws.access_key_id = ENV[‚AWS_KEY‘]
aws.secret_access_key = ENV[‚AWS_SECRET‘]
aws.keypair_name = ENV[‚AWS_KEYNAME‘]
aws.ami = „ami-c998b6b2“
aws.region = „us-east-1“
aws.instance_type = „t2.micro“
override.vm.box =“dummy“
override.ssh.username = „myuser“
override.ssh.private_key_path = ENV [‚AWS_KEYPATH‘]
end
end
end
Hi milind, what is the problem you have encountered? Any error message? Note, that the path to the credentials file is irrelevant. You just need to make sure you „source“ the credential file as shown in step 8, before you perform a „vagrant up“. This will work only on a Linux shell, e.g. Bash for Windows.
Note that you need to enter the AWS_KEYPATH in linux format. In my case, it starts with ‚/d/…‘ on git bash.
Best Regards, Oliver
Can you be more specific about the content of your article? After reading it, I still have some doubts. Hope you can help me.
Thank you for your sharing. I am worried that I lack creative ideas. It is your article that makes me full of hope. Thank you. But, I have a question, can you help me?
Your article helped me a lot, is there any more related content? Thanks!
Your article helped me a lot, is there any more related content? Thanks!