In this blog post, we will learn how to install a WordPress solution via Docker Compose. The solution consists of a MySQL container and a WordPress container. We will show, how to install Docker and Docker Compose. before we define the solution in a configuration file. Then we will show how to spin up and access the solution via a web browser. Finally, we will show how to shut down the WordPress solution.

In the course of this step-by-step tutorial, we will closely follow the instructions on https://docs.docker.com/compose/wordpress/.
Step 1: Install Docker
In our case, we have installed Docker on a CentOS system with 4 GB RAM and 2 shared vCPU on a Cloud system. We have installed docker on CentOS using the following script:
# install docker
yum check-update
curl -fsSL https://get.docker.com/ | sh
sudo usermod -aG docker $(whoami)
sudo systemctl start docker
sudo systemctl status docker
sudo systemctl enable docker

echo 'Docker should be installed now. Try with "sudo docker search hello".'
echo 'After logout and login again, "sudo" will not be needed anymore'
This was some months ago, and I have ended up with following docker version:
$ docker --version
Docker version 18.01.0-ce, build 03596f5
Step 2: Install Docker Compose
We are using CentOS. In this case, we could install Docker Compose as follows:
yum install -y epel-release
yum install -y docker-compose
Alternatively, you can install docker-compose on any Linux distro by:
- retrieving the latest docker-compose version on https://github.com/docker/compose/releases
- copying the right link (docker-compose-Linux-x86_64 for v1.23.1 in my case)
- and issue following commands (see https://docs.docker.com/compose/install/#install-compose for details):
sudo curl -L "https://github.com/docker/compose/releases/download/1.22.0/docker-compose-$(uname -s)-$(uname -m)-o /usr/local/bin/docker-compose
sudo chmod +x /usr/local/bin/docker-compose
The version can be checked as follows:
$ docker-compose version
docker-compose version 1.22.0, build f46880fe
docker-py version: 3.4.1
CPython version: 3.6.6
OpenSSL version: OpenSSL 1.1.0f  25 May 2017
Step 3: Edit a Docker Compose File
On the Docker host, we need to add a file named ‚docker-compose.yml‚ or ‚docker-compose.yaml‘.
Note, that the file name cannot be chosen freely. It must be either ‚docker-compose.yml‚ or ‚docker-compose.yaml‘.
The content of the file is as follows:
version: '3.3'

services:
   db:
     image: mysql:5.7
     volumes:
       - db_data:/var/lib/mysql
     restart: always
     environment:
       MYSQL_ROOT_PASSWORD: somewordpress
       MYSQL_DATABASE: wordpress
       MYSQL_USER: wordpress
       MYSQL_PASSWORD: wordpress

   wordpress:
     depends_on:
       - db
     image: wordpress:latest
     ports:
       - "8000:80"
     restart: always
     environment:
       WORDPRESS_DB_HOST: db:3306
       WORDPRESS_DB_USER: wordpress
       WORDPRESS_DB_PASSWORD: wordpress
volumes:
    db_data:
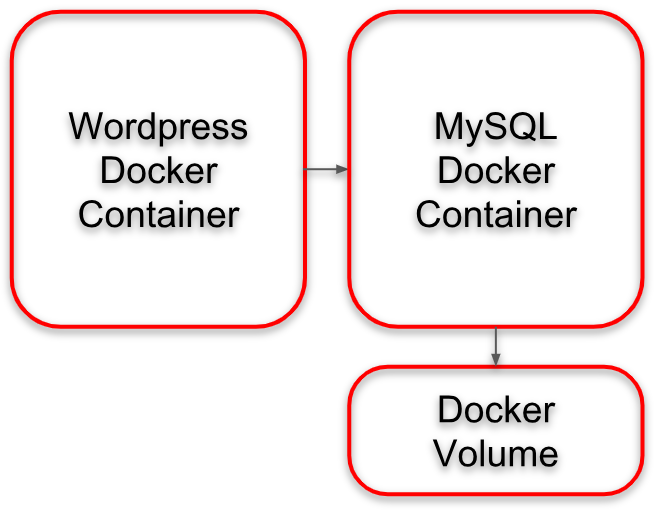
Here, we have defined two Docker containers: a WordPress container and a database container. The latter persists his data in a Docker volume:

Step 4: Spin up the WordPress Containers
Now is the time to start the WordPress installation: let us spin up the containers as follows:
docker-compose up -d
Step 5: Open the WordPress URL in a Browser
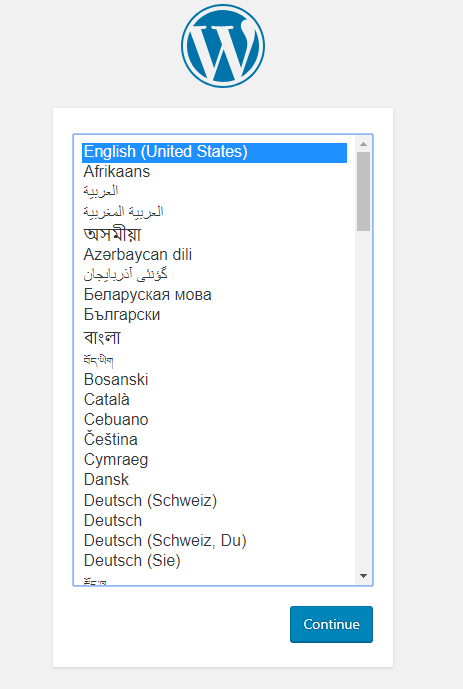
Now we can start the initial installation dialog by navigating to the Docker Host’s IP address or Domain name and port 8000, e.g. https://23.45.67.89:8000.
Note: Port 8000 is the port that had been chosen in the docker-compose.yml file above. This can be changed, as appropriately before spinning up the containers.#

(from https://docs.docker.com/compose/wordpress/#bring-up-wordpress-in-a-web-browser)

(from https://docs.docker.com/compose/wordpress/#bring-up-wordpress-in-a-web-browser)
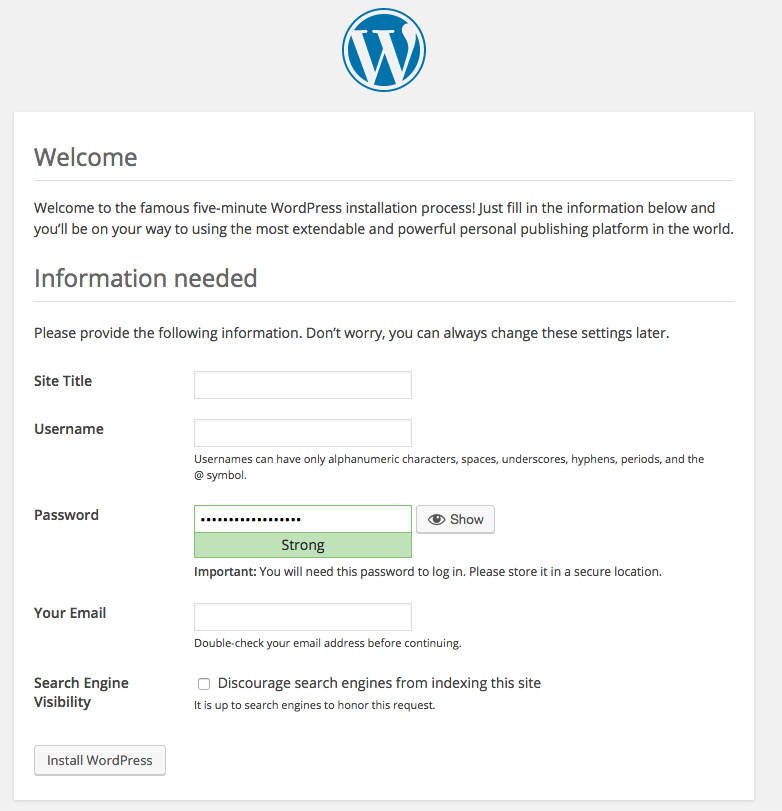
Do not forget to write down the password and username, so you can log in as administrator in the next step.
Step 6 (optional): Shut down the WordPress Containers
Finally, you also can shut down the WordPress containers as follows:
docker-compose down
This will preserve your installation and database.
Step 7 (optional): Clean the Database Volume
Instead of just stopping the containers, you also can clean up the database volume by adding the –volumes command-line option:
docker-compose down --volumes
Your article helped me a lot, is there any more related content? Thanks!
Thanks for shening. I read many of your blog posts, cool, your blog is very good. https://www.binance.com/register?ref=P9L9FQKY