IntelliJ Cloud Desktop by vocon IT GmbH is available as a free beta version on https://intellij-frontend.vocon-it.com/. Just register via GitHub or Google, and you are ready to start coding on IntelliJ Cloud Desktop in less than a minute.
NEW (2021-11-26): The hard session time limit of 30 minutes have been replaced by an idle timeout of 30 minutes: while you are actively working, your session will be kept up and running for up to 24 hours.
After a session has been paused, you can re-start your session as often as needed.
Your data on the disk is persisted between sessions. Just click the IntelliJ icon, and you can start off, where you have left your work.
Hints:
Datacenter is located in Europe, currently. Expect high latency if you access the service from outside of Europe!
Note: In case you choose to register via Email address, you will be asked to confirm your Email address before you get full access.
Connect to IntelliJ Cloud Desktop
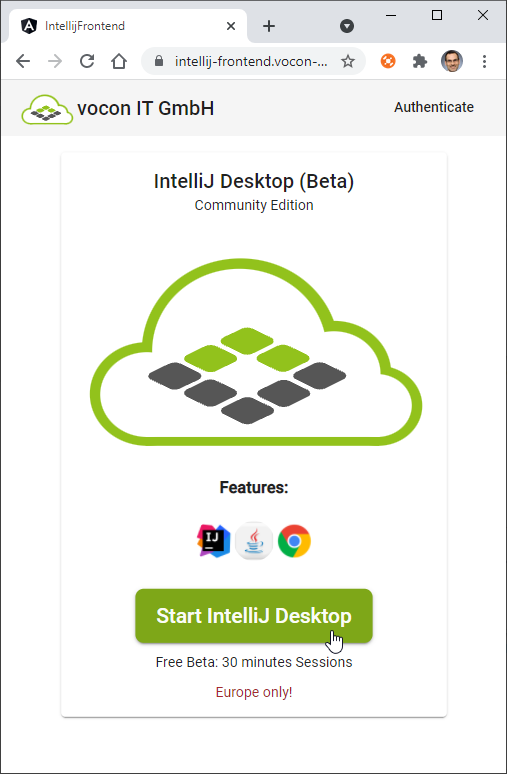
It is as simple as this: go to https://intellij-frontend.vocon-it.com/ and you will find following screen:
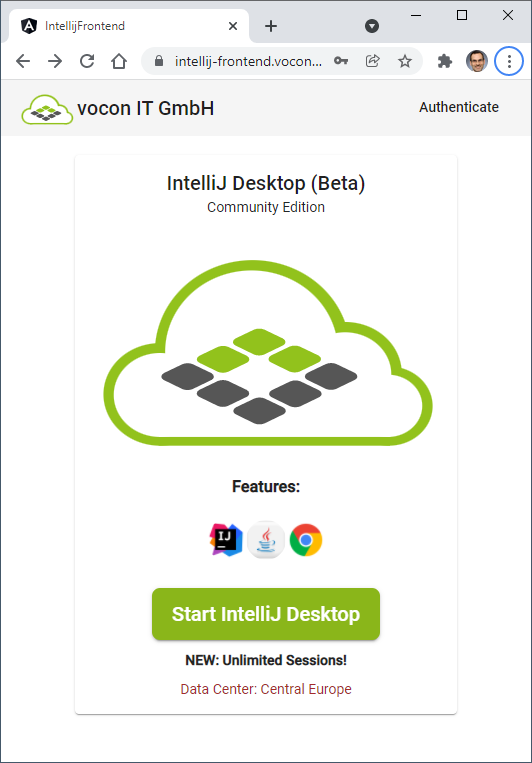
Now click on the Start IntelliJ Desktop button to enter the registration dialog.
Alternative A: Social Login via GitHub or Google (recommended)
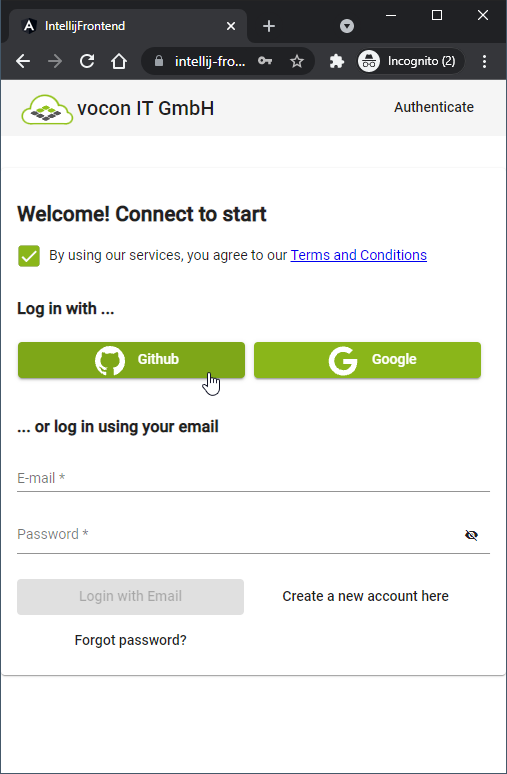
Confirm the Terms and Conditions and the GitHub and Google register buttons will turn active. Click on either one and enter your login credentials of your provider:

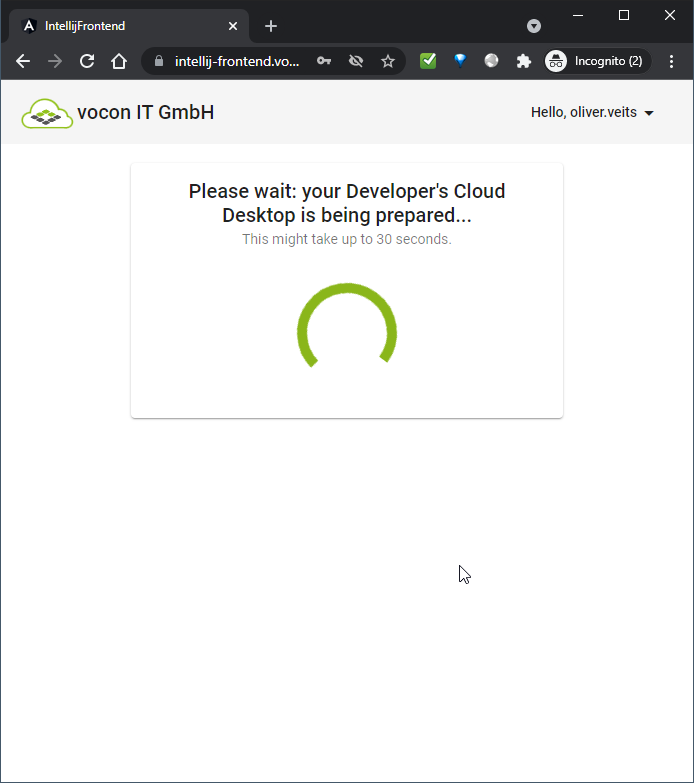
Upon successful registration, you will be redirected immediately to your personal IntelliJ Cloud Desktop. Usually, this will take no longer than 30 sec.
Alternative B: Email Registration (requires Email Verification)
In case you prefer Email registration, you need to click on Create a new account here, add your Email address and desired password and press the Register button:
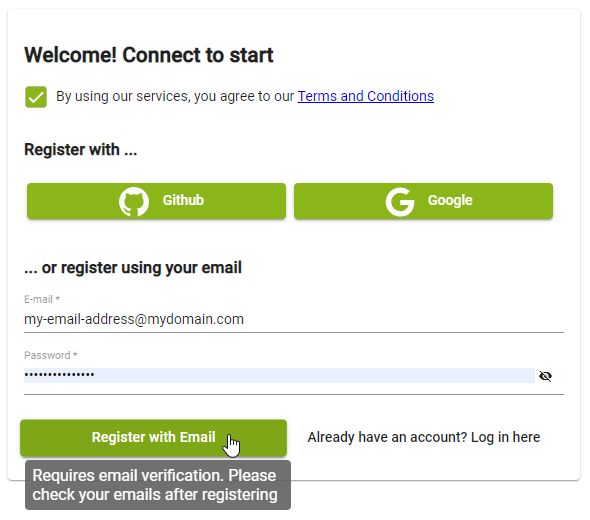
The system will inform you that the Email address needs to be verified first:
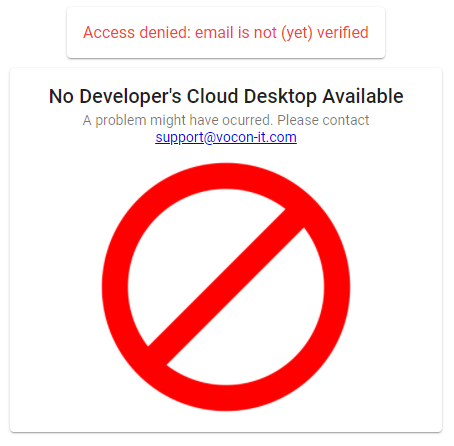
Check your emails and look for a registration email. Once you have clicked the registration link, press the back button of your browser or enter the link https://intellij-frontend.vocon-it.com/ again.
Now login with your email again and you will be forwarded to the IntelliJ Cloud Desktop within 30 seconds:
Getting started with IntelliJ Cloud Desktop
Here you are: your first contact with the IntelliJ Cloud Desktop. A chrome window will provide some information about IntelliJ Cloud Desktop. You can minimize or close the window now.

Configure the Display Resolution
The first time you connect to IntelliJ Cloud Desktop, a Display Settings Panel opens automatically. Choose the settings that are appropriate to your situation. E.g. in case you are using a Full HD Display and if you want to use IntelliJ Cloud Desktop in full display mode, keep the default setting and press the Close button.
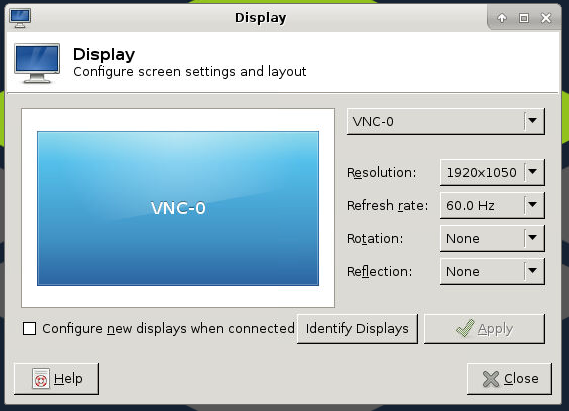
Otherwise, choose a resolution that works for you from the Resolution drop down list. The change will be effective immediately.
Note: You can change the display resolution any time by double-clicking the display icon on the desktop. This will re-open the Display Setting Panel:

Starting Coding in IntelliJ IDEA (Community Edition)
To start IntelliJ, double-click the corresponding desktop icon:

IntelliJ first Time Setup
The first time, IntelliJ is started, you need to answer a few questions:
- Confirm to have read and accept the user agreement
- Data sharing (send or do not send anonymous usage statistics)
The system will remember your choices, so you will not be asked again.

Search for and clone a GIT Repository
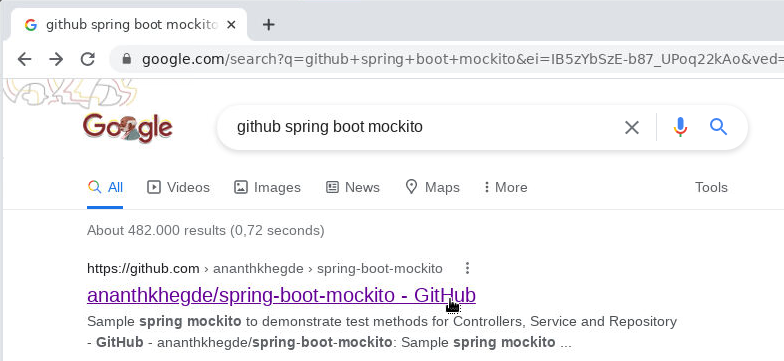
We can start coding by opening a chrome browser within IntelliJ Cloud Desktop, searching for a github spring boot mockito example:
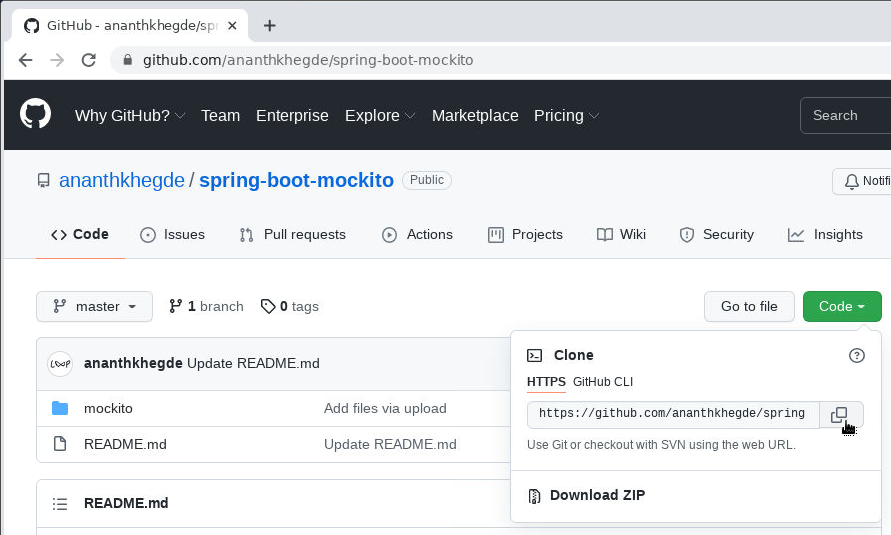
We copy the GitHub URL via Code -> Clone:
And we paste it to IntelliJ after having clicked „Get from VCS“:


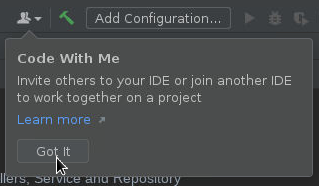
The first time you start IntelliJ, you are informed about the latest „Code with Me“ feature. We just click „Got it“ for now:
Prepare the Maven Project for first use
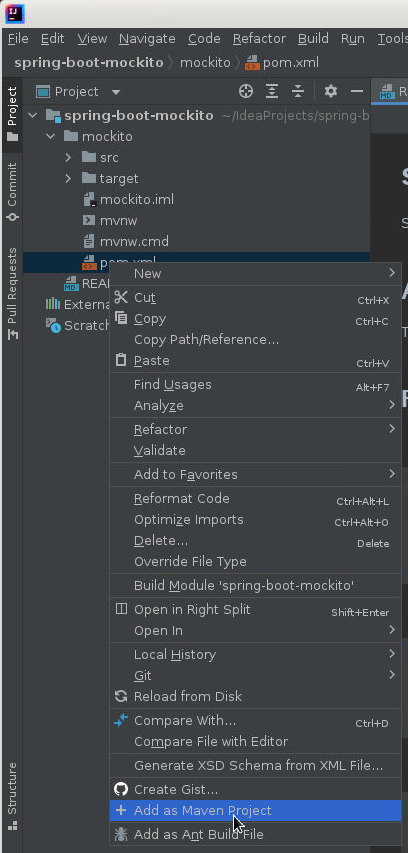
We navigate to the POM file on spring-boot-mockito/mockito/pom.xml. With a right-click, we find the instruction „+ Add as a Maven Project“:
We need to trust the project for running maven commands:

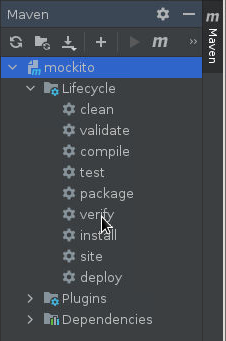
On the right-hand side of the IntelliJ window, we now open the newly displayed Maven panel:

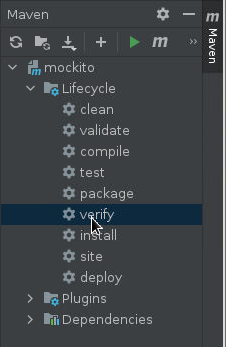
Let us try to run the tests with mvn test or mvn verify:
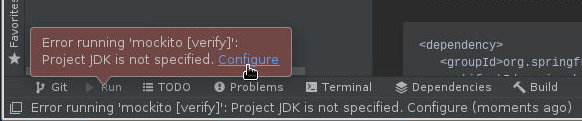
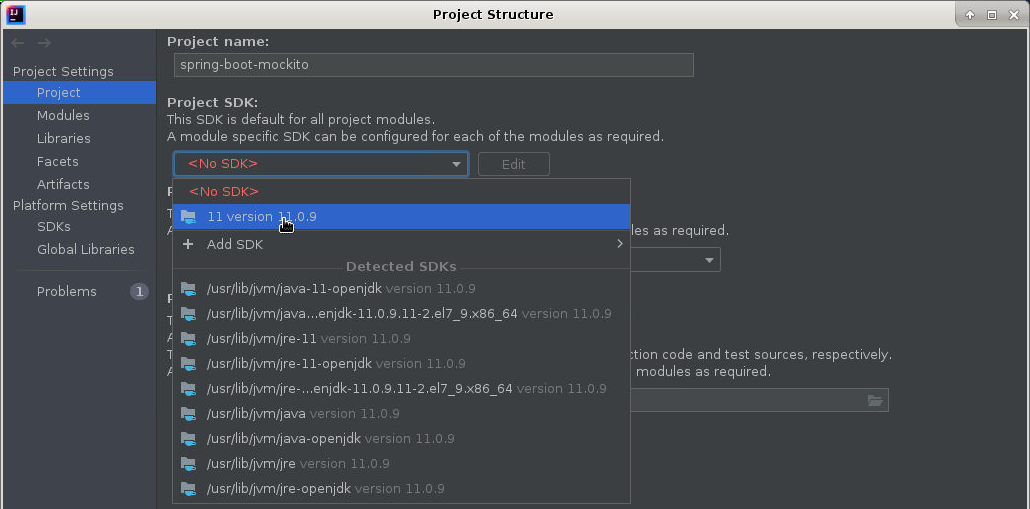
Instead of starting the tests, IntelliJ informs us with a pop-up on the lower left side that the project JDK is not yet specified. Let us do so by clicking the Configure link:
In the drop-down showing „<no SDK>“, we choose the only installed version JDK 11:
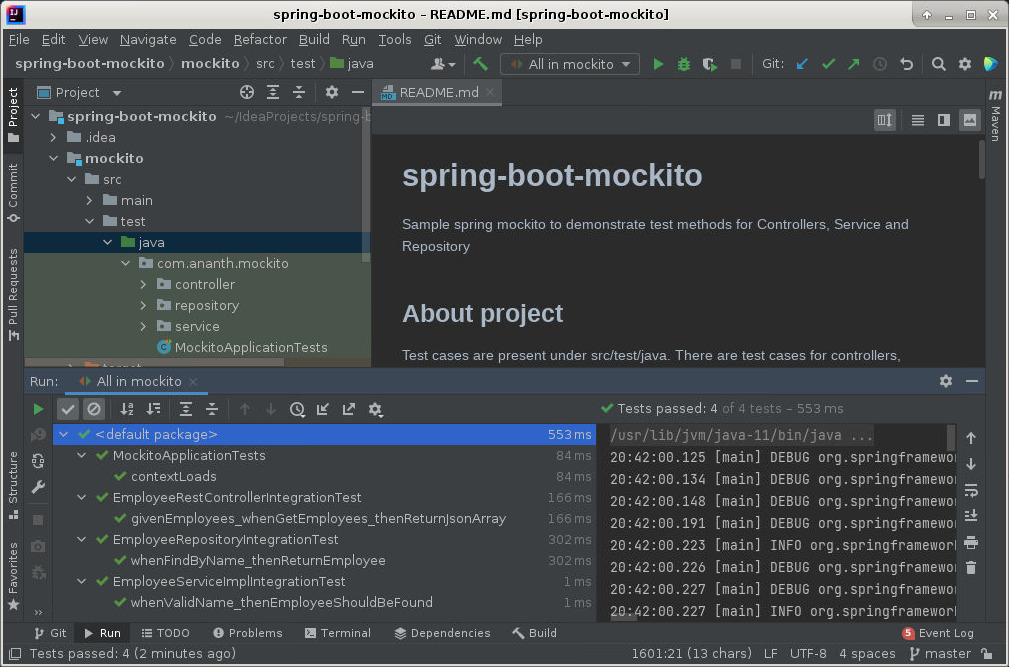
Run the Project’s Unit Tests
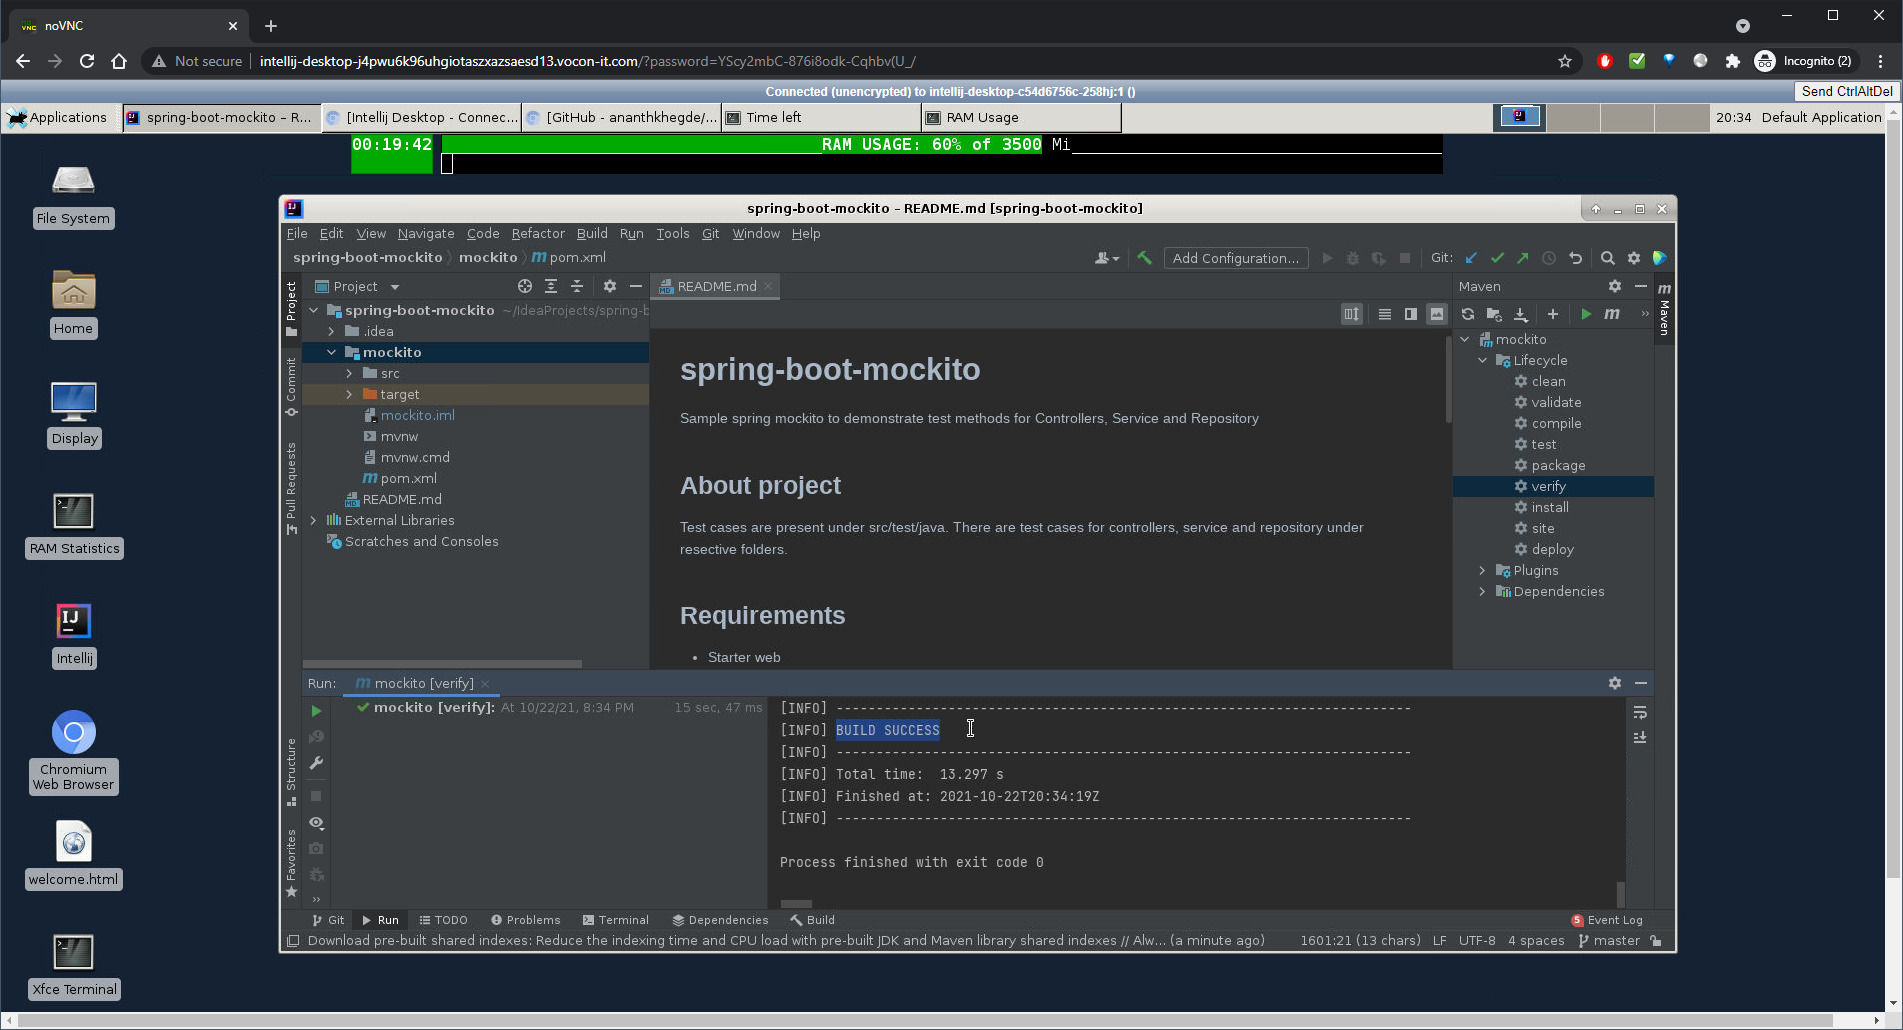
Now we try again with mvn verify:
Voila, the tests are performed successfully:
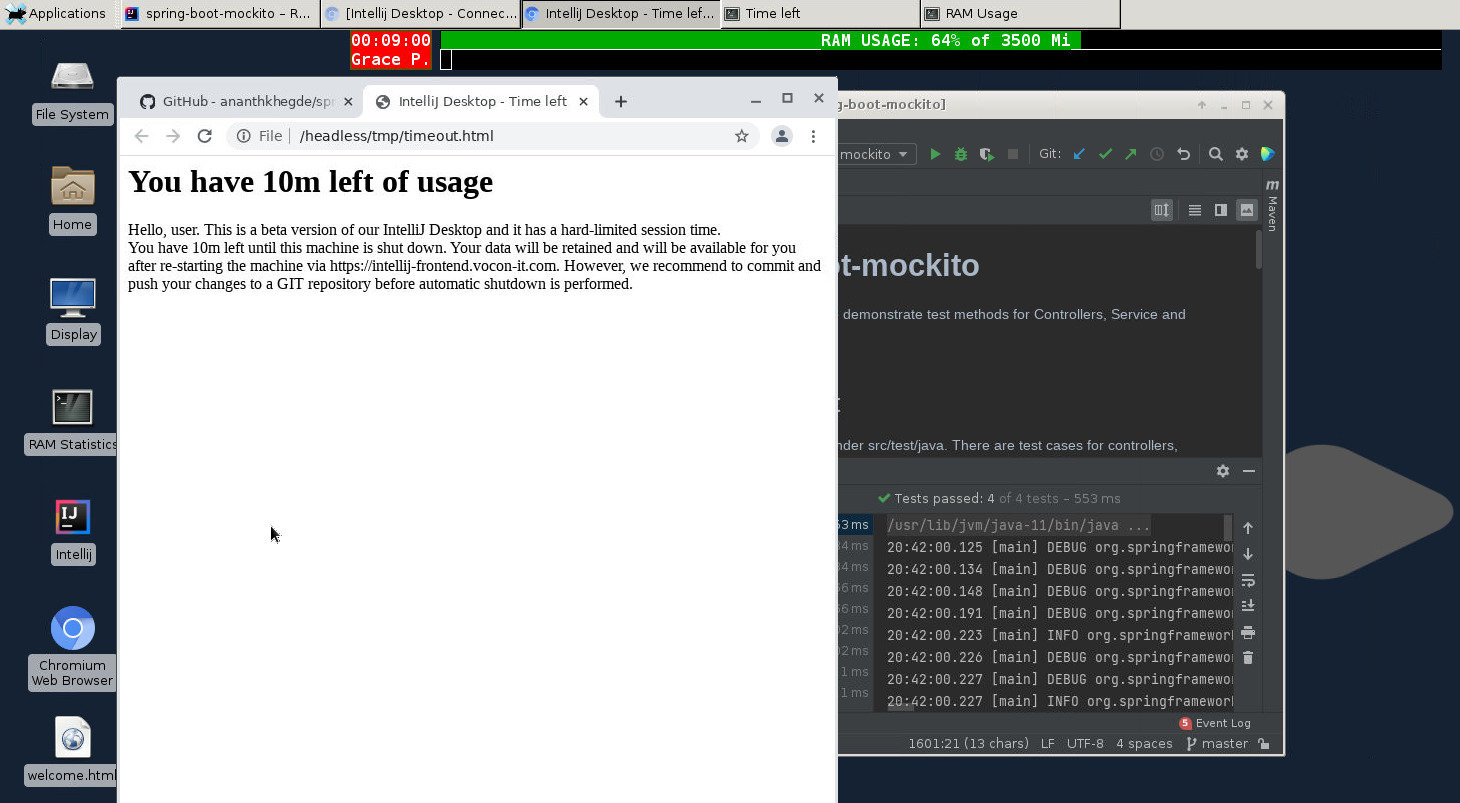
A note on Memory Resources: in the upper part of the desktop, you may observe the Memory being used. As with any physical machine, anything can happen, when this is reaching 100%. For the beta version, we offer 3500 Mebibit, which allows us to keep quite a bit below 100% RAM usage while performing commands like
mvn verifyor while testing and debugging the application.
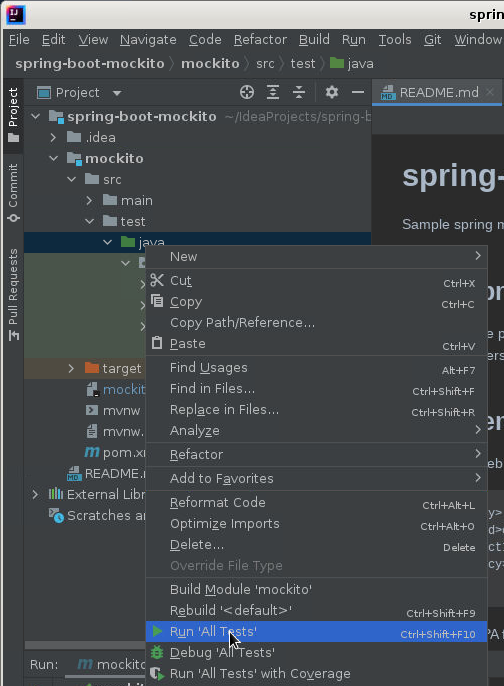
Alternatively to mvn test or mvn verify, we better can see the the status of individual tests by right-clicking test/java and choosing Run 'All Tests':
Idle Timeout: 30 minutes
If your session is idle for 30 minutes, the session will be paused. However, IntelliJ is automatically saving any changes to disk. And any changes of your home directory on disk are persisted and will be available in your next session.
A note on persistence: the IntelliJ Cloud Desktops are running in a Container on kubernetes. Each user’s home directory is mapped to a directory within an local SSD disk. The home directory data is retained even after the IntelliJ Cloud Desktop is shut down, so it is available for you after restarting IntelliJ Cloud Desktop.
When the IntelliJ Cloud Desktop is shut down due to inactivity, you are left with a „Disconnected“ screen.
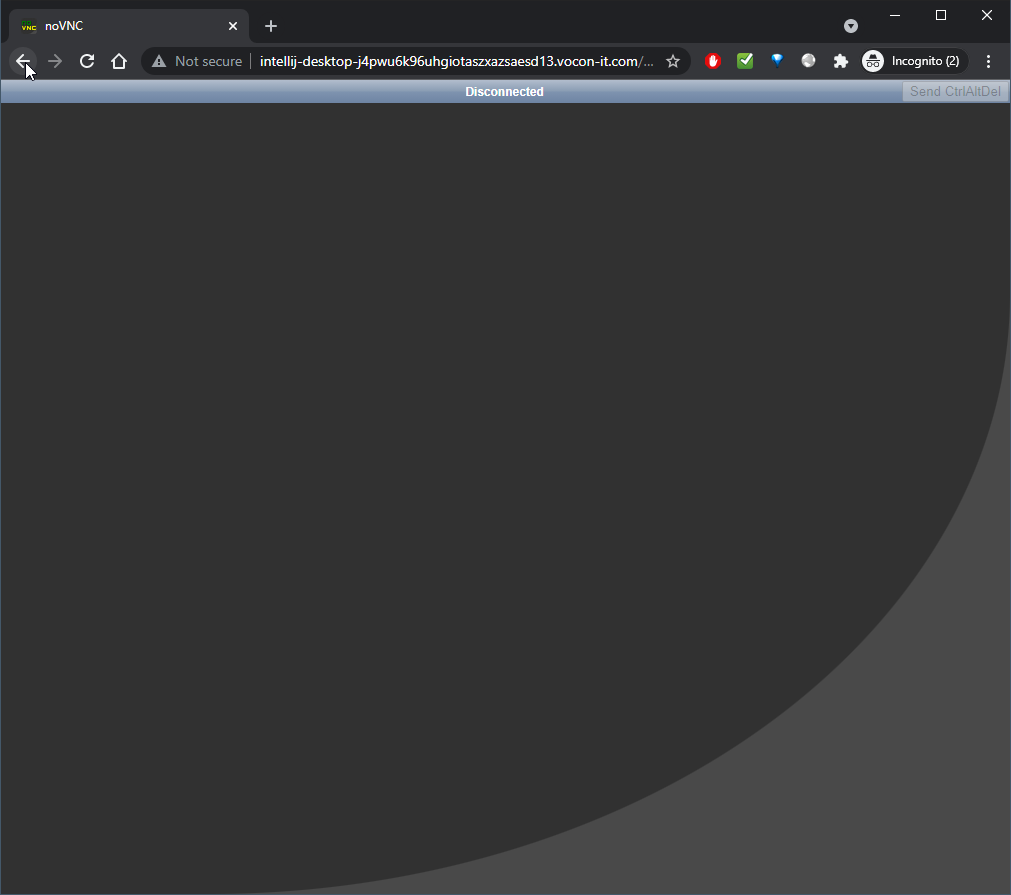
You can reach our https://intellij-frontend.vocon-it.com/ with the browser back button on the upper left.
Restart IntelliJ Cloud Desktop
Once the session has been terminated, you can start your personal IntelliJ Cloud Desktop on https://intellij-frontend.vocon-it.com/ again.
The applications are not started automatically. However, any state saved on disk is retained:
- you will not be prompted to change the display resolution the second time you connect. If you need to change the resolution, double-click the Display icon.
- All projects you had opened before exiting IntelliJ are re-opened next time you start IntelliJ. The configuration as well as any installed plugins are still available. In our case,
mvn verifycan be started without repeating the preparation steps we had performed the first time: - Per default, IntelliJ makes sure that any code change is saved to disk immediately. This prevents any losses of your valuable work.

From here, you can continue the work you had left off last time.
Restrictions
- NOT VALID ANYMORE:
Session hard limit: 30 min
However, you can start a new IntelliJ Cloud Desktop session after shutdown. Because the home directory is retained, you can continue your work almost at the same point the IntelliJ Cloud Desktop has been shut down. In the moment, the total session time per day is not limited. This may change in future. - Data Center in central Europe
During beta phase we have decided to start small with a data center in Europe only. Our partner in Brazil is reporting poor performance, so we figure that usage of our IntelliJ Cloud Desktop makes sense from within Europe only. - Hard limit: Memory 3500 Mi
During beta phase, there is no option to increase the amount of available DRAM to above 3500 Mi. - A note on CPU resources:
For now, we have decided not to restrict the CPU resources of each IntelliJ Cloud Desktop. We kindly ask you to a fair usage of CPU.
In a typical development workflow, high CPU usage is limited to some tens of seconds, or a few minutes. In between those peaks, the system is waiting for the developer to perform his debugs and code edits. This kind of system usage is supported. For other kinds of usage that requires high CPO for longer time period, IntelliJ Cloud Desktop is not your solution. - A note on disk resources:
As long as no hard limit is implemented, we kindly ask you to keep disk usage of the home directory below 1GB. You can check your disk usage withdu -h -d 0 /headlesson a terminal.
Contact
For issue reports or if you have any questions on IntelliJ Cloud Desktop, please contact support@vocon-it.com.