In this step-by-step guide, we will show you how to create your first successful e2e Playwright test for an Angular 14 project.
Step 0 (optional): Start Cloud Desktop – or use your own environment
If you need a development environment, you can connect to our Developer’s Cloud Desktop. Simply click on the image below and launch the environment by clicking on the WebStorm Cloud Desktop button (bring your own license or get a free 30-day trial from JetBrains).
Alternatively, you also can use the free VS Code Cloud Desktop. Or you use your own development environment and install NPM if needed.

You can increase the resolution by clicking on the Display icon on the desktop:
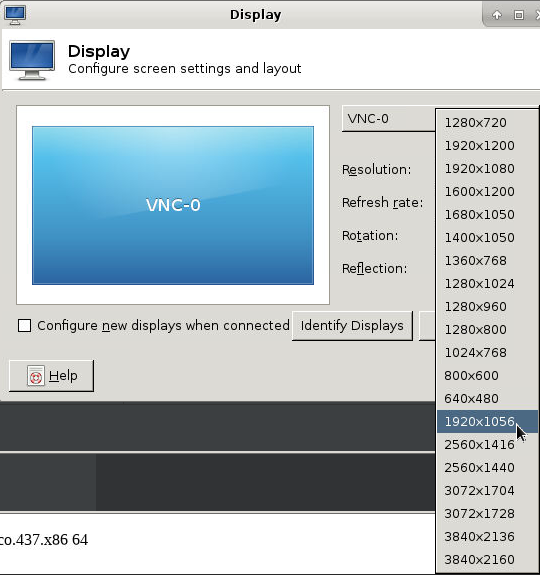
If you are running your development environment on a Full HD screen, we recommend 1920×1056 and running your browser in full-screen mode. This will avoid the need for scrollbars.
Step 1: (Re-) Install Angular
A relatively old version of angular is installed in the Developer’s Cloud Desktop, currently. The easiest way to upgrade it is to re-install it. For that, open a terminal and issue the following two commands:
npm remove -g @angular/cli
npm install -g @angular/cli
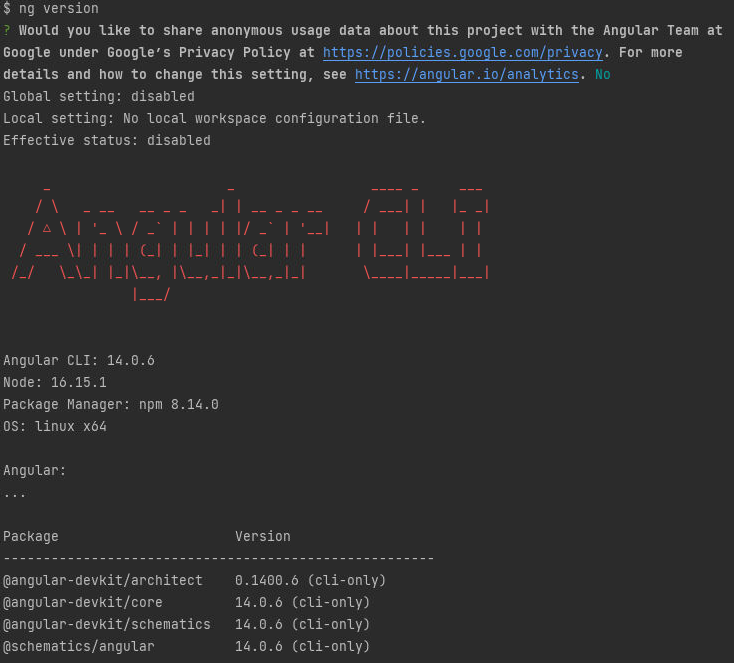
We can check the version with the ng version command:
Step 2: Create a Hello World Project
Let us now create a new hello world project
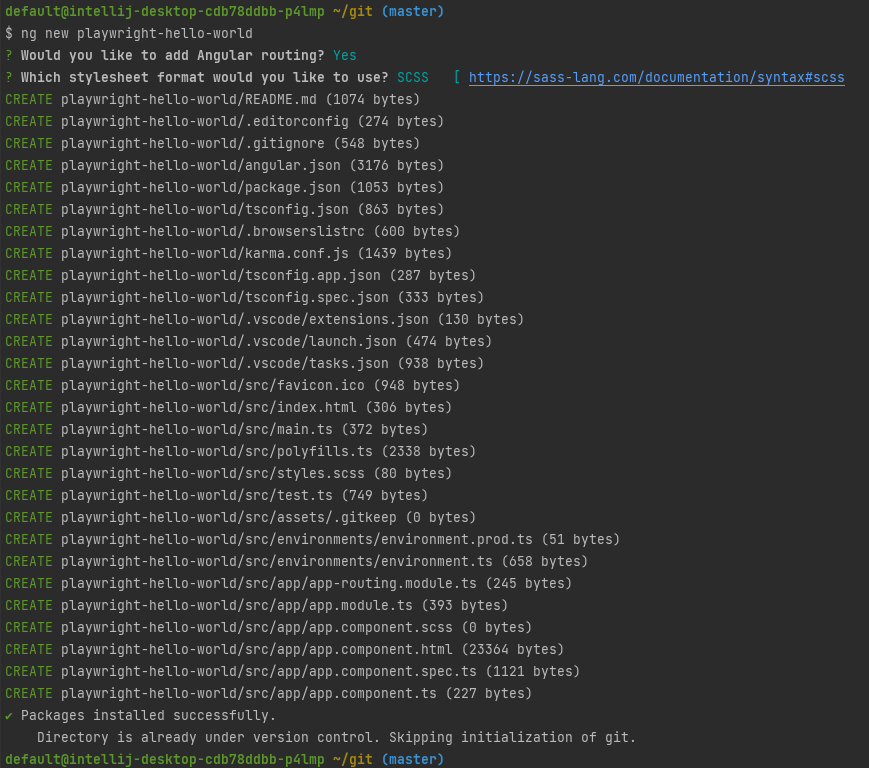
ng new playwright-hello-world
You are asked some questions. In my case, I have chosen Angular routing: Yes and stylesheet format: SCSS. However, in this Hello World program, we will not manipulate CSS anyway.
Let us enter the newly-created directory and start the server:
cd playwright-hello-world
ng serve
We optionally can connect to the server by opening http://localhost:4200 in a browser on the developer’s cloud desktop:
However, this is not needed for our first Playwright test.
Step 3: Install Playwright
We now choose to install Playwright as a dev-dependency in our project. In addition,
npm install @playwright/test --save-dev npx playwright install chromium
Playwright needs to know how to start a browser. By default, it will not find any installed browser on the system. The simplest way to circumvent that problem is to let Playwright install its own browser:
npx playwright install chromium
Step 4: Configure Playwright
We have seen that Playwright is confused if it finds any karma or jest spec files, and the test.js file. For details see the appendix chapter below.
In order to fix this behavior, we create a minimalistic Playwright configuration file on project root:
// playwright.config.ts
import type { PlaywrightTestConfig } from '@playwright/test';

const config: PlaywrightTestConfig = {
  testDir: './e2e-playwright',
};
export default config;
Here, we have told Playwright that it should search for spec files in the e2e-playwright directory. With that, it will not be confused by karma files anymore.
Step 5: Create a first Playwright spec file
In the Playwright configuration file above, we have specified that all Playwright tests will be located in the e2e-playwright directory. Therefore, let us create that folder and place a simple Playwright test into that folder:
// create test folder
mkdir e2e-playwright
// create an example spec file:
cat <EOF > e2e-playwright/example.spec.ts
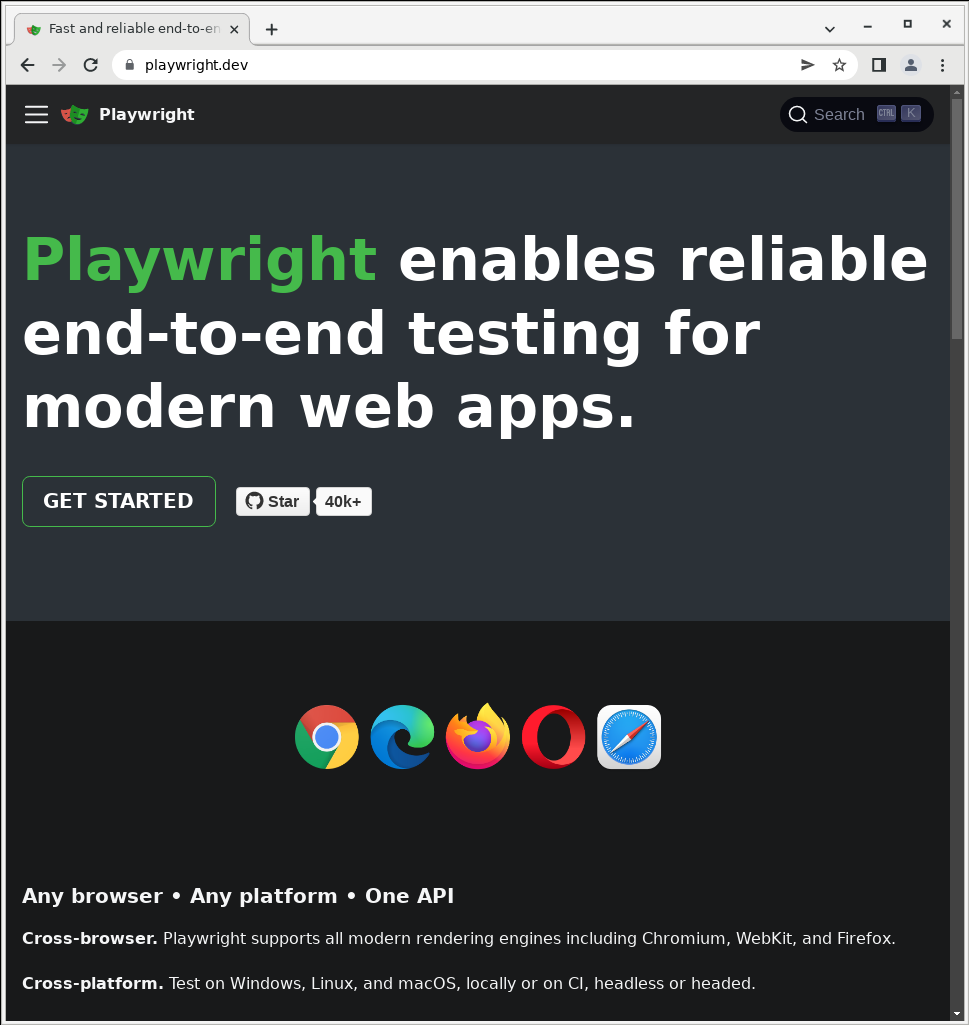
import { test, expect } from '@playwright/test';
test('basic test', async ({ page }) => {
await page.goto('https://playwright.dev/');
const title = page.locator('.navbar__inner .navbar__title');
await expect(title).toHaveText('Playwright');
});
EOFStep 6: Run the Playwright Test
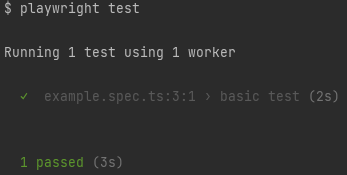
Now the test should be successful:
playwright test
We should see something like:
Step 7 (optional): Run the Test in non-headless Mode
We have not seen that yet, but under the hood, the installed Chromium browser will be started. We will be able to verify this by configuring the tests to be performed in a non-headless mode:
// playwright.config.ts
import type { PlaywrightTestConfig } from '@playwright/test';

const config: PlaywrightTestConfig = {
  testDir: './e2e-playwright',
  use: {
    headless: false
  },
};
export default config;
If we now re-run the test, a browser will be started visibly:
playwright test
Step 8: Test your own Application
You might have noticed that the „hello world“ Playwright test above did not test your own application. Instead, an external URL was tested.
Let us now create a first test that will test our own application. Once again, we start the application, if not already done:
npm run start # or ng serve
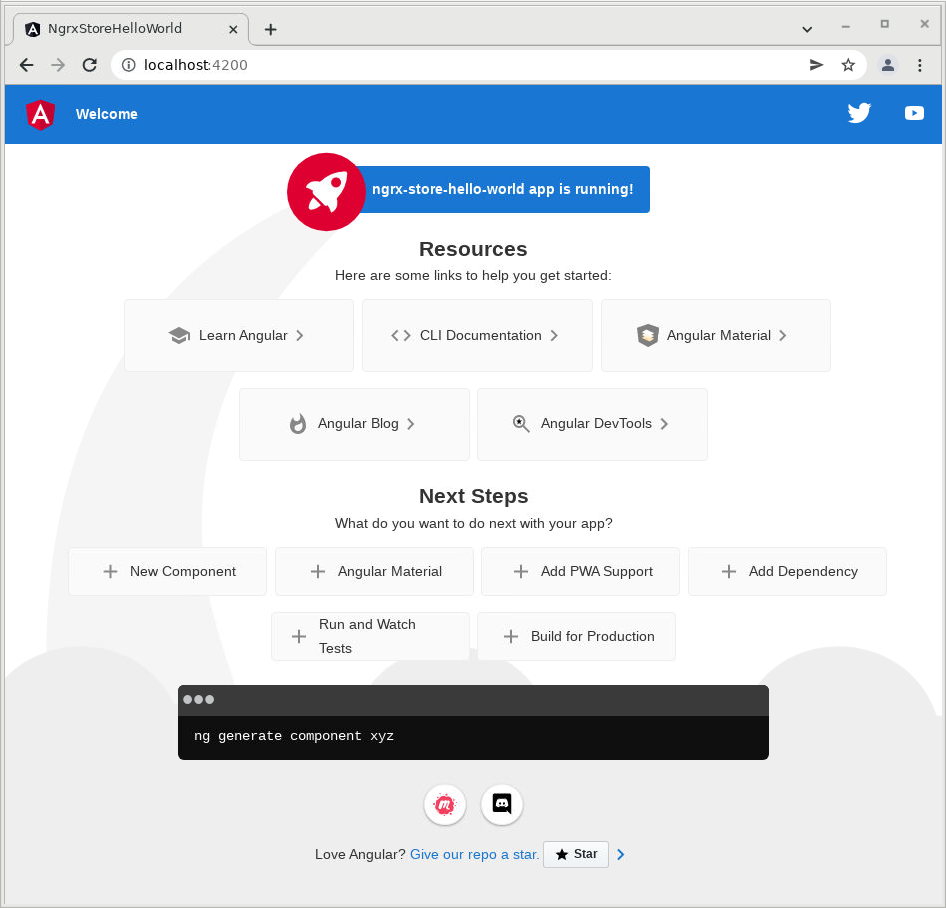
At the moment, our application consists of the default page provided by Angular 14, which can be seen, if we navigate to http://localhost:4200/:
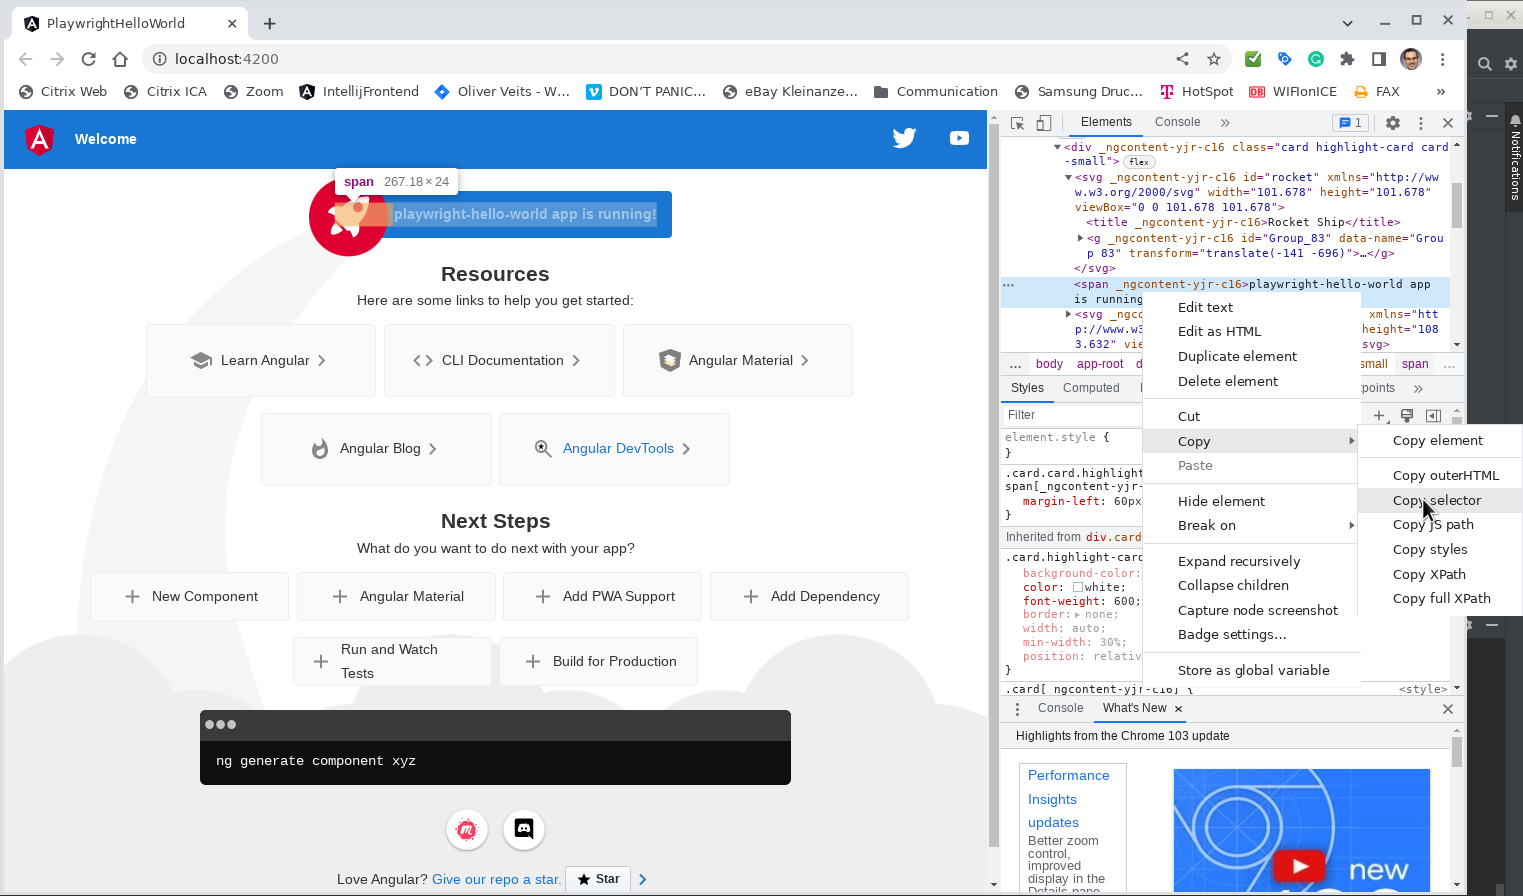
With F12 in a Chrome browser, we can see, that the locator of the title playwright-hello-world is body > app-root > div.content > div.card.highlight-card.card-small > span. In order for the locator not to be too implementation-specific, let us choose div.card.highlight-card.card-small > span only.
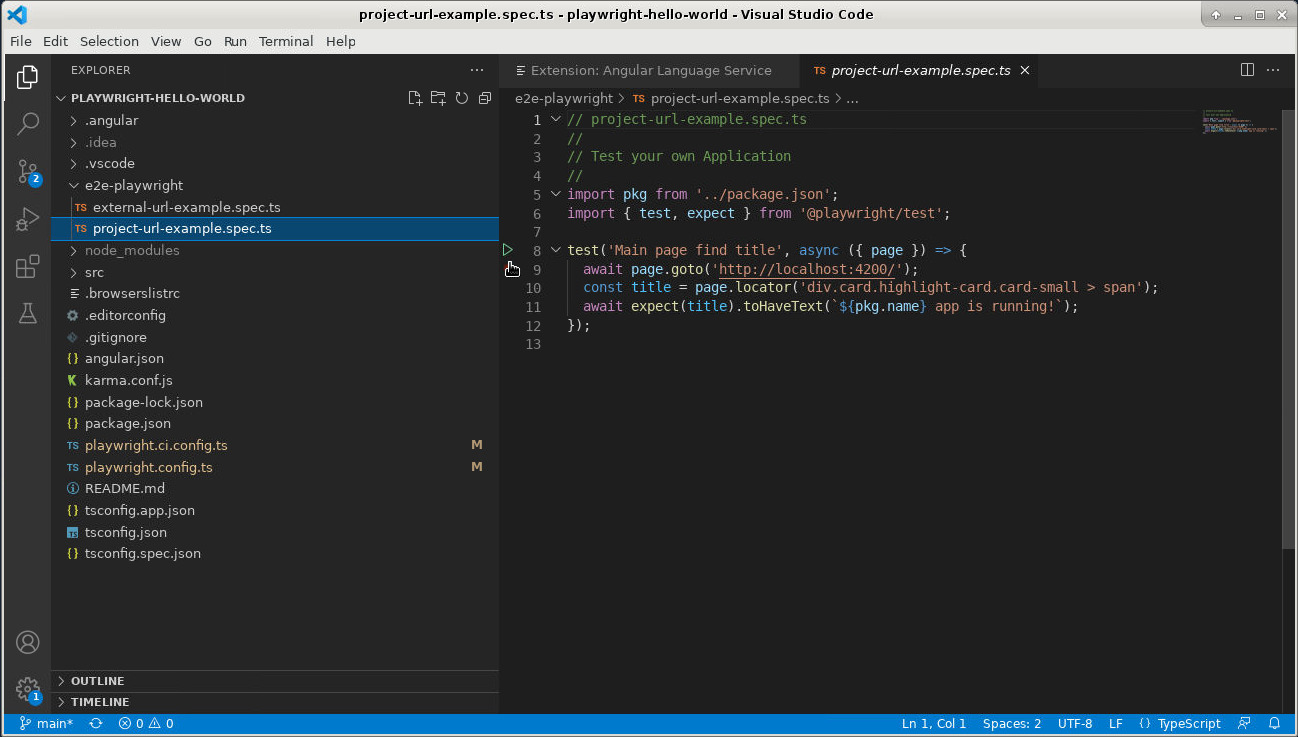
With this information, we can create a Playwright test that tests our application. Let us create following file within the e2e-playwright directory:
// project-url-example.spec.ts
//
// Test your own Application
//
import pkg from '../package.json';
import { test, expect } from '@playwright/test';

test('Main page find title', async ({ page }) => {
  await page.goto('http://localhost:4200/');
  const title = page.locator('div.card.highlight-card.card-small > span');
  await expect(title).toHaveText(`${pkg.name} app is running!`);
});
Note: if you want to get rid of the TS-Lint complaints your IDE might show, you should add the following two lines into the compilerOptions section of the tsconfig.json file located in the project root:
// tsconfig.json
...
  "compilerOptions": {
    "resolveJsonModule": true,
    "esModuleInterop": true,
Now let us run the playwright test.
playwright test
If all went well, the output will look like follows:

Step 9 (optional): Automatically spin up the Server (suitable for Continuous Integration)
Note that the application must be up and running for the test to succeed. That is, why we have manually run the command npm run start above. Can we automate this, e.g. for usage in a continuous integration pipeline?
Yes, we can:
// playwright.ci.config.ts
import type { PlaywrightTestConfig } from '@playwright/test';

const config: PlaywrightTestConfig = {
  testDir: './e2e-playwright',
  webServer: {
    command: 'npm run start',
    reuseExistingServer: true,
    url: 'http://localhost:4200/'
  },
  use: {
    headless: true
  },
};
export default config;
Here, we have added the webServer section that specifies the command to start the application server, if the server is not already running on port 4200.
Now let us stop the manually started server and run the Playwright tests again:
playwright test
If the web server was stopped before, th
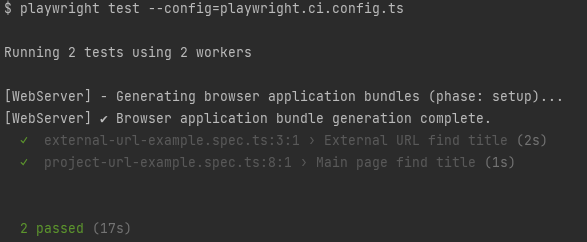
Notice the WebServer logs before the actual tests are started if the server is not already running.
Let us double-check the other case, where the server is running in the background continuously:
npm run start
In a second terminal, we run the tests again:
playwright test
In this case, the startup of the web server is skipped, which speeds up the setup time:
Since the setup time is optimized in the mode, this mode is best suitable for the local development of Playwright scripts.
Step 10: Debugging with Playwright Inspector
There is a simple method how to debug Playwright scripts step by step: just start the Playwright Inspector by using the --debug option:
playwright test --debug
This will spin up the Playwright Inspector and it will pause on the first Playwright command; the page.goto command in this case:
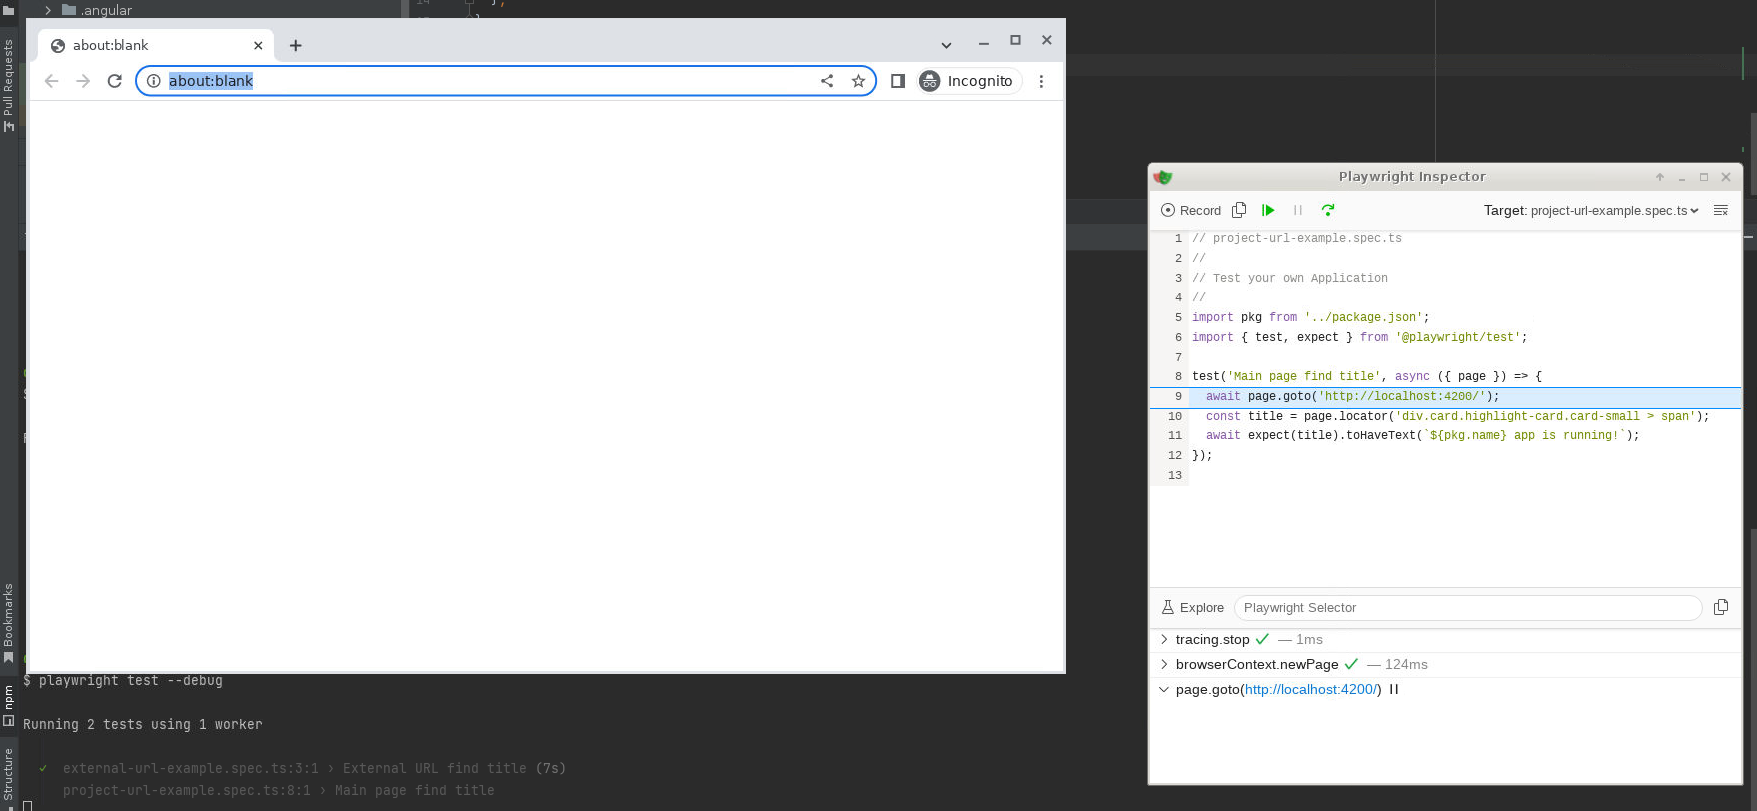
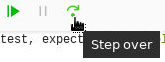
We now can debug the Playwright script step-by-step by clicking the „step over“ button:
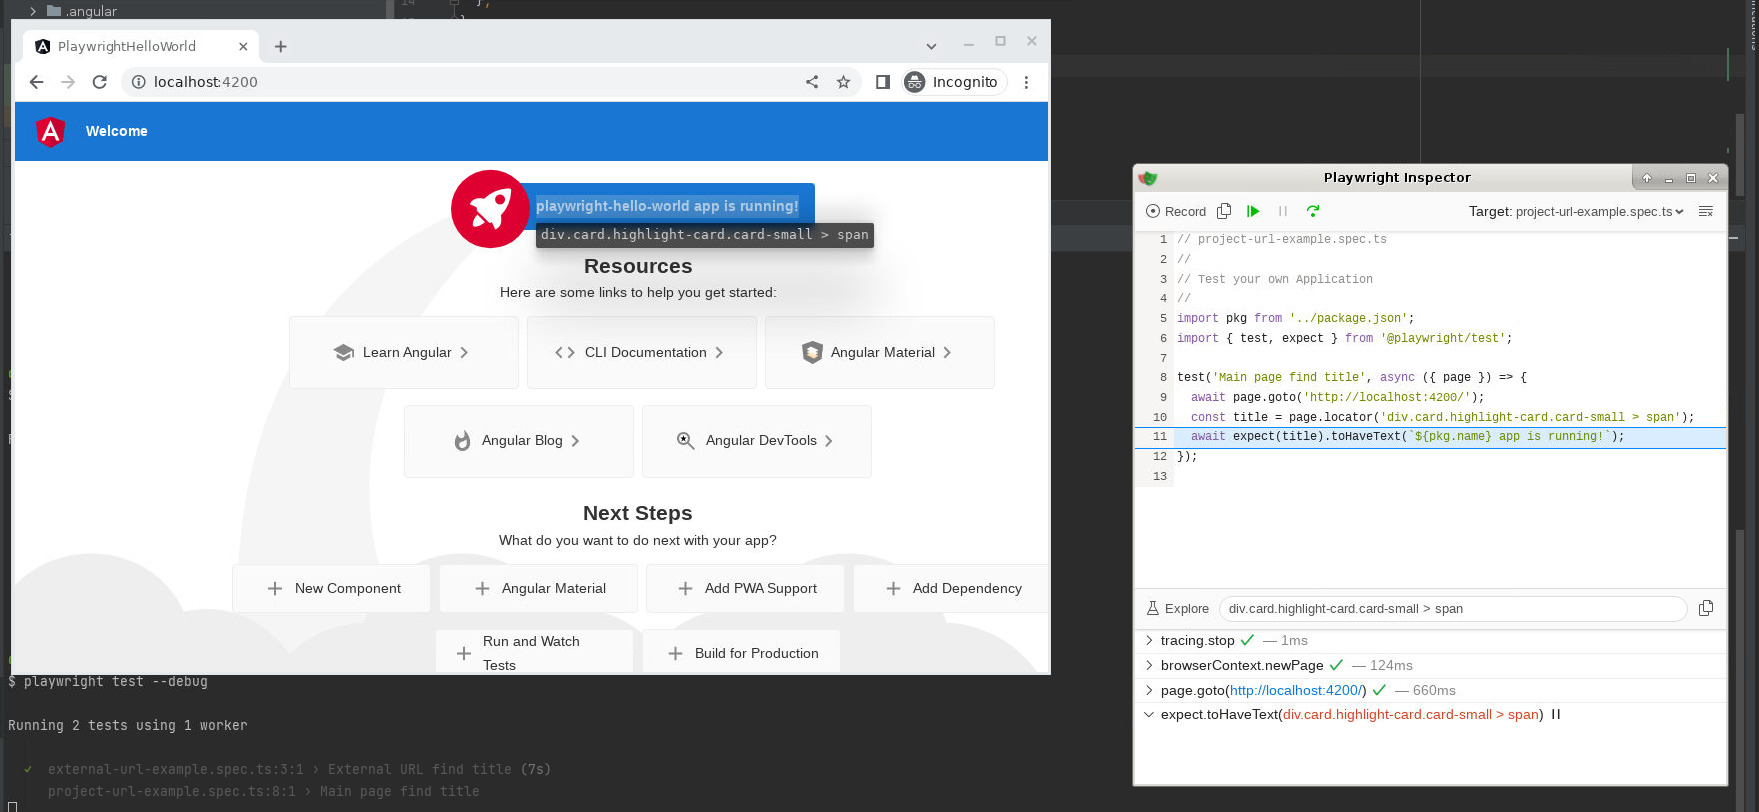
In our case, our application will load and the located HTML element is highlighted in the browser:
Step 11 (optional): Debugging using the „Playwright Test for VSCode“ Plugin
Playwright Inspector comes with Playwright and there was no need to install anything. It helped to test our Playwright scripts step-by-step. However, Inspector does not offer a convenient possibility to watch the values of the variables used.
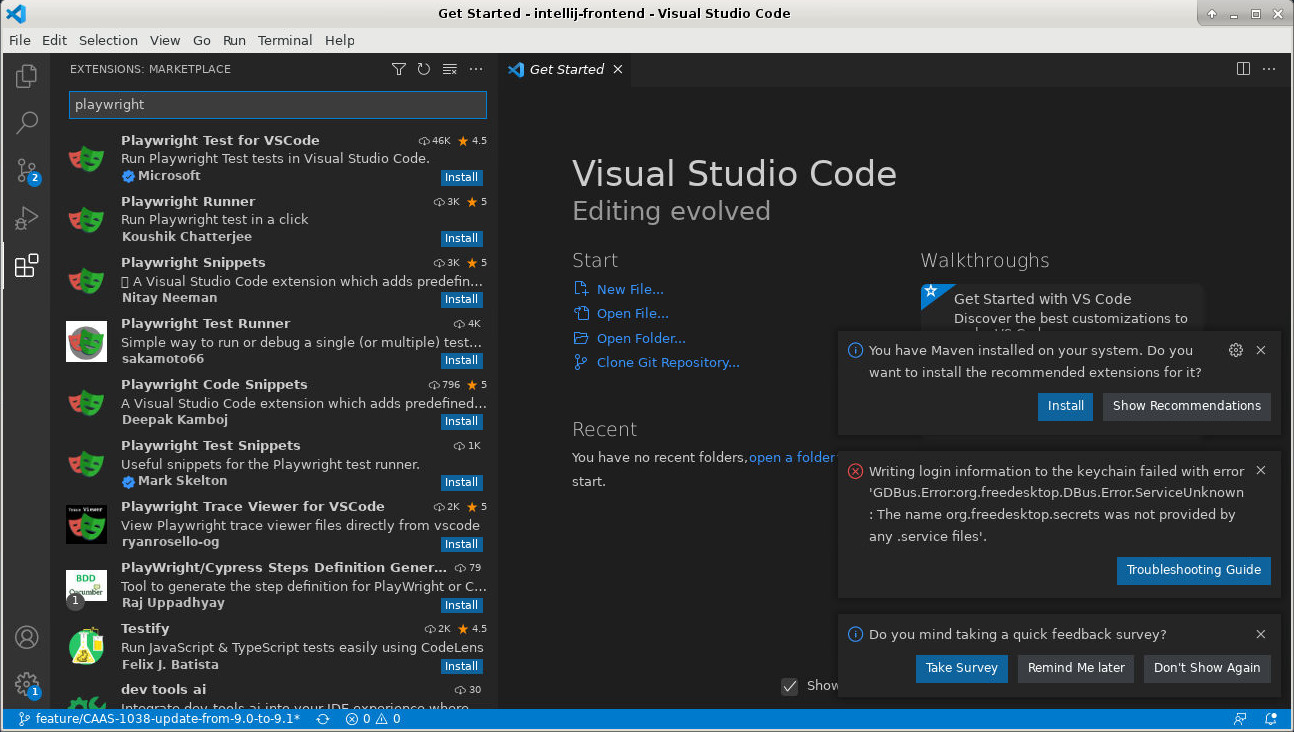
A little Internet research has shown that there is a free plugin for Visual Studio Code that will help us here.
In a recent version of Visual Studio Code, install the plugin „Playwright Test for VSCode“:
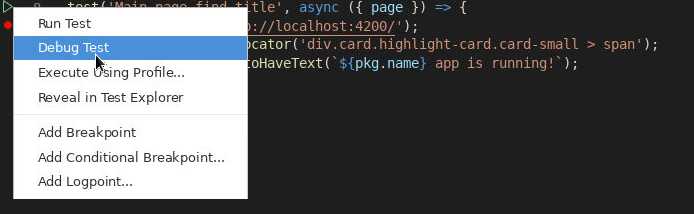
Now open the Folder, where our project is located and wait for 2 to 3 minutes until the indexing has finished. After that, you should see a green triangle left of the playwright test:
Here, you can either run that single test, or you can debug the test by setting a breakpoint left of the await line and by right-clicking on the triangle:
VS Code run Playwright, which will start the browser. The execution is paused at the previously set breakpoint:
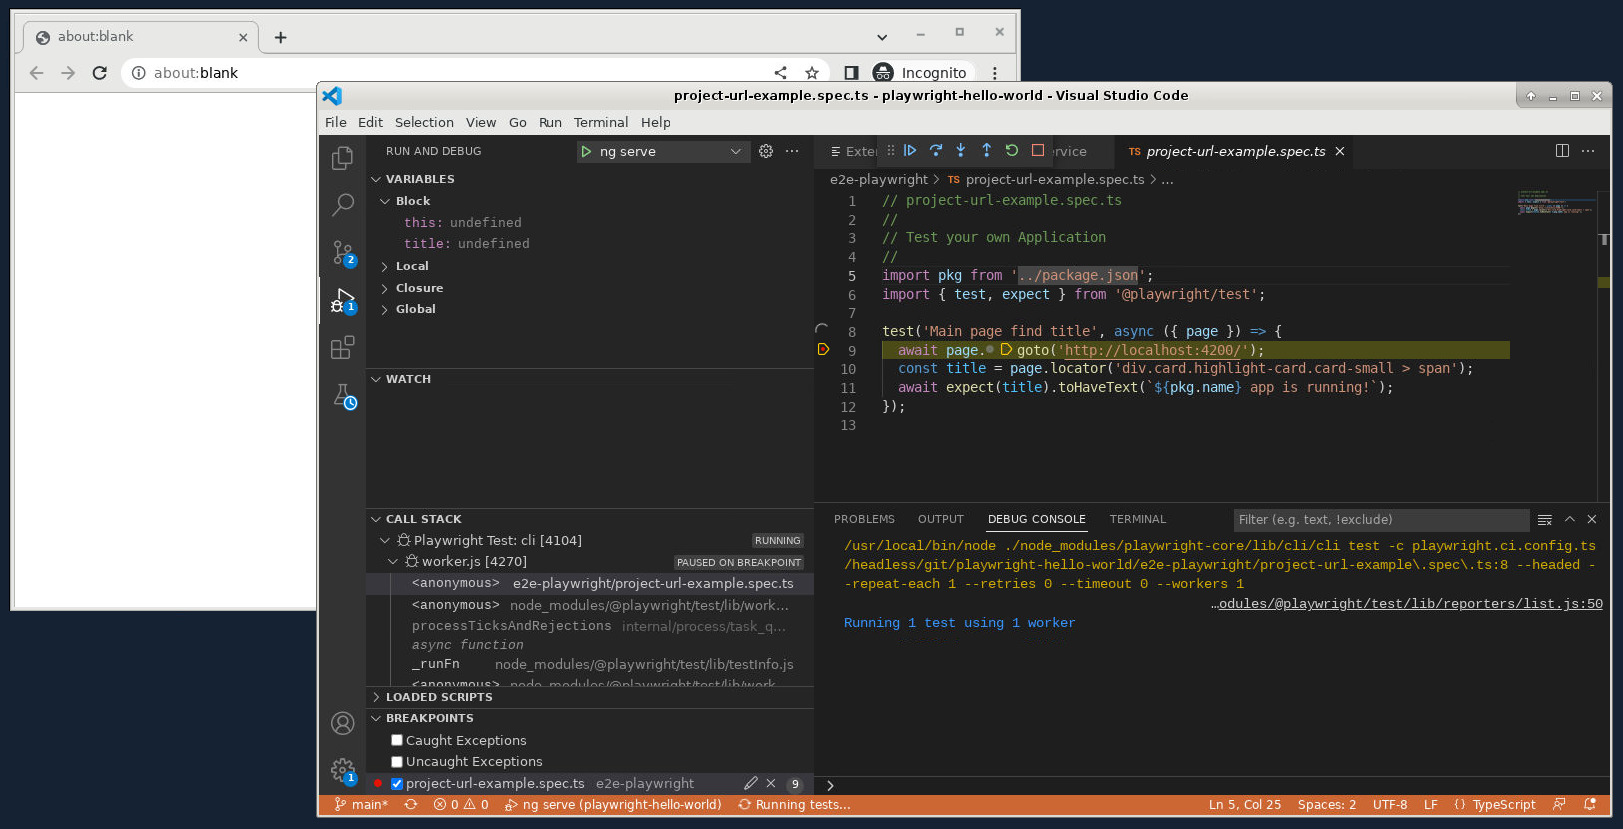
We now can step through the code as we are used to when using an integrated development environment:

Moreover, the IDE allows us to watch the values of any object.
Step 12: Tracing after failed tests
In case of failed tests, Playwright offers extensive tracing capabilities. After a failed test, run the following command and select the zip file found on <playwright-dir>/reports/html/data
playwright show-trace
In the actions pane, navigate through the steps. In the middle main window, you will see the content of the browser for each step. The great thing about the tool is. that those are no screenshots, but they are snapshotted browser contents that can be browsed by right-click and choosing „Investigate“. Chrome will open the dynamic HTML content of the page.
Note: you might need to repeat the right-click a second time in order to be navigated to the correct position within the dynamic HTML content of the snapshot.
Appendix: Error message in case of a missing playwright.config.ts File
Problem
We have seen that Playwright is confused if it finds any karma or jest spec files, and the test.js file. In our case, we have seen error messages like follows, when we run playwright test without telling Playwright where to search for specification files:
// error messages seen on a fresh Angular project
// when we run `playwright test` without playwright.config.ts file:
$ playwright test

Running 0 test using 0 worker


Error [ERR_REQUIRE_ESM]: require() of ES Module /headless/git/playwright-hello-world/node_modules/@angular/core/fesm2015/testing.mjs not supported.
Instead change the require of /headless/git/playwright-hello-world/node_modules/@angular/core/fesm2015/testing.mjs to a dynamic import() which is available in all CommonJS modules.

   at src/app/app.component.spec.ts:3

  1 | import { TestBed } from '@angular/core/testing';
  2 | import { RouterTestingModule } from '@angular/router/testing';
> 3 | import { AppComponent } from './app.component';
    |                ^
  4 |
  5 | describe('AppComponent', () => {
  6 |   beforeEach(async () => {

    at Object. (/headless/git/playwright-hello-world/src/app/app.component.spec.ts:3:16)
    at Module.A._compile (/headless/git/playwright-hello-world/node_modules/@playwright/test/lib/utilsBundleImpl.js:16:994)
    at Object.t..tu._extensions. (/headless/git/playwright-hello-world/node_modules/@playwright/test/lib/utilsBundleImpl.js:16:1010)
    at Loader._requireOrImport (/headless/git/playwright-hello-world/node_modules/@playwright/test/lib/loader.js:276:14)
    at Loader.loadTestFile (/headless/git/playwright-hello-world/node_modules/@playwright/test/lib/loader.js:163:18)
    at Runner._runFiles (/headless/git/playwright-hello-world/node_modules/@playwright/test/lib/runner.js:289:44)
    at Runner._run (/headless/git/playwright-hello-world/node_modules/@playwright/test/lib/runner.js:224:23)
    at async TimeoutRunner.run (/headless/git/playwright-hello-world/node_modules/playwright-core/lib/utils/timeoutRunner.js:53:14)
    at async raceAgainstTimeout (/headless/git/playwright-hello-world/node_modules/playwright-core/lib/utils/timeoutRunner.js:113:15)
    at async Runner.runAllTests (/headless/git/playwright-hello-world/node_modules/@playwright/test/lib/runner.js:182:20)
    at async runTests (/headless/git/playwright-hello-world/node_modules/@playwright/test/lib/cli.js:162:18)
    at async Ai. (/headless/git/playwright-hello-world/node_modules/@playwright/test/lib/cli.js:70:7)

ReferenceError: Zone is not defined

   at node_modules/zone.js/bundles/zone-testing.umd.js:101

   99 |         return Error.stackTraceLimit > 0;
  100 |     }
> 101 |     Zone['longStackTraceZoneSpec'] = {
      |     ^
  102 |         name: 'long-stack-trace',
  103 |         longStackTraceLimit: 10,
  104 |         // add a getLongStackTrace method in spec to

    at /headless/git/playwright-hello-world/node_modules/zone.js/bundles/zone-testing.umd.js:101:5
    at /headless/git/playwright-hello-world/node_modules/zone.js/bundles/zone-testing.umd.js:18:9
    at Object. (/headless/git/playwright-hello-world/node_modules/zone.js/bundles/zone-testing.umd.js:19:3)
    at Object. (/headless/git/playwright-hello-world/src/test.ts:3:1)

=================
 no tests found.
=================
Even if there are valid Playwright tests, Playwright will skip them due to those errors.
Solution
In order to fix this behavior, we create a minimalistic Playwright configuration file on project root:
// playwright.config.ts
import type { PlaywrightTestConfig } from '@playwright/test';

const config: PlaywrightTestConfig = {
  testDir: './e2e-playwright',
};
export default config;
Here, we have told Playwright that it should search for spec files in the e2e-playwright directory. With that, it will not be confused by karma files anymore.
References
- Find this code on GitHub: https://github.com/vocon-it/playwright-hello-world-angular